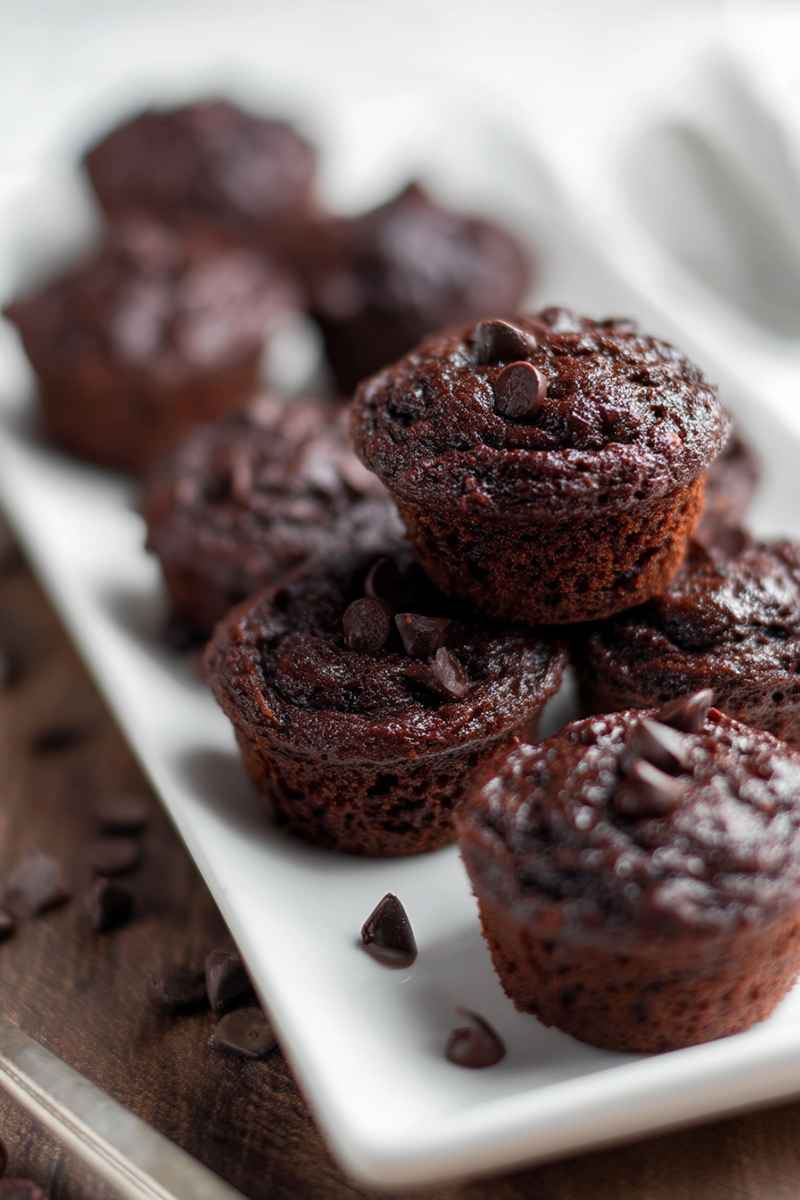
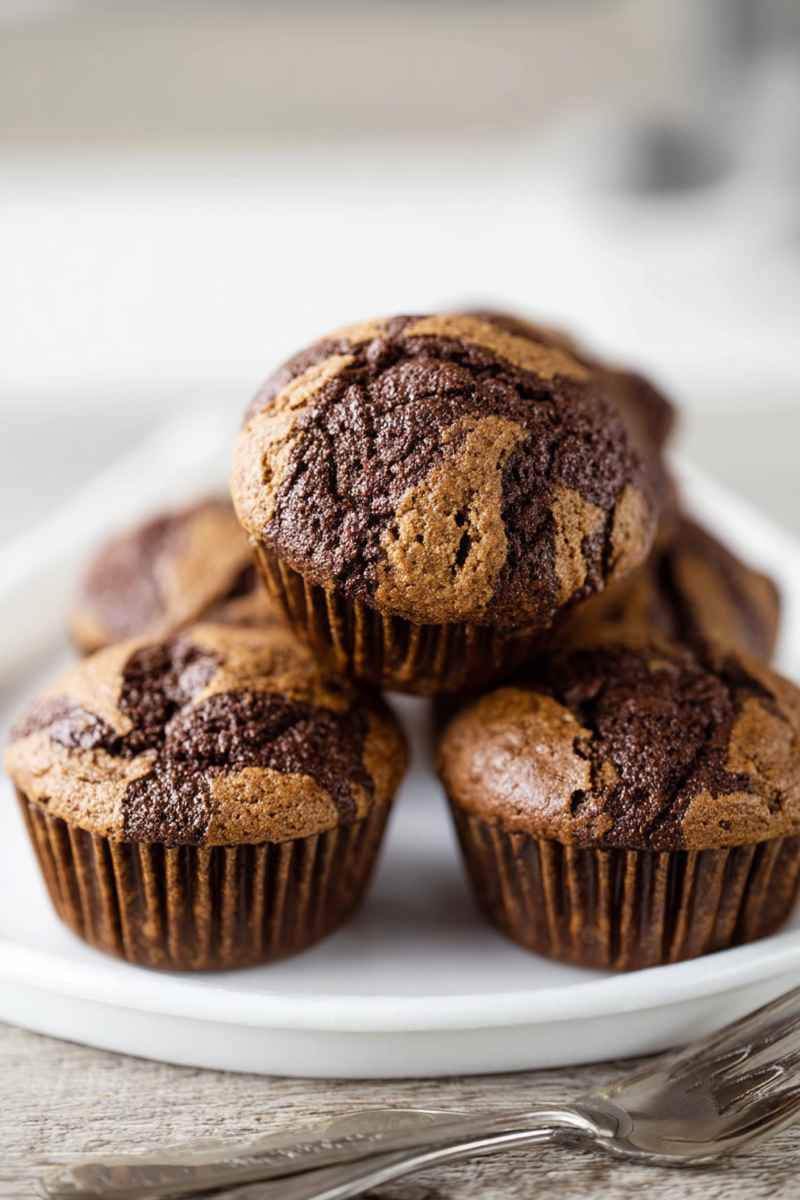
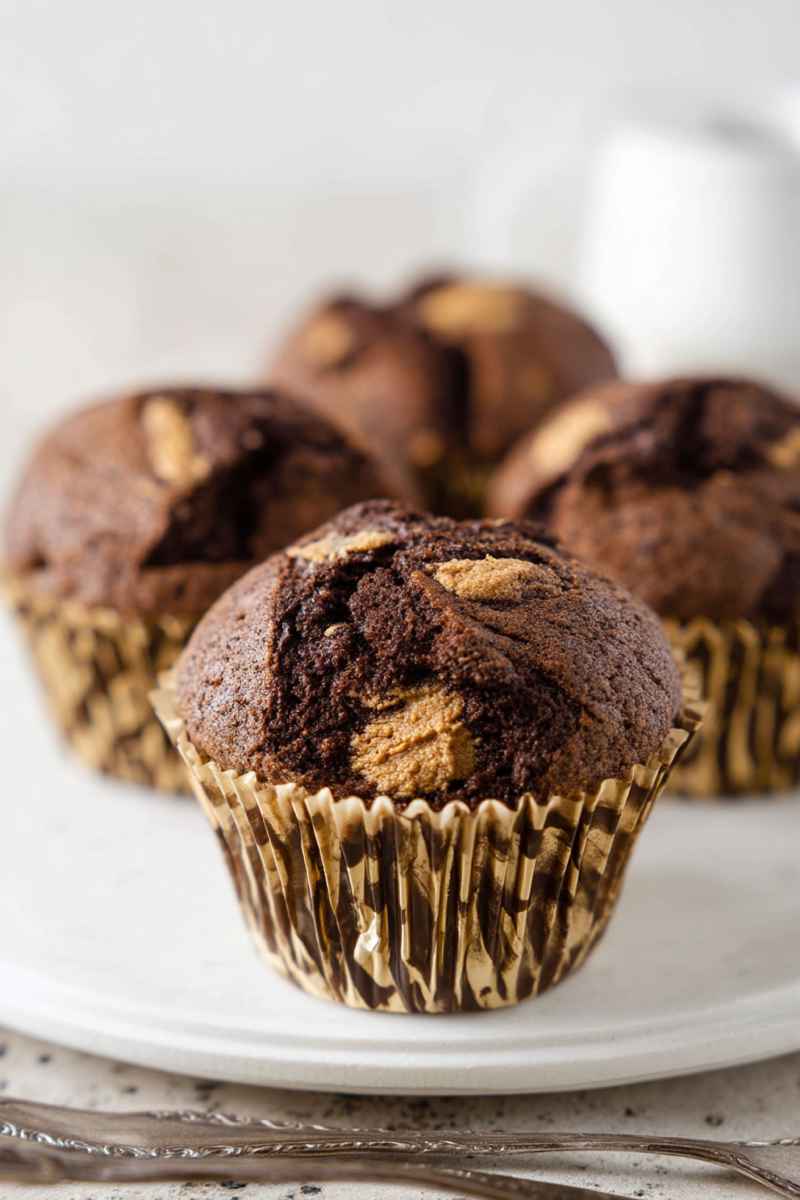
These incredibly moist chocolate muffins are swirled generously with creamy peanut butter, creating a rich, decadent treat that’s truly hard to resist. After spending ages tweaking muffin recipes, I’ve finally landed on this one, and I’m so excited to share my secrets for getting those perfect bakery style results at home. Honestly, they are just fantastic, combining two classic flavors into one perfect bite.
The Best Ever Peanut Butter Chocolate Muffins
I’m thrilled to share another winner for your muffin recipe collection. If you adore peanut butter, prepare yourself, because these might just be the ultimate chocolate peanut butter muffins you’ll ever bake. And if you’re like me and believe chocolate and peanut butter belong together, you’re in for a real treat. Seriously, who can resist that combination?
Featuring smooth peanut butter and deep cocoa powder flavor, these homemade muffins bake up wonderfully moist and tender every single time. My big goal during all my muffin experiments was always clear. I wanted to develop recipes you could easily follow at home, even with zero baking experience, that would give professional bakeries a run for their money.
With that goal driving me, I’ve refined this chocolate peanut butter muffin recipe down to seven simple steps. Following them guarantees success.
I personally think muffins are fantastic any time. They work beautifully for breakfast, make a perfect afternoon snack, satisfy as an after dinner dessert, or maybe best of all, serve as that late night indulgence when a chocolate craving hits hard.
Make sure you keep reading below. I’m sharing all my essential tips for things like measuring flour correctly, achieving those impressive domed muffin tops, and ensuring your muffins are perfectly moist.
Reasons You Will Adore These Chocolate Peanut Butter Muffins
- The ideal mix of rich chocolate and creamy peanut butter tastes
- Wonderful for snacks, desserts, or satisfying late night cravings
- Made using common ingredients you likely have already
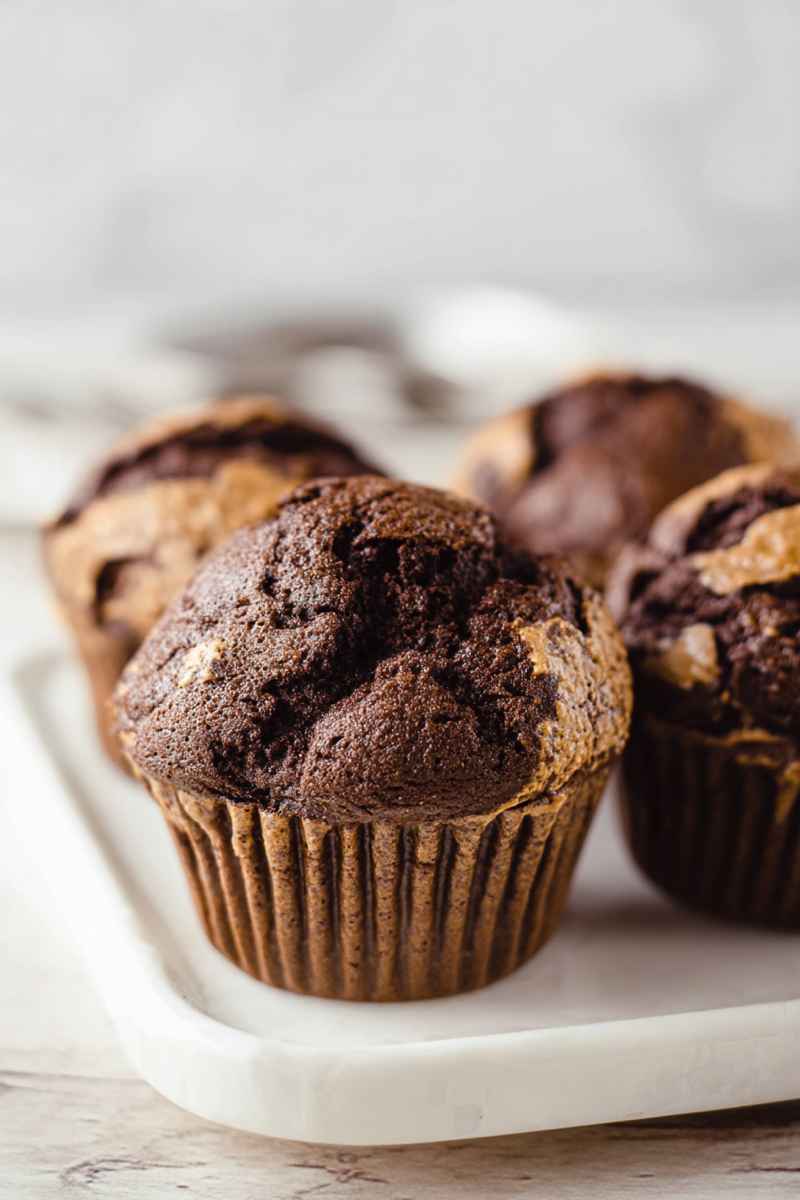
- Creates moist, soft muffins with a lovely tender texture
- Achieves tall, beautifully domed muffin tops just like a bakery
What Goes Into This Chocolate Peanut Butter Muffins Recipe
The ingredients for these muffins are mostly simple items you probably keep in your pantry. Together, they create unbelievably delicious muffins.
Read on for all my go to muffin techniques, including the secrets to getting those gorgeous, high rising bakery style domes on your muffin tops. You’ll find the complete recipe with exact measurements and instructions further down.
- All purpose flour
- Unsweetened cocoa powder
- Granulated sugar
- Baking powder
- Baking soda
- Salt
- Large eggs
- Buttermilk (room temperature works best)
- Vegetable oil
- Vanilla extract
- Creamy peanut butter
Making Chocolate Peanut Butter Muffins Step By Step
If you follow my seven straightforward steps outlined here, you’ll end up with wonderfully moist muffins boasting those signature bakery style domed tops. Keep scrolling for all my helpful hints and tricks, plus the full recipe card awaits at the end of this post.
- First, grab a medium sized bowl. Combine the all purpose flour, cocoa powder, granulated sugar, baking powder, baking soda, and salt in it. Whisk these dry ingredients together well to break up any clumps. Set this bowl aside for a moment.
- Next, get a larger mixing bowl. Into this bowl, add the eggs, buttermilk, vegetable oil, and pure vanilla extract. Stir these wet ingredients together just until they are combined. Don’t overmix here.
- Now, gradually pour the dry ingredient mixture into the wet ingredients in the larger bowl. Mix everything together gently. Stop mixing as soon as most of the flour streaks have disappeared. You want to be careful not to overmix the batter. Expect the batter to be quite thick at this stage.
- Cover the bowl loosely with a clean kitchen towel. Let the batter rest undisturbed at room temperature for 15 minutes. While the batter is resting, go ahead and preheat your oven to 425 degrees F (220 degrees C).
- To get those bakery style muffins, prepare a standard 12 cup muffin pan. Place paper liners in only 6 of the cups, alternating them (leave every other cup empty). This spacing helps the muffins rise taller. Spoon about 2 tablespoons of the chocolate batter into the bottom of each prepared liner.
- Gently warm the creamy peanut butter in your microwave for about 15 to 20 seconds. You just want it slightly softened and easy to drizzle. Drop approximately half a tablespoon of this warmed peanut butter into each muffin cup, right on top of the batter. Take a toothpick or a thin skewer and gently swirl the peanut butter into the chocolate batter below. Then, carefully spoon about 4 to 6 more tablespoons of chocolate batter over the peanut butter swirl, covering it completely.
- Add another half tablespoon of the warmed peanut butter on top of the batter in each cup. Use your toothpick again to create a pretty swirl pattern on the surface. Place the muffin pan carefully into the center of your preheated oven. Bake for exactly 7 minutes at 425 degrees F (220 degrees C). After 7 minutes, keep the muffins inside the oven but immediately reduce the oven temperature down to 350 degrees F (180 degrees C). Continue baking for another 12 to 14 minutes. You’ll know the muffins are done when a toothpick inserted into the center of a chocolate section comes out clean (a little melted peanut butter sticking to it is perfectly fine). Let the muffins cool in the pan for about 10 minutes before moving them to a wire rack to cool completely. Repeat the filling and baking process with the remaining batter, remembering to turn the oven temperature back up to 425 degrees F (220 degrees C) before baking the second batch.
Achieving Those Perfect Bakery Style Muffin Tops
You know those beautiful, high domed muffin tops you see in bakeries? Getting them at home is easier than you think. I rely on a few specific techniques that really help these muffins puff up tall and proud.
- Give the Batter a Rest
Letting the prepared batter sit for about 15 minutes before you scoop it is a crucial step. During this short rest, the flour absorbs more liquid, which thickens the batter significantly. This thicker consistency helps the muffins climb upwards when they bake instead of spreading outwards too quickly. It’s a simple pause that makes a big difference. - Space Out Your Muffins
This tip was a real breakthrough for me. Instead of filling every cup in your 12 count muffin pan, use only six liners placed in every other cup. Leaving that extra space allows hot air to circulate more freely around each muffin. This encourages them to dome up nicely without bumping into their neighbors. It also helps the tops get that lovely golden brown color. - Fill the Liners Generously
Fill those muffin liners almost all the way to the top with batter. I know this might sound counterintuitive compared to standard cupcake advice, but for muffins, it’s key to getting that impressive height. Don’t be shy with the batter. - Start Baking Hot, Then Reduce Heat
Begin baking the muffins at a higher temperature, specifically 425 degrees F. This initial blast of heat causes the batter to rise very quickly, creating a sort of crust on the outside that sets the domed shape early on. After the first few minutes, you’ll reduce the temperature to 350 degrees F to allow the insides to cook through evenly without burning the tops.
Getting Your Flour Measurement Just Right
Measuring flour accurately is one of the most important steps for successful baking. Using too much or too little can really affect the final texture of your muffins. The absolute best way to measure flour is by weight using a digital kitchen scale. Grams offer the most precision.
If you don’t have a kitchen scale, don’t worry. You can still get a good measurement using measuring cups if you follow this spoon and level method carefully.
First, fluff up the flour in its container or bag using a whisk or a spoon. Flour tends to settle and become compacted over time, so aerating it like this makes it lighter. Please note this is different from sifting. Don’t sift the flour unless a recipe specifically tells you to.
Next, use a large spoon to gently sprinkle the fluffed flour into your measuring cup. Keep spooning it in until the cup is overflowing slightly. Avoid scooping directly with the measuring cup, as this packs the flour down. Also, resist the urge to tap the cup on the counter, which also compacts the flour.
Finally, take the straight edge of a butter knife or an offset spatula and sweep it across the top of the measuring cup. This levels off the excess flour perfectly, leaving you with a much more accurate measurement than scooping.
Frequently Asked Questions About Chocolate Peanut Butter Muffins
A Creamy processed peanut butter like Jif or Skippy generally works best for swirling as it stays smooth when warmed. Natural peanut butter can sometimes separate or be oily. If you do use natural peanut butter, make sure it’s stirred extremely well before measuring and warming it.
A No problem. You can easily make a substitute. For this recipe, measure 1 ½ cups of regular milk (whole or low fat works). Add 1 ½ tablespoons of white vinegar or fresh lemon juice to the milk. Stir it briefly and let it sit for about 5 minutes. It will look slightly curdled, which is exactly what you want. Use this homemade buttermilk just like the recipe calls for.
A Once the muffins have cooled completely, store them in an airtight container at room temperature. They should stay fresh and delicious for up to 3 days. Keeping them airtight is key to preventing them from drying out.
A Absolutely. These muffins freeze wonderfully. Let them cool completely first. Then, place them in a single layer in a freezer safe zip top bag or an airtight container. They can be frozen for up to 2 months. To enjoy, thaw them at room temperature for a few hours, or gently warm a frozen muffin in the microwave for about 20 to 30 seconds.
A Several factors contribute to getting those high tops. Make sure you followed the resting step for the batter, used the alternating cup method in the muffin pan, filled the liners generously, and started baking at the high 425 degree F temperature before reducing it. Using fresh baking powder and baking soda is also important, as older leaveners lose their power.
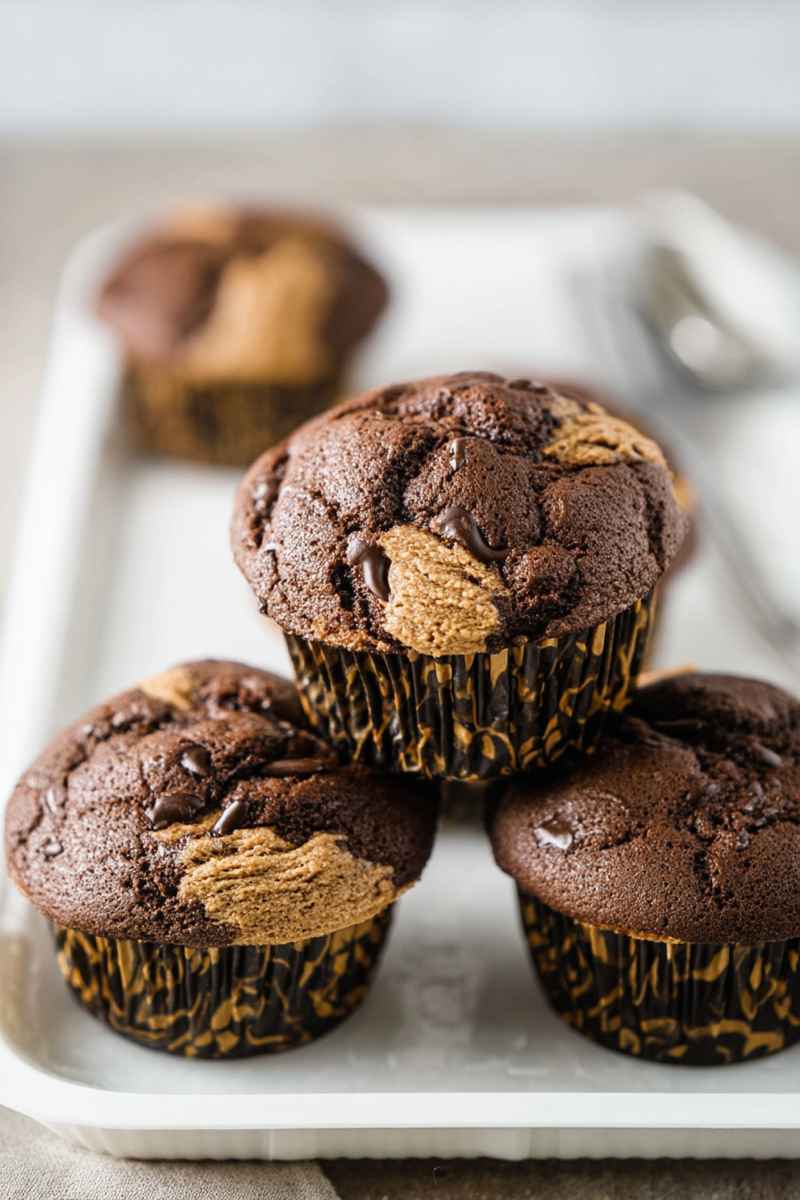
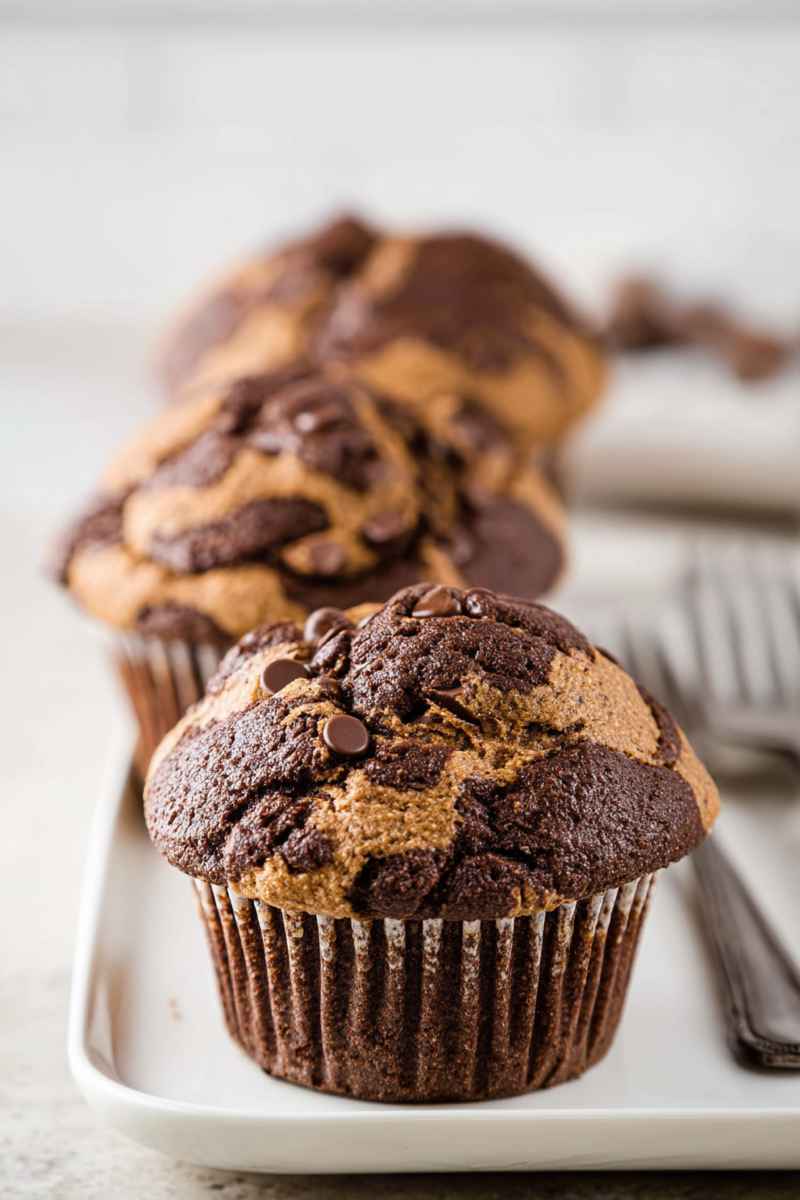
A You could certainly stir in about a cup of chocolate chips (semi sweet, milk, or dark) into the chocolate batter right before resting if you want an extra chocolate boost. This would make them even more decadent.

Chocolate Peanut Butter Muffins
- Prep Time: 10 minutes
- Cook Time: 22 minutes per batch
- Total Time: 0 hours
- Yield: 12 muffins
- Category: Muffins
- Method: Oven
Description
These Chocolate Peanut Butter Swirl Muffins are unbelievably moist and rich, packed with deep chocolate flavor and dreamy peanut butter swirls in every bite. They bake up perfectly tall and are simply irresistible!
Ingredients
- 3 cups (360g) all purpose flour
- 1 cup (85g) natural unsweetened cocoa powder
- 1 ½ cups (300g) granulated sugar
- 4 tsp baking powder
- 1 tsp baking soda
- 1 tsp salt
- 3 large eggs
- 1 ½ cups (360ml) buttermilk, at room temperature
- ½ cup (120ml) vegetable oil
- 1 tsp vanilla extract
- ⅔ cup (170g) creamy peanut butter
Instructions
- In a medium mixing bowl, combine the all purpose flour, unsweetened cocoa powder, granulated sugar, baking powder, baking soda, and salt. Whisk everything together well to ensure no clumps remain. Set this bowl aside.
- Get a larger mixing bowl. Add the large eggs, buttermilk, vegetable oil, and vanilla extract to it. Stir these wet ingredients together until they are just combined.
- Pour the dry ingredient mixture into the bowl with the wet ingredients. Mix gently until the flour streaks mostly disappear. Be careful not to overmix. The batter will be quite thick.
- Cover the bowl loosely with a clean kitchen towel and let the batter rest at room temperature for 15 minutes. While the batter rests, preheat your oven to 425°F (220°C).
- Prepare a 12 count standard muffin pan by lining every other cup with a paper liner (you will use 6 liners). This spacing helps create taller muffin tops. Spoon about 2 tablespoons of chocolate batter into the bottom of each liner.
- Gently warm the creamy peanut butter in the microwave for 15-20 seconds, just until it’s soft and easier to drizzle. Drop about ½ tablespoon of the warmed peanut butter onto the batter in each muffin cup. Use a toothpick or a thin skewer to gently swirl the peanut butter into the chocolate batter.
- Divide the remaining chocolate batter evenly among the 6 muffin cups, adding about 4 to 6 tablespoons on top of the peanut butter swirl, covering it.
- Add another ½ tablespoon of warmed peanut butter on top of the batter in each cup. Swirl it again gently with a toothpick for a nice pattern on top.
- Carefully place the muffin pan in the center of the preheated oven. Bake at 425°F (220°C) for exactly 7 minutes.
- Keeping the muffins inside the oven, reduce the oven temperature immediately to 350°F (180°C). Continue baking for another 12 to 14 minutes. The muffins are done when a toothpick inserted into the center of a chocolate part comes out clean (a little melted peanut butter on the toothpick is okay).
- Let the muffins cool in the pan on a wire rack for about 10 minutes before transferring them directly onto the rack to cool completely.
- Repeat steps 5 through 11 with the remaining batter, remembering to increase the oven temperature back to 425°F (220°C) before baking the second batch.
Notes
Storage: Store cooled muffins in an airtight container at room temperature for up to 3 days.
Freezing: These muffins freeze beautifully. Place cooled muffins in a freezer safe bag or container and freeze for up to 2 months. Thaw at room temperature or gently warm in the microwave.
Bakery Style Tops: Baking initially at a high temperature (425°F) helps the muffins rise quickly, creating those desirable domed tops. Filling only every other muffin cup also promotes better rising.
Peanut Butter: Creamy peanut butter works best for swirling. Natural peanut butter might separate, so stir it very well if using.
Buttermilk: If you don’t have buttermilk, you can make a substitute by adding 1 ½ tablespoons of white vinegar or lemon juice to 1 ½ cups of milk. Let it sit for 5 minutes before using.
Nutrition
- Serving Size: 1 muffin
- Calories: 518kcal
- Sugar: 35g
- Sodium: 650mg
- Fat: 24g
- Carbohydrates: 71g
- Fiber: 5g
- Protein: 12g
- Cholesterol: 60mg