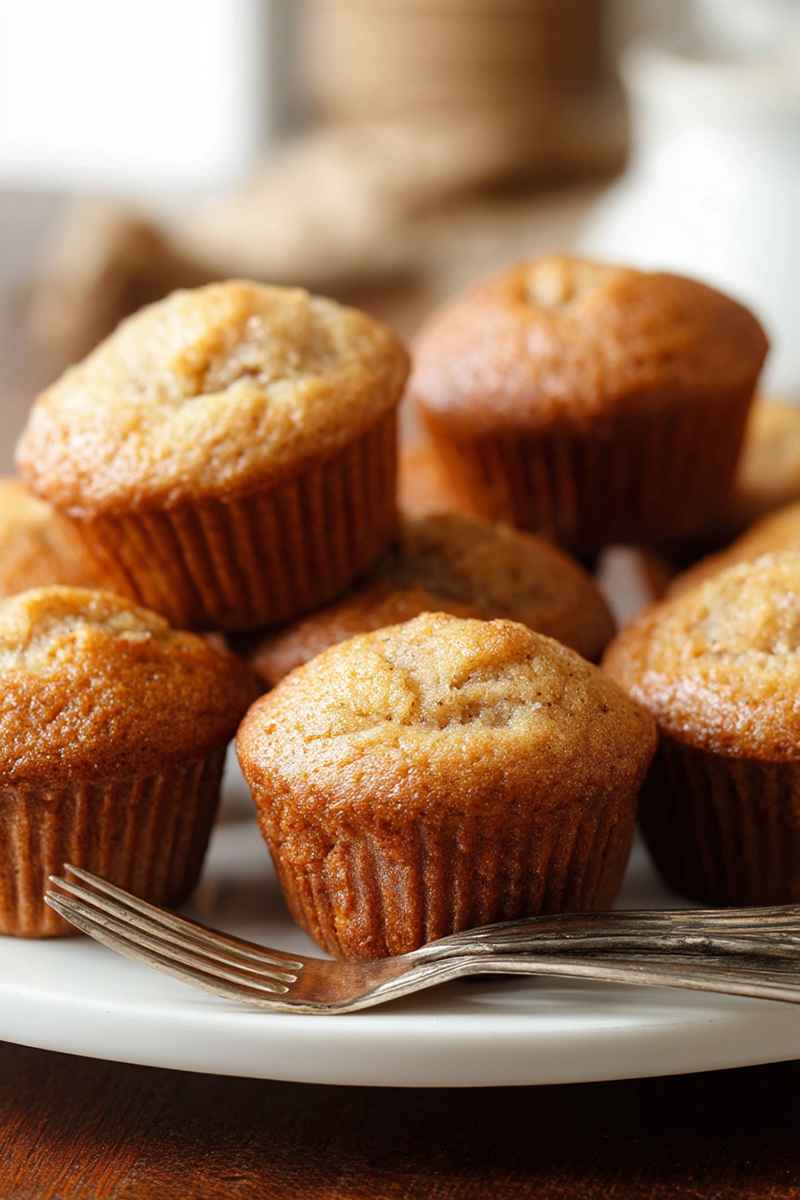
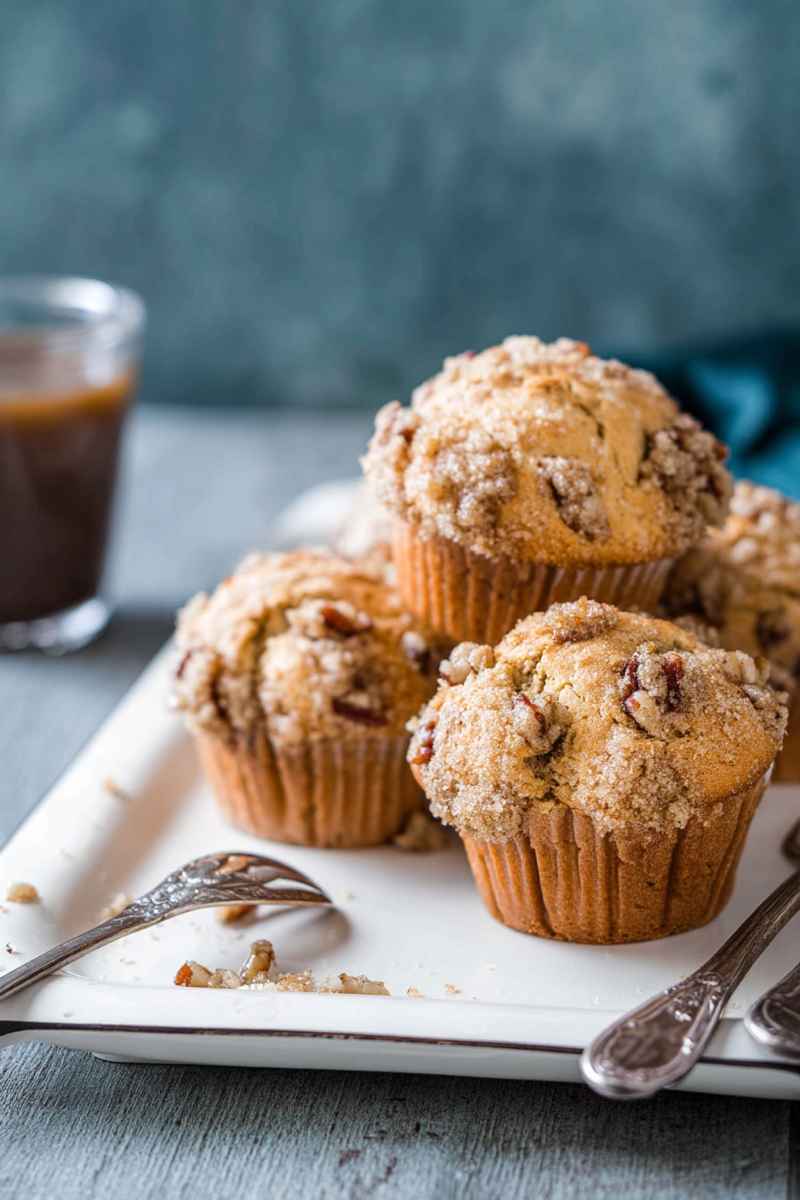
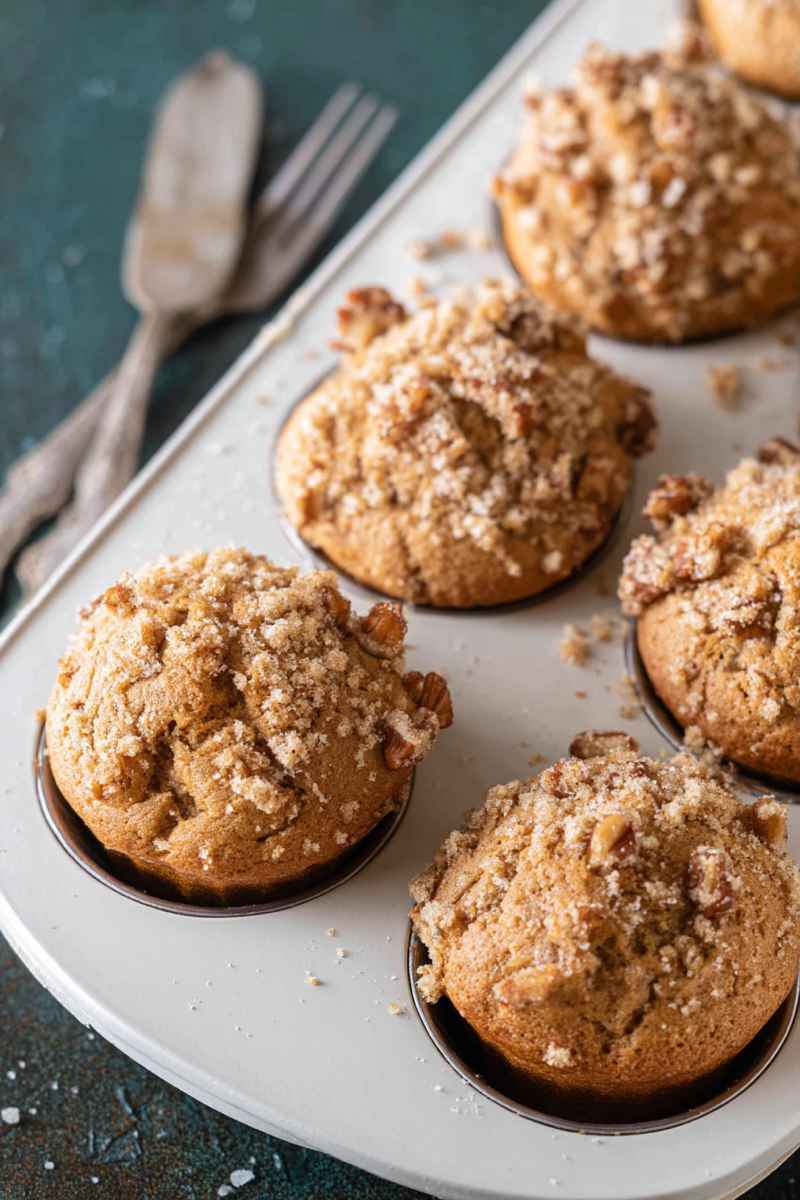
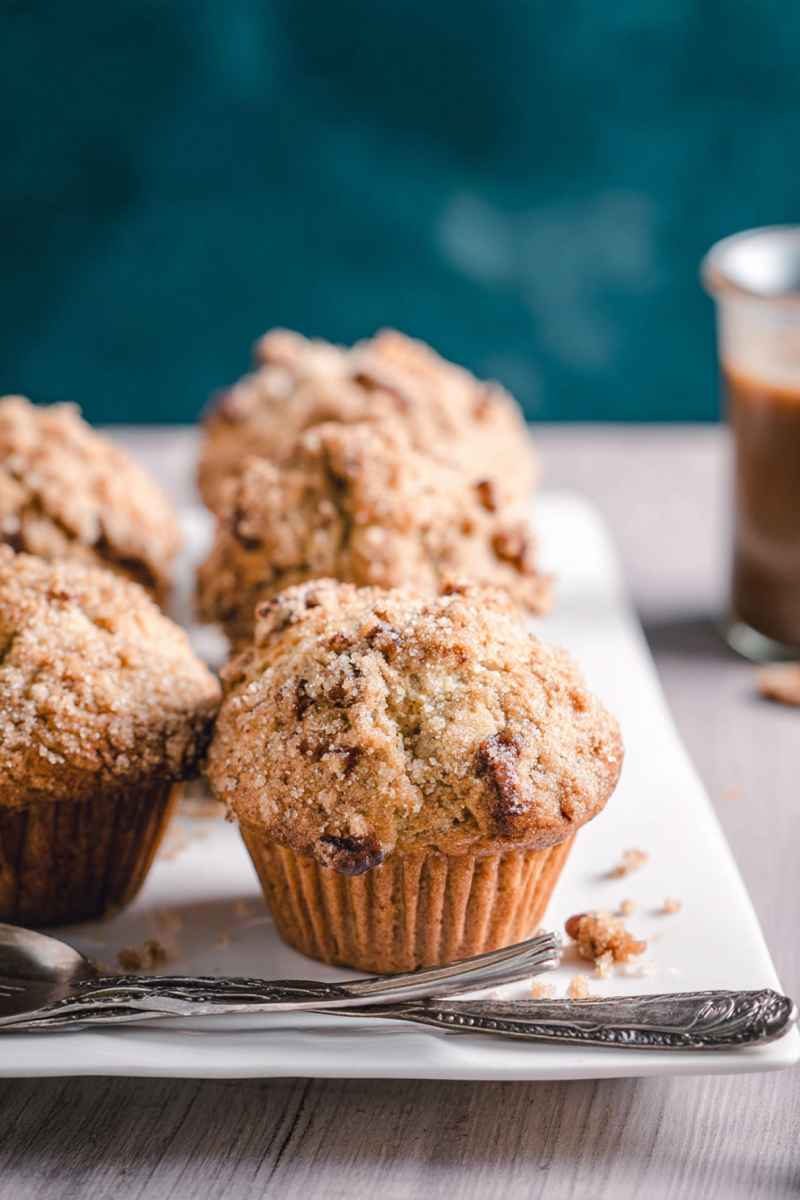
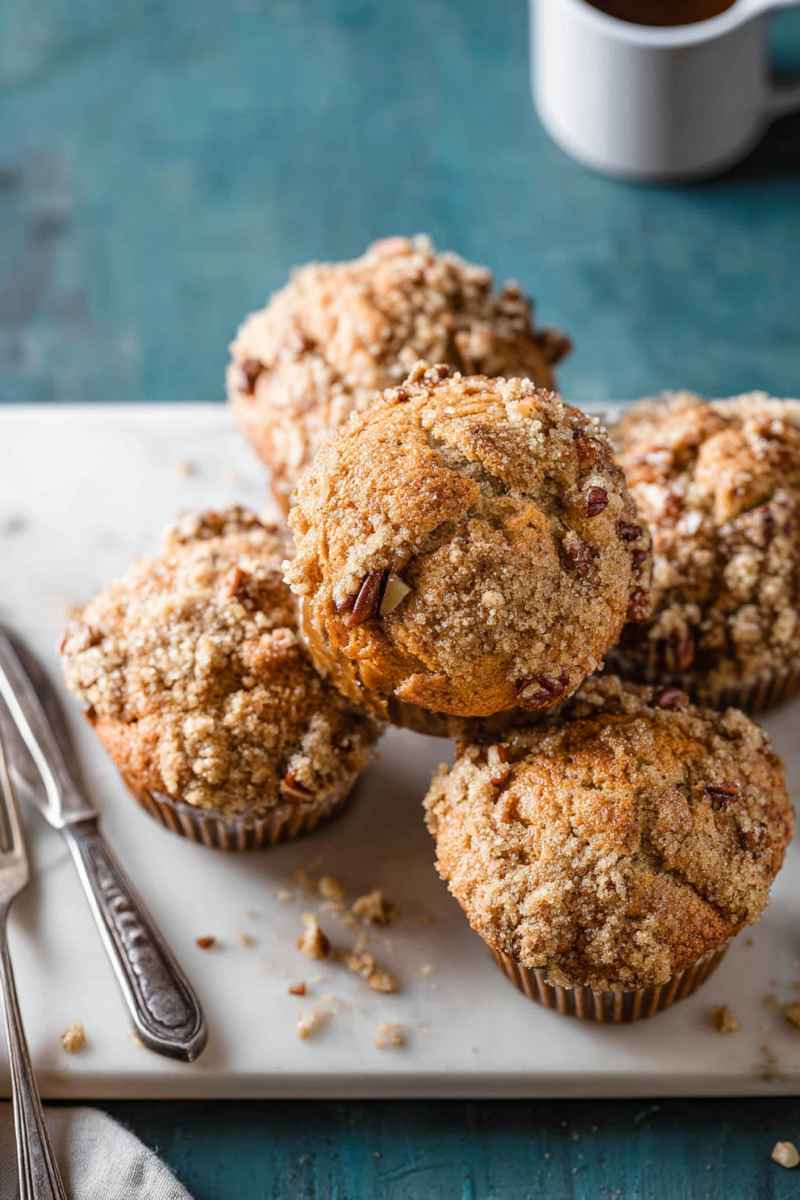
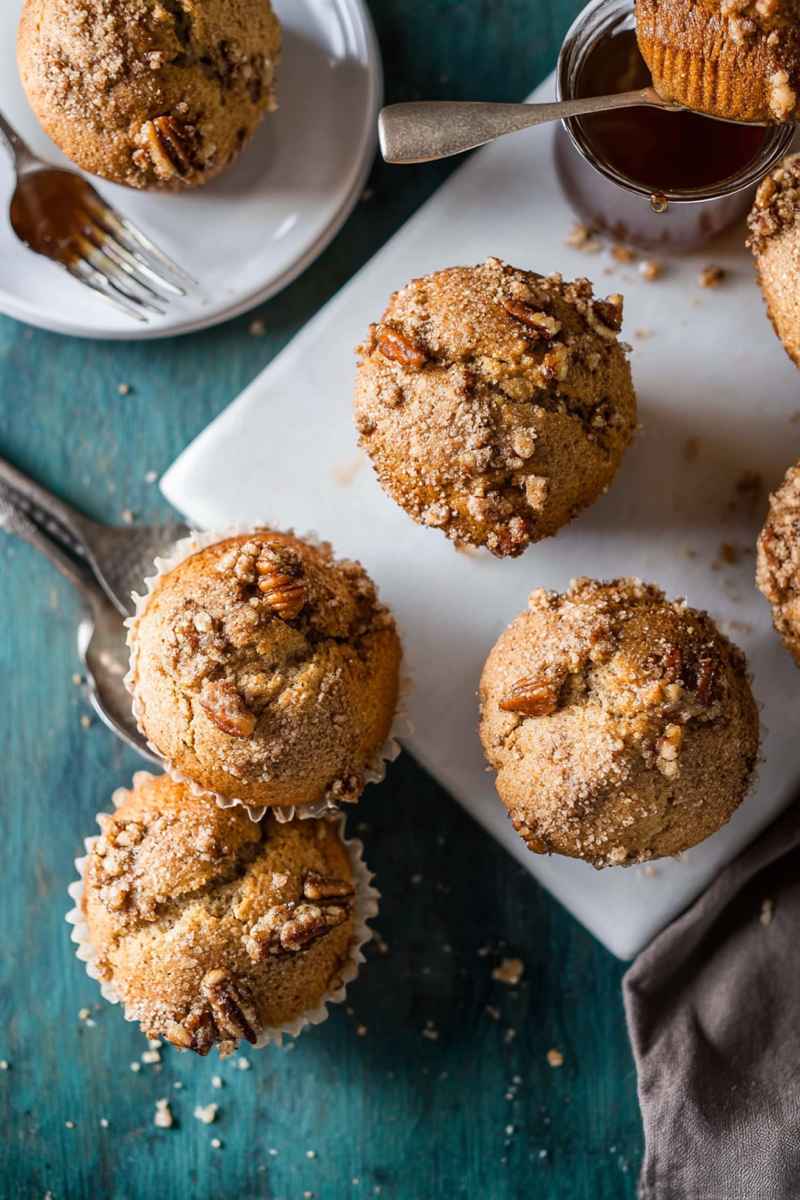
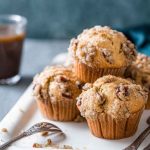
These incredibly moist maple pecan muffins are packed with rich maple flavor and delightful crunchy pecans. I promise you will adore the soft texture and the sweet streusel topping that makes every bite taste like a special bakery treat.
The Ultimate Maple Pecan Muffins Recipe You Need
These muffins hold a special place in my baking collection, perfect for enjoying at any time of day. Need a simple, delicious breakfast alongside your morning coffee? Grab a maple pecan muffin. Craving a satisfying snack mid-afternoon? A maple pecan muffin is just the thing. Looking for a sweet finish after dinner? You know where I am going with this.
The wonderful maple flavor and nutty pecans truly shine through in this recipe. If you are searching for muffins that are perfectly moist inside, this is the recipe for you. The natural sweetness of the maple syrup complements the rich nuttiness of the pecans beautifully. These muffins gain extra deliciousness thanks to just the right amounts of warm cinnamon and aromatic vanilla extract.
The best part is you absolutely do not need extensive baking experience to master this recipe. With only about 10 minutes of simple prep time and straightforward steps to follow, you will be amazed at how easy making these delightful muffins really is.
Why You Will Absolutely Love These Maple Pecan Muffins
Get ready for your entire family to fall head over heels for these muffins. They just might start asking you to bake them constantly. Do not say I did not give you fair warning. Here are just a few of the reasons why I think you will love this recipe:
- They have that addictive maple pecan flavor combination.
- The prep time is only around 10 minutes.
- They are fantastic for breakfast, snacks, dessert, or even a late-night treat.
- These muffins turn out moist and soft with a wonderfully tender interior crumb.
- You can achieve those tall, beautiful domed tops just like you find at your favorite bakery.
What Ingredients You Will Need for Maple Pecan Muffins
This maple pecan muffin recipe calls for very common pantry staples that come together to create truly delicious muffins with a perfect texture. You can find the exact quantities and a complete list of ingredients in the recipe card below. Here is a summary of what you will need to gather:
- All purpose flour: The base of our tender muffin crumb.
- Granulated sugar: Adds sweetness to the muffin batter.
- Ground cinnamon: Provides a warm spice note that pairs perfectly with maple and pecan.
- Baking powder: Our leavening agent for a lovely rise.
- Salt: Enhances all the flavors.
- Pecans: Use pecans that are roughly chopped for bits of nutty crunch throughout.
- Eggs: Help bind the ingredients and add richness.
- Buttermilk: Contributes to the muffins moistness and tender texture.
- Vegetable oil: Adds moisture and richness to the batter.
- Maple syrup: Provides that signature flavor. Be sure to use real maple syrup for the best results.
- Vanilla extract: Enhances the overall sweetness and aroma.
And for that irresistible Crumb Topping:
- All purpose flour: Forms the structure of the crumb.
- Brown sugar: Gives the topping sweetness and a lovely caramel note.
- Ground cinnamon: A touch more warm spice for the topping.
- Salt: Just a pinch to balance the sweetness.
- Unsalted butter: Make sure it is melted so you can easily mix and form crumbs.
How to Prepare Maple Pecan Muffins Step by Step
Just imagining a warm maple pecan muffin fresh from the oven with a steaming cup of coffee makes my mouth water. Maple and pecan are truly a classic pairing. When tucked into a muffin they are just incredible. You will find the full details on quantities and ingredients in the recipe card provided below. Here are the straightforward steps to follow for making these utterly delicious maple pecan muffins:
- Combine the dry ingredients: In a medium sized mixing bowl, measure and combine the all purpose flour, granulated sugar, ground cinnamon, baking powder, salt, and the roughly chopped pecans. Stir all of these dry ingredients together very well until they are evenly distributed. Set this bowl aside for a moment.
- Blend the wet ingredients: Using a larger mixing bowl, measure and combine the eggs, buttermilk, vegetable oil, maple syrup, and vanilla extract. Gently whisk these wet ingredients together until they are fully blended and smooth.
- Mix the wet and dry ingredients: Gradually pour the dry ingredients you set aside into the larger bowl containing the wet ingredients. Begin mixing everything by hand. Stir just until the ingredients are combined. Avoid overmixing. The batter will look quite thick at this stage.
- Let the batter rest and prepare the oven: Cover the bowl containing the muffin batter with a clean kitchen towel. Allow the batter to rest quietly for 15 minutes. While the batter is resting, take this time to preheat your oven to 425 degrees Fahrenheit (220 degrees Celsius). Also, prepare the crumb topping during this resting period.
- Make the crumb topping: In a separate mixing bowl, combine the flour, brown sugar, cinnamon, salt, and the melted butter. Use your hands to gently squeeze and mix the ingredients together until lovely crumbs begin to form. Set this crumb topping mixture aside until you are ready to use it for the muffins.
- Prepare the muffin pan and fill with batter: To achieve that wonderful bakery style domed top on your muffins, line a standard 12 count muffin pan with only 6 muffin liners. This means you will leave an empty cup between each liner you place. Fill each lined muffin well with about 6 to 8 heaping tablespoons of the muffin batter. Next, take the crumb topping mixture you prepared and generously crumble it over the top of each filled muffin cup. You can gently press the crumbs onto the batter so they adhere well. If you like, you can also sprinkle a bit of sanding sugar over the tops at this point for extra sparkle and crunch.
- Bake and cool the muffins: Place the prepared muffin pan carefully into the center of your preheated oven. Bake for the initial 7 minutes at the high temperature of 425 degrees Fahrenheit (220 degrees Celsius). After exactly 7 minutes, keep the muffins inside the oven but immediately turn the oven temperature down to 350 degrees Fahrenheit (180 degrees Celsius). Continue baking for an additional 16 to 20 minutes. You will know the muffins are done when a toothpick inserted into the center of one comes out clean with no wet batter attached. Allow the baked muffins to cool completely in the pan before you attempt to remove them. If you still have remaining batter, repeat the baking process with another pan. Remember to bump the oven temperature back up to 425 degrees Fahrenheit (220 degrees Celsius) for the first 7 minutes of baking before lowering it again.
Secrets to Achieving Bakery Style Muffins
Everyone loves those beautiful muffins with tall, impressive domed tops that you find at a professional bakery. Who does not find them appealing? I have discovered a few simple yet effective techniques that really help “lift” these muffins and give them those large, wonderfully domed tops.
- Allow the Batter to Rest
Make sure to let your muffin batter rest for about 15 minutes after you have finished mixing it but before you scoop it into your muffin pan. During this short resting period, the starch molecules present in the flour have time to absorb the liquid ingredients in the batter. This absorption causes the starch molecules to swell slightly and helps the batter become thicker in consistency. A quick 15 minute rest makes a difference. - Fill Every Other Muffin Cup
This particular tip has been a game changer for getting high domes. For true bakery style muffin tops, when you line a standard 12 count muffin pan, only place liners in 6 of the cups. This means you will consciously fill only every other muffin well with your batter. Filling just every other cup provides more space for the muffins to spread upwards and dome nicely without bumping into their neighbors. This method also seems to encourage the muffins to brown more effectively, helping create that lovely golden top crust. - Fill the Liners to the Very Top
Do not be shy when filling your muffin liners. Go ahead and fill them right up to the top with batter. I know this goes against what you might have heard in the past about not overfilling. However, generous filling is quite important in helping the muffins gain that significant height and dome shape. - Begin Baking at a High Temperature
Start baking your muffins at a high temperature, specifically 425 degrees Fahrenheit. Then, reduce the temperature to 350 degrees Fahrenheit partway through the baking time. Starting the muffins off in a very hot oven causes the outside of the batter to set quickly. Simultaneously, the leavening agents inside are activated by the heat, causing the batter to rise rapidly. This rapid initial rise is what helps produce that characteristic dome shape on top before the lower temperature allows the inside to bake through evenly.

The Right Way to Measure Flour Accurately
Measuring flour correctly is more important than many people realize for consistent baking results. The most precise way to measure flour for any recipe is to use a digital kitchen scale and weigh it in grams. This method eliminates guesswork and is highly accurate.
If you do not happen to have a kitchen scale available, you can still measure flour accurately using the spoon and level method.
First, you need to aerate the flour. Use a whisk or a spoon to gently fluff up the flour inside its bag or container. Flour can settle and become quite heavy and compact as it sits. Aerating means fluffing it up, which is different from sifting it. Only sift the flour if the recipe specifically instructs you to do so.
Next, use a spoon to lightly sprinkle the aerated flour into your dry measuring cup. Continue spooning the flour until the cup is slightly overflowing. Be careful not to tap the measuring cup against the counter at all. Tapping will compact the flour back down, leading to too much flour being measured.
Finally, use the back of a straight edge, like a butter knife or a bench scraper, to sweep across the top of the measuring cup. This levels off the excess flour cleanly, leaving you with the precise amount needed.
Essential Tips for Baking the Best Maple Pecan Muffins
Here are a few helpful tips and reminders to ensure your maple pecan muffins turn out absolutely perfect every single time you bake them.
- Do not skip the resting time. Allowing the batter to rest for that 15 minutes in the mixing bowl before baking is key to developing moisture and achieving those lovely domed tops. It really makes a difference in texture and rise.
- Consider adding sanding sugar to the tops. For an extra touch of sweetness, crunch, and that authentic bakery look, sprinkle a bit of coarse sanding sugar over the crumb topping just before the muffins go into the oven.
- Focus on creating bakery-style domed muffin tops. Remember the technique of lining only every other cup in the muffin pan. This gives the muffins the space they need to spread and dome beautifully without crowding. This method also promotes better browning for a delicious top crust.
- Use the two-temperature baking method. Starting the bake at a higher temperature and then lowering it is crucial. The initial high heat triggers a fast rise, setting the top and creating the dome shape, while the lower temperature ensures the center bakes through completely without burning the outside.
Storing and Freezing Your Delicious Muffins
Knowing how to properly store your baked maple pecan muffins is important to keep them tasting their best for as long as possible.
For very short term storage, if you anticipate eating the muffins within about 24 hours of baking them, you can actually leave them simply uncovered on your kitchen counter. Because these muffins are so wonderfully moist, they generally will not dry out if left at room temperature for just one day.
In fact, sometimes muffins that are very moist can become slightly soggy when stored in a completely airtight container right away. The crunchy, sugary tops might lose some of their crispness in an airtight environment due to trapped moisture.
However, I have a great little trick to help manage moisture for longer storage using simple paper towels.
For longer storage needs, anywhere from 2 to 4 days, first line the bottom of your airtight storage container with a layer or two of paper towels. Place the completely cooled muffins in a single layer on top of the paper towels inside the container. Then, cover the top of the muffins with an additional layer of paper towels before sealing the lid. The paper towels will act like a sponge, helping to absorb any excess moisture that the muffins naturally release while they are stored. If the paper towels seem damp after a couple of days, around day 2 or day 3, simply replace them with fresh ones.
If you want to store your muffins for a longer period, freezing is an excellent option. Baked and fully cooled muffins can be frozen for up to 3 months. The best way to do this is to individually wrap each cooled muffin snugly in plastic wrap. Then, place all the individually wrapped muffins into a large resealable freezer bag or a freezer safe container. This helps prevent freezer burn.
To thaw frozen muffins, you can simply leave them at room temperature on the counter until they are completely defrosted. This usually takes about an hour or so. Alternatively, you can unwrap a frozen muffin and gently warm it in the microwave. Microwave in short 20 second intervals until it is warmed through and defrosted.
Common Questions About Maple Pecan Muffins
Here are answers to a few questions people often ask about making maple pecan muffins.
Yes you absolutely can. Walnuts are a very popular and delicious substitute for pecans in this recipe. You could also try chopped almonds or even hazelnuts if you like. Be sure to chop them roughly just like you would the pecans.
If you do not have buttermilk on hand, you can easily make a substitute at home. For 1 cup of buttermilk, measure out 1 cup of regular milk (dairy or non dairy works). Stir in 1 tablespoon of white vinegar or lemon juice. Let this mixture sit for about 5 to 10 minutes until it looks slightly curdled. Then stir it again and use it as directed in the recipe.
Resting the batter allows the flour to fully absorb the liquids. This process helps create a more tender crumb texture in the finished muffins. It also contributes to a better rise and those desirable domed tops.
Starting the muffins at a high temperature (425F) provides an initial burst of heat. This causes the batter to rise quickly before the tops set, helping to form a dome. Then lowering the temperature (350F) allows the inside of the muffin to bake through completely without the outside getting too dark or burning.
When stored properly in an airtight container with paper towels, these muffins should stay moist and delicious at room temperature for 2 to 4 days. If refrigerated, they can last up to 5 days. Freezing extends their life up to 3 months.
You can mix the dry ingredients and wet ingredients separately the day before. Store them covered at room temperature. When you are ready to bake, combine the wet and dry mixtures, let the batter rest for 15 minutes as directed, and then proceed with the baking steps. Do not mix the wet and dry ingredients too far in advance as the leavening agent starts working once wet.
The BEST Maple Pecan Streusel Muffins
- Prep Time: 10 minutes
- Cook Time: 25 minutes
- Total Time: 35 minutes
- Yield: 10 muffins
- Category: Muffins
- Method: Oven
Description
These Maple Pecan Muffins are incredibly moist and packed with irresistible maple flavor and crunchy pecans. You will love the soft crumb and the sweet streusel topping that makes them taste just like a bakery treat.
Ingredients
For the Muffins
- 3 cups (350 grams) all purpose flour
- ¾ cup (150 grams) granulated sugar
- 2 teaspoons ground cinnamon
- 2 teaspoons baking powder
- 1 teaspoon salt
- 1 ½ cups (175 grams) pecans, roughly chopped
- 2 large eggs
- 1 cup (230 ml) buttermilk
- ½ cup (120 ml) vegetable oil
- 1 cup (250 ml) maple syrup
- 1 teaspoon vanilla extract
For the Crumb Topping
- ¾ cup (90 grams) all purpose flour
- ⅓ cup (75 grams) brown sugar
- 1 teaspoon ground cinnamon
- ¼ teaspoon salt
- ¼ cup (60 grams) unsalted butter, melted
Instructions
For the Muffins
- In a medium mixing bowl combine the all purpose flour, granulated sugar, cinnamon, baking powder, salt, and chopped pecans. Stir these dry ingredients together well. Set this bowl aside for now.
- In a larger mixing bowl combine the eggs, buttermilk, vegetable oil, maple syrup, and vanilla extract. Whisk these wet ingredients together until they are fully combined.
- Gradually add the dry ingredients from the first bowl into the wet ingredients in the larger bowl. Mix everything by hand just until the ingredients are combined. The batter will be quite thick.
- Cover the bowl of batter with a clean towel. Let the batter rest for 15 minutes. While it is resting, preheat your oven to 425 degrees F (220 degrees C) and prepare the crumb topping.
For the Crumb Topping
- In a mixing bowl combine the flour, brown sugar, cinnamon, salt, and melted butter.
- Use your hands to squeeze the mixture together until crumbs form. Set the crumb topping aside until you are ready to use it.
Assembly and Baking
- For muffins with a bakery style dome, line a standard 12 count muffin pan with only 6 muffin liners. This means you will fill every other muffin spot.
- Fill each lined muffin well with 6 to 8 heaping tablespoons of the batter.
- Take the crumb topping mixture and crumble it over the top of each muffin. Gently press the crumbs onto the batter. You can sprinkle sanding sugar over the tops now if you like.
- Place the prepared muffin pan in the center of the preheated oven. Bake for 7 minutes at 425 degrees F (220 degrees C).
- After 7 minutes, keep the muffins in the oven but turn the oven temperature down to 350 degrees F (180 degrees C). Bake for an additional 16 to 20 minutes. The muffins are done when a toothpick inserted into the center comes out clean.
- Allow the muffins to cool completely in the pan before removing them.
- If you have remaining batter, repeat the baking process with another pan, bumping the oven temperature back up to 425 degrees F (220 degrees C) for the initial 7 minutes.
Notes
Storage: Store cooled muffins in an airtight container at room temperature for up to 3 days or in the refrigerator for up to 5 days.
Freezing: Baked and cooled muffins can be frozen for up to 3 months. Wrap each muffin individually in plastic wrap, then place them in a freezer safe bag or container. Thaw at room temperature.
Bakery Style Tip: Baking at a higher temperature initially helps the muffins rise quickly and develop that beautiful domed top before the temperature is reduced to ensure they bake through evenly. Filling only every other muffin well also helps with heat circulation and encourages a better rise.
Yield: This recipe makes 10 large muffins when using the bakery style spacing method. If you fill all 12 wells, they might be slightly smaller and the yield will be 12.
Nutrition
- Serving Size: 1 muffin
- Calories: 450
- Sugar: 45g
- Sodium: 310mg
- Fat: 22g
- Carbohydrates: 60g
- Fiber: 2g
- Protein: 5g
- Cholesterol: 45mg