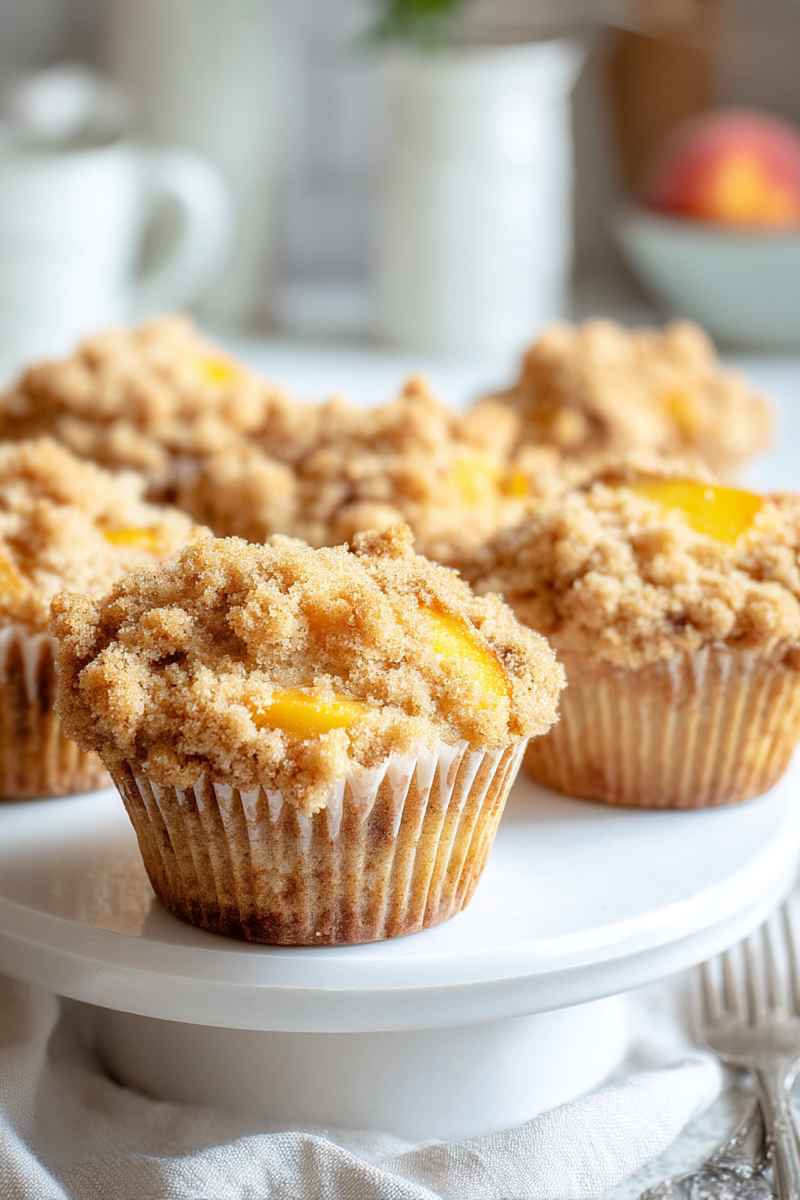
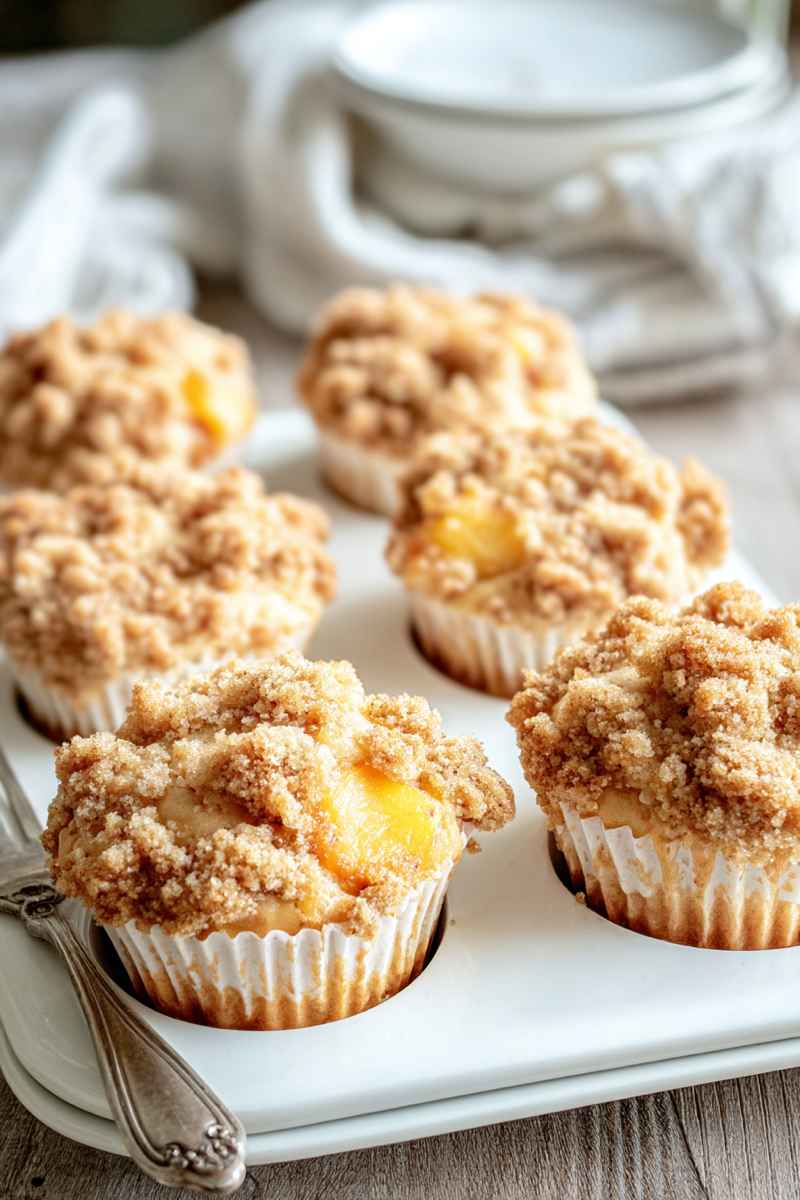
Hey there! I’m so excited to share a recipe that feels like sunshine in a wrapper. Imagine biting into a muffin that’s incredibly soft, bursting with the sweet flavor of ripe peaches, and crowned with the most perfect, buttery crumb topping you can dream of. Making these peach muffins with a delightful crumb topping at home is such a rewarding experience. It’s a simple joy to create something so delicious that brings everyone together.
Here are a few things you’ll love about this recipe:
- Embrace the season: Using fresh or frozen peaches captures that lovely summer feeling any time of year.
- Baking happiness: There’s real satisfaction in creating these beautiful, tasty muffins from scratch.
- Sweet connections: Baking and sharing these treats is a wonderful way to make happy moments with those you care about.
Gathering Your Ingredients
Let’s talk about what you’ll need to bring these wonderful peach muffins and that must-have crumb topping to life. For the irresistible crumb topping, you’ll start with standard all-purpose flour, then mix in both granulated sugar and light brown sugar for a richer sweetness. A touch of warm ground cinnamon adds a lovely spice note. And of course, you’ll need melted butter; it’s the magic binder that creates those perfect, chunky crumbs everyone craves.
Now, for the stars of the show, the muffins themselves. The foundation is once again all-purpose flour, paired with baking powder to ensure they rise beautifully and have a light, airy texture. A little bit of salt is important too; it helps balance all the sweet flavors. For the wet ingredients, you’ll combine eggs and granulated sugar until they’re light and fluffy. Then comes full-fat sour cream; it’s my secret weapon for making these muffins incredibly moist and tender. Vegetable oil adds even more softness to the crumb, and a splash of vanilla extract brings that comforting, aromatic scent we all adore. The absolute highlight is adding diced peaches; they infuse every bite with sweet, juicy goodness. This recipe is truly ideal whether you’re planning a relaxed brunch or looking for that perfect sweet snack.
Creating the Perfect Crumb Topping
Oh, making the crumb topping is one of my favorite parts of this recipe. It truly elevates these peach muffins from lovely to absolutely unforgettable. I like to grab a medium-sized bowl and measure the dry ingredients for the topping first. That’s where the all-purpose flour, both granulated and light brown sugar, and the cinnamon all go in. Give them a quick whisk together to make sure everything is well distributed. This simple mix is the start of that wonderful crumbly texture. The next step is adding the melted butter. It’s pretty amazing how pouring in the butter and mixing with a fork turns the dry mixture into coarse, beautiful crumbs. Now, here’s a little baker’s trick I always use: pop this bowl of crumb topping into the refrigerator. Letting it chill while you prepare the muffin batter helps the crumbs hold their shape better when you sprinkle them, giving you that gorgeous, defined crumb layer on top. It’s a small extra step, but it makes a big difference in the final look and texture.
Preparing the Dry Ingredients
When you’re getting ready to bake something as delightful as homemade peach muffins, setting up a solid base is key. That’s why preparing the dry ingredients correctly is a fundamental step towards achieving perfect muffins. For our peach muffin recipe, you’ll need your measured all-purpose flour, baking powder, and a pinch of salt. Think of the all-purpose flour as the main building block; it provides the essential structure that keeps our muffins from collapsing and gives them their form. Baking powder is like the little engine of the recipe; it’s the leavening agent that reacts in the oven, creating air pockets and making the muffins light, fluffy, and gorgeously risen.
And let’s not overlook that small but mighty dash of salt. While it doesn’t make the muffins taste salty, it plays a crucial role in enhancing and balancing the sweetness from the sugars and peaches, making all the flavors shine brighter. I usually grab a large mixing bowl and add all these dry ingredients. Then, I use a whisk to gently stir them together. This mixing isn’t just for show; it makes sure the baking powder and salt are evenly distributed throughout the flour. This means every single muffin will rise properly and have consistent flavor. Getting this mixture just right creates the perfect foundation for when we add the wet ingredients and those delicious peach pieces later on.
Blending the Wet Ingredients
Alright, let’s talk about mixing the wet ingredients to get them just right for our peach muffins. This step is where a lot of the flavor and moisture really come together. I start in a separate medium-sized bowl by adding the granulated sugar and the eggs. I whisk them together really well. You want to keep whisking until the mixture lightens in color and becomes nicely combined; it should look pale yellow and a little thicker. It’s kind of satisfying to watch it transform. But the component that truly takes these muffins to the next level of moistness is the sour cream. Adding full-fat sour cream doesn’t just contribute moisture; it also adds a slight tanginess that complements the sweet peaches beautifully and gives the muffins an incredibly tender crumb.
Next, I pour in the vegetable oil and the vanilla extract. The vegetable oil helps keep the muffins soft and moist over time, contributing to that lovely texture we’re aiming for. Vanilla extract is essential for that classic, comforting baked goods aroma and taste. I continue whisking gently until all these wet ingredients are fully blended together. The goal is a smooth, cohesive mixture before combining it with the dry ingredients. Getting this wet base right is crucial for ensuring our muffins are not only delicious but also perfectly moist and tender.
Incorporating Those Juicy Peaches
This step is what makes these peach muffins sing with flavor. It’s time to get those wonderful peach pieces ready. I always like to use ripe, sweet peaches, diced into nice bite-sized chunks. To prevent them from sinking to the bottom of the batter while baking (a common muffin problem!), I take most of the diced peaches and place them in a small bowl. Then, I sprinkle just a couple of tablespoons of all-purpose flour over them and gently toss to coat. This light flour coating helps the peaches stay suspended throughout the batter as the muffins bake, ensuring you get peachy goodness in every single bite.
Now, it’s time to combine them with the batter we’ve prepared. You want to be gentle here. Add the floured peaches to the batter and use a spatula to carefully fold them in. The goal is to distribute them relatively evenly without overmixing the batter. Overmixing can develop the gluten in the flour too much, resulting in tough muffins. We want them tender and moist. As I’m folding, I make sure not to mash the peaches. Oh, and don’t forget to set aside about a cup of those beautiful diced peaches before coating the rest with flour. We’ll use these reserved pieces to scatter on top of the muffins just before they go into the oven. It adds extra peach flavor right on top and looks really lovely too. It’s a simple touch that makes a big difference in the final presentation and taste.
Baking These Beautiful Muffins
Okay, we’ve got our glorious batter mixed, our peaches folded in, and that lovely crumb topping chilling. Now for the truly exciting part: getting these peach muffins baked to perfection. First, grab your prepared muffin tin; you’ll want it lined with paper liners. Carefully scoop or spoon the batter into each cup. I find filling them about two-thirds full is just right to allow for that beautiful rise. You can gently tap the muffin pan on the counter a couple of times after filling; this helps the batter settle evenly and removes any large air pockets. Next, remember those reserved peach pieces? Gently place a few pieces on top of the batter in each cup, pressing them down slightly. Then, take your chilled crumb topping from the fridge. Using your fingers, crumble generous amounts over the top of each muffin. Don’t be shy here; the crumb topping is a key part of the magic!
Now, for the baking method that helps create those wonderful, domed tops like you get at a bakery. You’ll start by placing the pan carefully into your preheated oven set at a higher temperature, specifically 400 degrees Fahrenheit. Let them bake at this temperature for precisely 5 minutes. This initial blast of heat gives them a quick lift. After that first 5 minutes is up, here’s the crucial part: without opening the oven door or taking the muffins out, simply reduce the oven temperature down to 375 degrees Fahrenheit. Let them continue baking at this lower temperature for another 15 minutes, or until they look golden brown and a wooden toothpick inserted into the center of a muffin comes out clean. The toothpick test is your best friend here; it tells you they are perfectly baked through.
Adding That Sweet Glaze
While your amazing peach muffins are cooling, you have the option to whip up a simple, sweet glaze. This glaze adds another layer of deliciousness and a lovely finish. It’s incredibly easy to make. You’ll just need some powdered sugar, a little splash of vanilla extract for flavor, and a small amount of milk. I like to start with just a tablespoon or two of milk and add more a tiny bit at a time if needed.
Combine the powdered sugar and vanilla extract in a small bowl. Then, gradually add the milk, stirring or whisking everything together. You want to mix until you have a smooth, slightly thick but pourable glaze. If it seems too thick to drizzle easily, just add a tiny drop more milk and stir again. If you accidentally add too much milk and it’s too thin, you can stir in a little more powdered sugar to thicken it up. This glaze is meant to be drizzled over the muffins once they have cooled completely. Putting it on warm muffins will just make it melt everywhere. Once the muffins are cool, get your spoon or fork ready and drizzle that sweet glaze generously over the tops. It adds such a nice touch!
Cooling and Serving Your Masterpieces
After your peach muffins have finished baking and passed the toothpick test, carefully remove the pan from the oven. It’s important to let them cool in the pan for about 5 minutes before trying to move them. This brief cooling time in the pan helps them set up properly so they don’t break apart when you take them out. After 5 minutes, you can gently lift them from the muffin pan and transfer them to a wire cooling rack. Let them cool completely on the rack. Waiting for them to cool fully is key, especially if you plan on adding that lovely glaze. Once they are cool, you can drizzle on the glaze if you chose to make it.
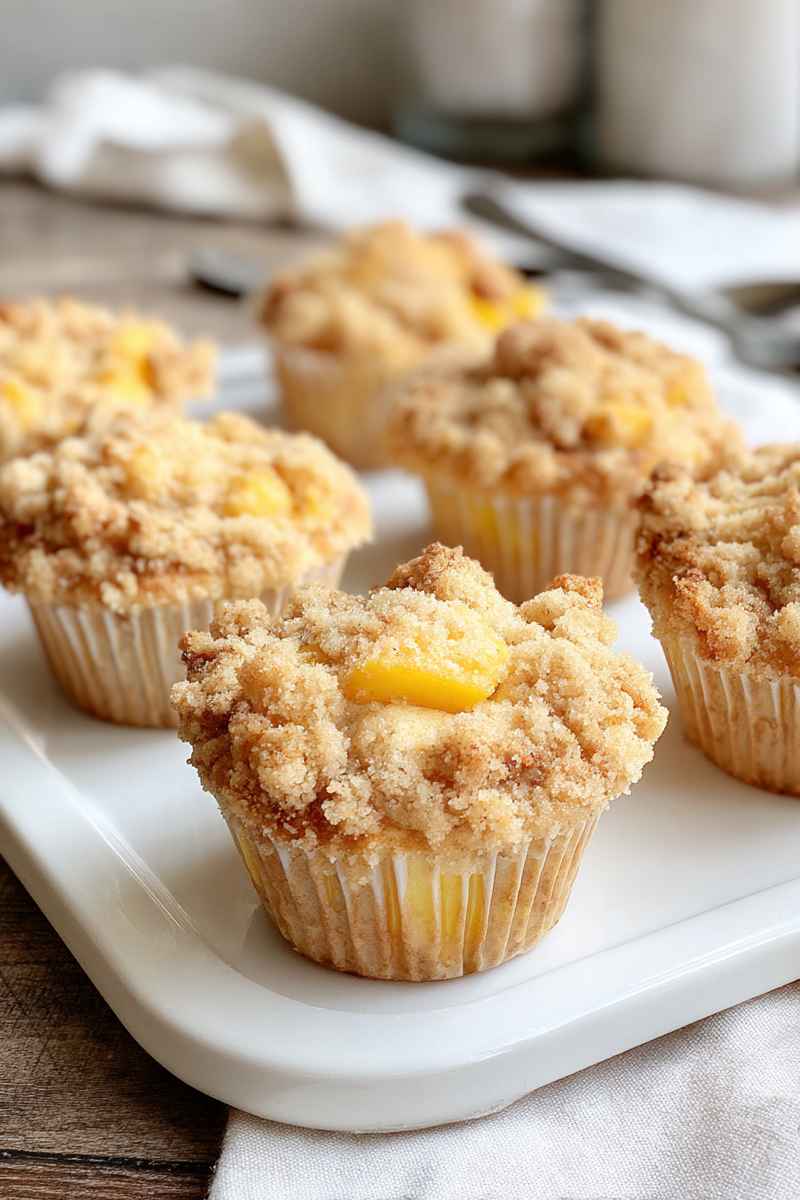
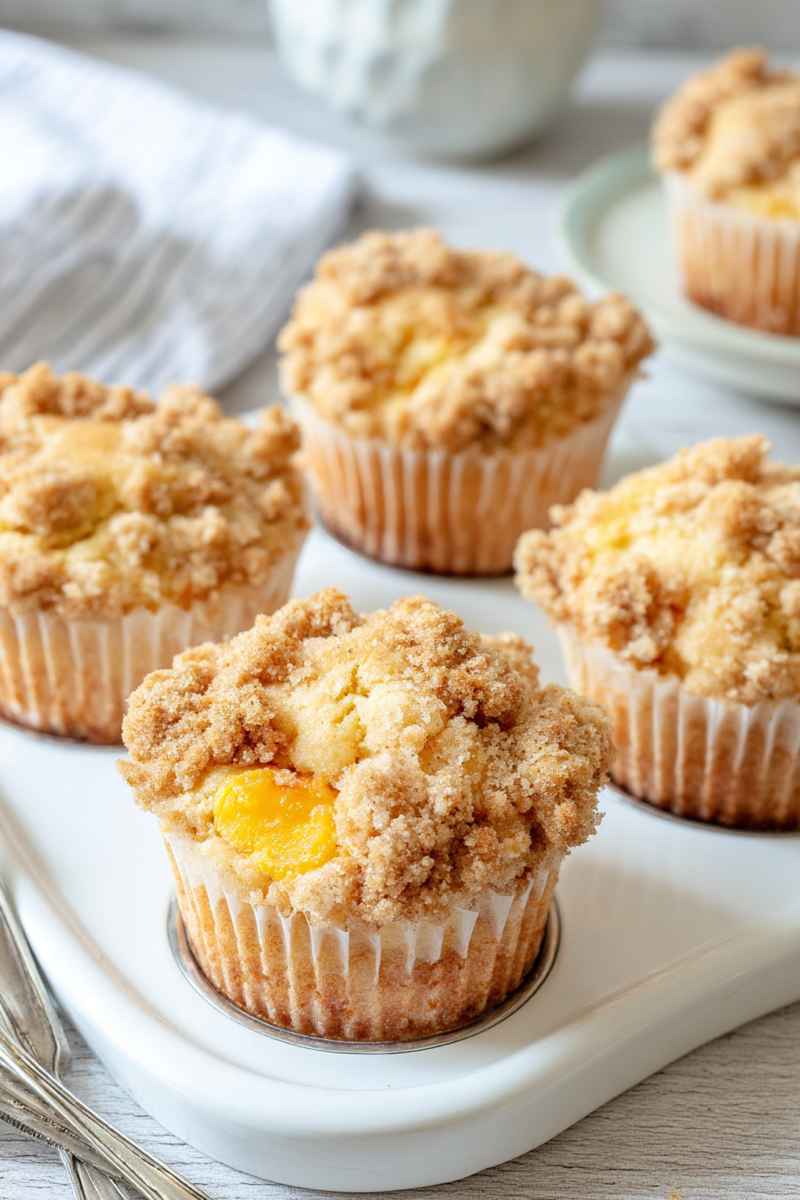
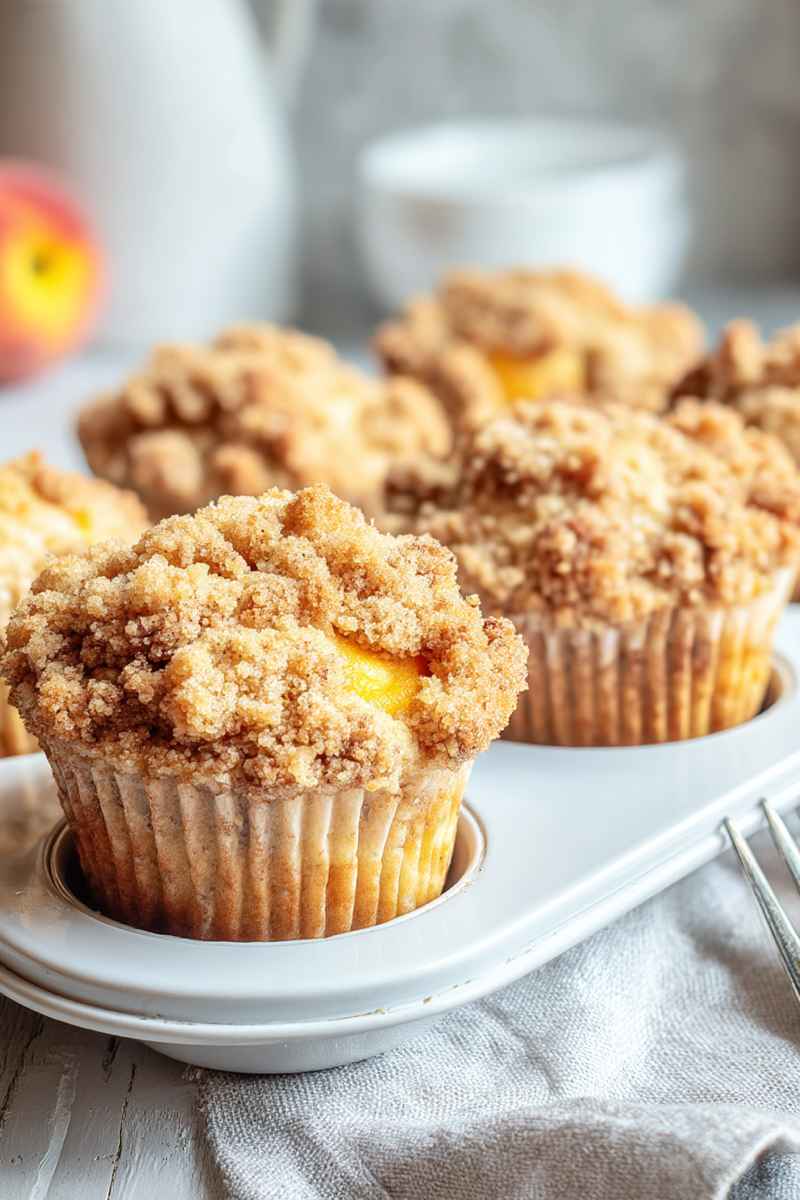
Serving these peach muffins is the best part! They are absolutely wonderful enjoyed warm or at room temperature. They make a perfect addition to a weekend breakfast or brunch spread. They are also fantastic as a snack with a cup of tea or coffee, or even as a simple dessert. The combination of the moist, peachy interior and the crunchy, sweet crumb topping is truly irresistible. Share them with family and friends; they’re sure to be a hit!
Notes From My Kitchen
Here are a few helpful tips and details based on my experience making these muffins.
- Storing Leftovers: If you happen to have any muffins left (it’s rare in my house!), make sure they are completely cool before storing them. Pop them into an airtight container. They’ll keep well at room temperature for about 3 days. If you need them to last a bit longer, you can keep them in the refrigerator for up to 5 days.
- Freezing Muffins: These muffins freeze really well if you want to make a batch ahead of time or save some for later. Make sure they are completely cool and haven’t been glazed yet. You can wrap each muffin individually in plastic wrap, or place them in a single layer in a freezer-safe container. They can stay in the freezer for up to 3 months. When you’re ready to enjoy one, just take it out and let it thaw at room temperature.
- Working with Peaches: You can absolutely use fresh or frozen peaches for this recipe. If you’re using fresh ones, pick peaches that are ripe enough to be juicy and flavorful but still firm enough to hold their shape when diced. If you’re using frozen peaches, make sure they are thawed completely before you dice them. It’s also important to drain away any excess liquid from thawed peaches; too much moisture can make your muffin batter too wet.
- About the Glaze: The glaze is totally optional. These peach muffins are absolutely delicious on their own with just the crumb topping. The glaze just adds an extra bit of sweetness and a pretty drizzle if you like. Feel free to skip it if you prefer a less sweet muffin or want to save a little time.
Common Questions About Peach Muffins
Here are some questions people often ask when making peach muffins with crumb topping.
Yes, you can. Just make sure you drain them very well to get rid of all that extra syrup or juice. Pat them dry with a paper towel before dicing them and adding them to the batter.
This usually happens if the butter wasn’t mixed in thoroughly enough to create distinct crumbs, or if the topping wasn’t chilled before baking. Chilling helps the butter solidify a bit, which holds the crumb structure together better in the oven.
This could be due to a few things. Make sure your baking powder isn’t old; it loses its effectiveness over time. Also, be careful not to overmix the batter after adding the wet ingredients to the dry; overmixing can lead to tough, flat muffins. Make sure your oven temperature is accurate too.
How can I get those beautiful domed tops on my muffins?
Using the initial higher oven temperature for the first few minutes of baking helps create that sudden burst of steam and leavening activity that pushes the tops up, giving you that nice dome shape.
Can I add other spices to the muffins or topping?
Absolutely! A pinch of nutmeg or cardamom could be lovely additions, especially alongside the cinnamon in the crumb topping or the muffin batter itself. Get creative with your favorite warm spices.
When you’re combining the wet and dry ingredients, stop mixing as soon as you no longer see streaks of dry flour. The batter might still look a little lumpy, and that’s perfectly fine. Overmixing happens when you keep stirring and the batter becomes smooth and elastic.
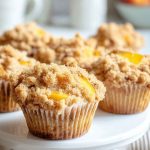
Easy Peach Crumb Muffins (with The Best Streusel Topping)
- Prep Time: 15 minutes
- Cook Time: 20 minutes
- Total Time: 35 minutes
- Yield: 12 muffins
- Category: Muffins
- Method: Oven
Description
These Peach Muffins with Crumb Topping are incredibly moist, bursting with sweet peaches, and finished with an irresistible golden crumb topping! They make a delicious treat for breakfast or any time of day!
Ingredients
For the Crumb Topping
- 1 cup (120 grams) all-purpose flour
- 6 ½ tablespoons (100 grams) melted butter
- ¼ cup (50 grams) granulated sugar
- ¼ cup (50 grams) light brown sugar, packed
- 1 ¼ teaspoons (3 grams) ground cinnamon
For the Muffin Batter
- 2 large eggs, at room temperature
- 2 cups (250 grams) all-purpose flour
- 2 cups (300 grams) peaches, diced (use frozen thawed or fresh peeled and sliced)
- 1 cup (200 grams) granulated sugar
- 1 cup (240 grams) sour cream, full-fat recommended
- ½ cup (120 grams) vegetable oil
- 2 tablespoons (15 grams) all-purpose flour (for dusting peaches)
- 3 teaspoons (12 grams) baking powder
- 1 teaspoon (5 grams) vanilla extract
- ½ teaspoon (3 grams) salt
For the Glaze
- 1 cup (120 grams) powdered sugar
- ½ teaspoon (2.5 grams) vanilla extract
- 1 to 2 tablespoons (15 to 30 grams) milk
Instructions
- Preheat your oven to 400 degrees Fahrenheit. Prepare a standard 12-cup muffin pan by lining each cup with paper liners.
- To make the crumb topping, measure flour, granulated sugar, brown sugar, and cinnamon into a small bowl. Whisk these dry ingredients together until they are combined. Pour in the melted butter. Stir with a fork until the mixture resembles coarse crumbs. Place this bowl in the refrigerator to chill while you make the batter.
- In a large mixing bowl, measure the 2 cups of flour, baking powder, and salt. Stir these dry muffin ingredients together. Set this bowl aside for now.
- In a separate medium-sized bowl, add the granulated sugar and eggs. Whisk them together until they are well combined. Next, add the sour cream, vegetable oil, and vanilla extract to the bowl. Continue whisking until the mixture looks pale yellow and is fully blended.
- Now, gently fold the wet ingredients from the medium bowl into the dry ingredients in the large bowl. Mix carefully until the batter is just combined and no dry streaks remain. Do not overmix.
- Take the diced peaches. Reserve about 1 cup of the diced peaches to place on top of the muffins later. Put the remaining peaches in a small bowl. Add the 2 tablespoons of flour to these peaches and gently toss to coat them lightly. Carefully fold these floured peaches into the prepared muffin batter.
- Using a spoon or scoop, divide the batter evenly among the prepared muffin cups. Fill each cup to about two-thirds full. Gently tap the muffin pan on your kitchen counter a few times to help the batter settle evenly in the cups.
- Place the reserved 1 cup of diced peaches on top of the batter in each muffin cup, pressing a few pieces gently into the surface of each muffin. Remove the chilled crumb topping from the refrigerator. Using your hands, crumble chunks of the topping over the batter in each muffin cup, covering the top generously.
- Carefully place the pan of muffins into the preheated 400-degree Fahrenheit oven. Bake for exactly 5 minutes at this temperature. Without opening the oven door or removing the muffins, reduce the oven temperature down to 375 degrees Fahrenheit. Continue baking for an additional 15 minutes. The muffins are done when a wooden toothpick inserted into the center of a muffin comes out clean.
- Remove the muffin pan from the oven. Allow the muffins to cool in the pan for 5 minutes before attempting to move them. After 5 minutes, carefully lift the muffins out of the pan and transfer them to a wire rack to cool completely.
- While the muffins cool, prepare the glaze. In a small bowl, combine the powdered sugar, vanilla extract, and the starting amount of milk (1 to 2 tablespoons). Stir or whisk until a smooth, pourable glaze forms. If the glaze is too thick, add a tiny splash more milk. If it’s too thin, stir in a little more powdered sugar until you reach your desired consistency. Once the muffins are cool, drizzle the glaze generously over the tops. Enjoy!
Notes
Storage: Store cooled muffins in an airtight container at room temperature for up to 3 days, or in the refrigerator for up to 5 days.
Freezing: Cooled, unglazed muffins can be wrapped individually or stored in a freezer-safe container for up to 3 months. Thaw at room temperature before serving.
Peaches: If using fresh peaches, ensure they are ripe but still firm. For frozen, thaw completely and drain well to avoid excess moisture in the batter.
Glaze: The glaze is optional but adds an extra touch of sweetness. You can omit it for a less sweet muffin.
Nutrition
- Serving Size: 1 muffin
- Calories: 350
- Sugar: 35g
- Sodium: 150mg
- Fat: 18g
- Carbohydrates: 42g
- Fiber: 1g
- Protein: 4g
- Cholesterol: 45mg