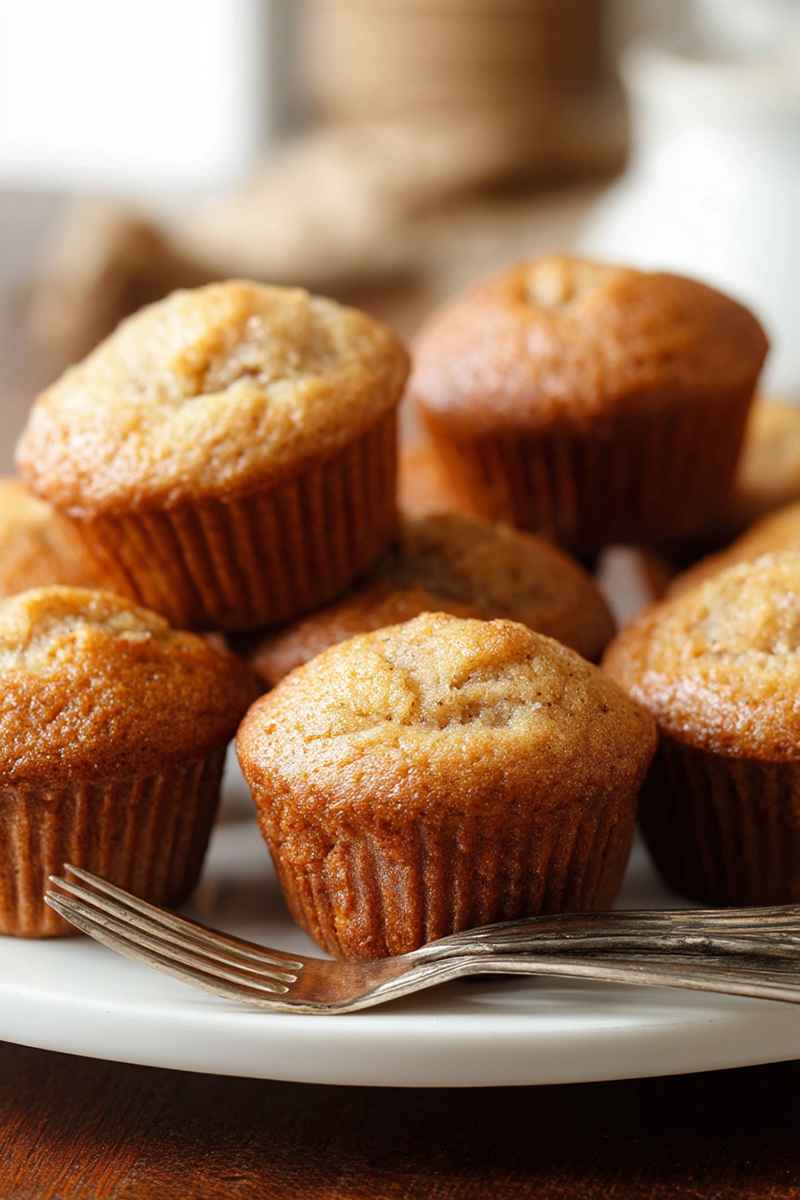
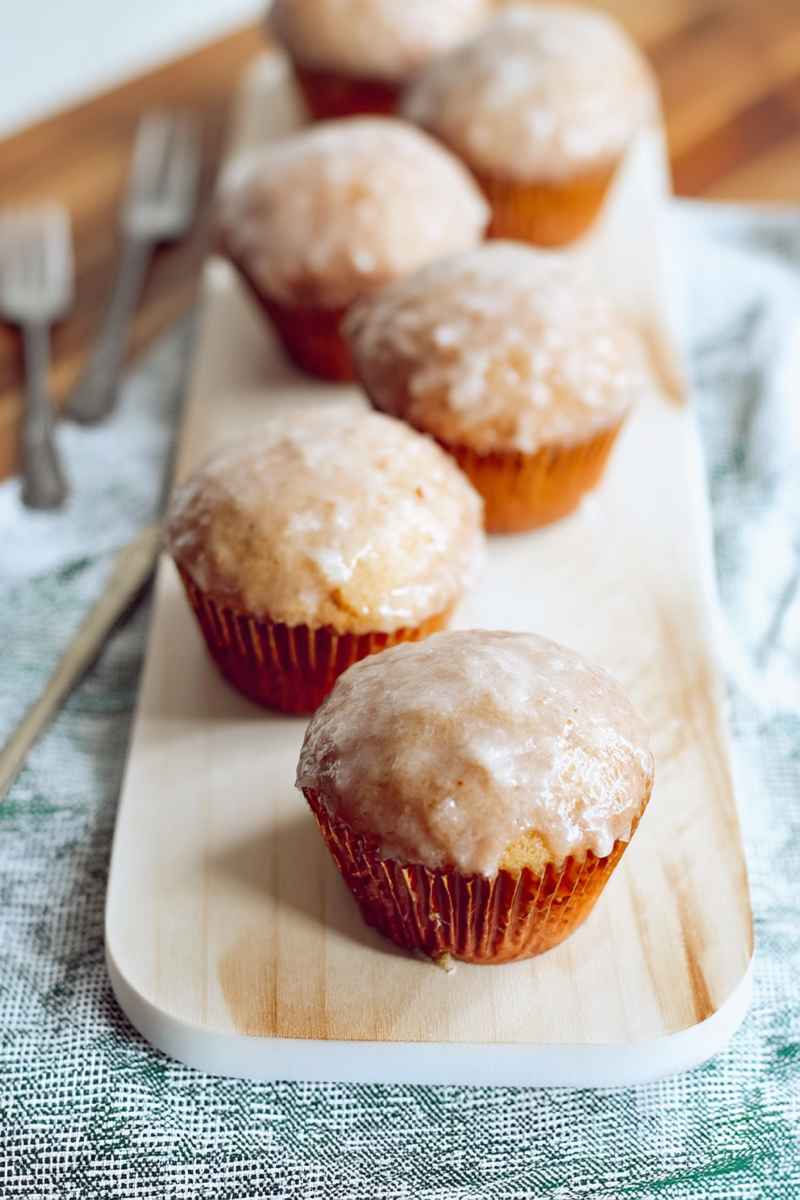
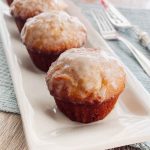
These Old Fashioned Donut Muffins are wonderfully dense and rich just like your favorite classic donut, offering that perfect crumb and delicious spiced flavor in an easy to make muffin form. I just adore how they capture the essence of a bakery favorite without needing a deep fryer. They are a surprisingly simple treat perfect for a relaxed weekend breakfast or a special holiday brunch.
Why I Adore These Donut Muffins
There’s something so comforting about a classic old fashioned donut, isn’t there? Growing up, a Saturday trip to the donut shop was a cherished ritual, often involving choosing that perfectly craggy, dense donut coated in a sweet glaze. For me, it wasn’t about the light and airy raised varieties. I always gravitated towards the substantial, cake like ones that felt like a real treat with every bite.
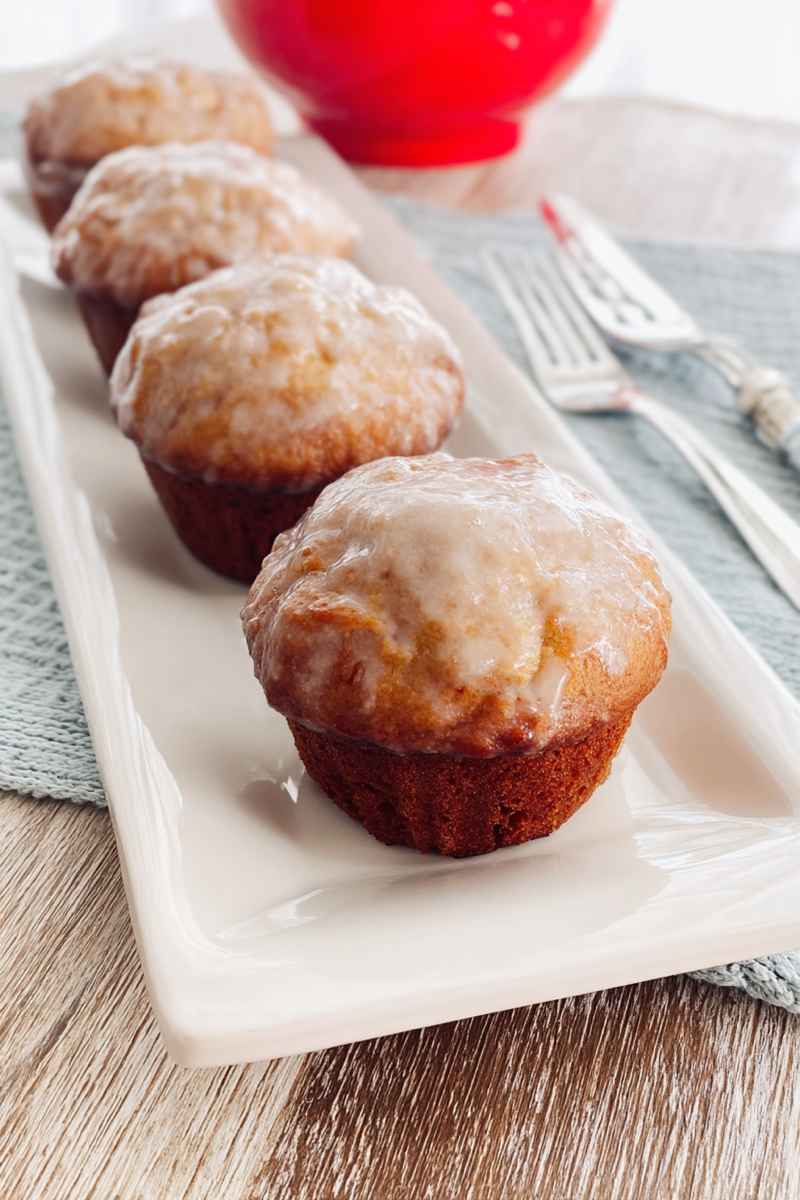
That’s exactly what drew me to developing a recipe for Old Fashioned Donut Muffins. They capture everything I love about those classic donuts but come out of my oven instead of a fryer. The texture is spot on dense yet tender with that signature rich flavor. Add the sweet glaze that sets with a slight crispness on top, and you have a muffin that truly channels its donut namesake. The warm notes of cinnamon and nutmeg also make them feel extra special, especially when the weather turns cooler or for holiday mornings.
Unpacking “Donut Muffins” What Are They Exactly
So, what makes a muffin qualify as a “donut muffin”? Essentially, it’s a clever way to recreate the flavor and texture of a cake donut using a muffin pan and an oven instead of hot oil. Cake donuts, unlike their yeasted, airy cousins, are made from a sweet, thick batter. Donut muffins use a similar type of batter.
The goal is often to achieve the dense, slightly crumbly texture characteristic of an old fashioned donut. While some recipes might use ingredients like sour cream to help with that density, this particular recipe achieves its wonderful crumb through a careful balance of fats like softened butter and vegetable oil combined with a specific mixing method. Once baked to golden perfection, these muffins get dipped (twice for good measure) into a simple, sweet glaze, which is really the magic touch that transforms them from simple muffins into something truly reminiscent of an old fashioned donut. It’s all the flavor and feel of the classic donut, baked right into a convenient muffin shape.
Gathering Your Ingredients for Old Fashioned Donut Muffins
Putting together these delightful muffins starts with having the right components ready. You will need a few standard pantry staples to create both the moist, flavorful muffin base and the signature sweet glaze that goes on top.
Here is what you will need on hand for this recipe:
For the Muffins
- Unsalted butter, softened to room temperature
- Vegetable oil
- Granulated sugar
- Packed light brown sugar
- Large eggs
- Baking powder
- Baking soda
- Ground nutmeg
- Ground cinnamon
- Fine sea salt
- Vanilla extract
- All purpose flour
- Whole milk
For the Glaze
- Unsalted butter, melted
- Powdered sugar
- Vanilla extract
- Hot water
Having all your ingredients measured and ready before you begin mixing will make the process smoother and help ensure everything comes together just right.
Baking Up Your Old Fashioned Donut Muffins A Step by Step Guide
Creating these delicious donut muffins is a straightforward process, but paying attention to a few key details will ensure they turn out perfectly dense and tender with those lovely crinkled tops. Follow these steps and you’ll have warm, glazed donut muffins ready to enjoy in no time.
Here is how we make them:
- Start by preparing your oven and muffin pan. Preheat your oven to 375 degrees Fahrenheit (190 degrees Celsius). Line a standard 12 cup muffin tin with paper liners. This helps prevent sticking and makes cleanup a breeze.
- In a large mixing bowl, combine the softened butter, vegetable oil, granulated sugar, and light brown sugar. Use a sturdy wooden spoon or a rubber spatula to mix these ingredients together until they are well combined and the mixture looks smooth and creamy. Make sure your bowl is large enough to comfortably hold all the batter ingredients later.
- Next, add the large eggs to the sugar and fat mixture. Add them one at a time, beating well with your spoon or spatula after each addition. Continue mixing until each egg is fully incorporated into the batter before adding the next one.
- Now it’s time to add the dry leavening agents and spices. Stir in the baking powder, baking soda, ground nutmeg, ground cinnamon, salt, and vanilla extract. Mix these into the wet ingredients until they are just blended throughout the batter.
- This is a crucial step for achieving the right texture, so pay close attention. You will now add the flour and milk to the batter alternately, starting with the flour and ending with the flour. Begin by folding in about one third of the all purpose flour. Use a rubber spatula and mix gently until the flour is just combined. Do not overmix. Then, pour in about half of the whole milk and stir gently until it’s incorporated. Add another third of the flour and mix until just combined. Pour in the remaining milk and stir gently. Finally, add the last portion of the flour and mix just until no dry streaks of flour remain. The key here is to mix gently and not overmix the batter at any stage. Overmixing develops the gluten in the flour too much, which can result in tough muffins that don’t rise properly or have a dry crumb. It’s better to have a few small lumps or streaks of flour visible than to have a perfectly smooth batter. Using a rubber spatula with gentle folding motions (like scraping down the side, across the bottom, and up the other side of the bowl) is ideal here instead of a whisk or wooden spoon, especially when adding the flour.
- Once your batter is ready, spoon it evenly into the prepared muffin cups lined with paper liners. Fill the cups quite full to get nice, domed tops on your muffins. An ice cream scoop can be helpful forportioning the batter neatly.
- Bake the muffins in your preheated oven for 17 to 19 minutes. Keep an eye on them starting around the 17 minute mark. You can tell they are done baking when the tops spring back gently if you lightly touch the center. Avoid over baking as this can also lead to dry muffins. Once baked, remove the muffin tin from the oven and let the muffins cool in the pan for just a few minutes. Then, carefully transfer them from the muffin tin to a wire rack to cool completely. Let them cool on the rack for at least 10 minutes before moving on to the glazing step. Allowing them to cool slightly before glazing helps the glaze set properly.
Preparing the Signature Glaze
While your delicious donut muffins are cooling down slightly on the wire rack, you can whip up the simple yet essential glaze that gives them their classic finish. This glaze is quick to make and provides that sweet, slightly crisp exterior layer that is so characteristic of old fashioned donuts.
Here’s how to prepare the glaze:
- In a medium sized bowl, whisk together the melted unsalted butter, powdered sugar, vanilla extract, and the hot water. Continue whisking until the mixture is completely smooth and free of lumps. The consistency should be pourable but not too thin. If it seems too thick, you can add another tiny splash of hot water (about a teaspoon at a time) until you reach the desired consistency. If it’s too thin, you can whisk in a little more powdered sugar.
The Final Touch Glazing Your Muffins
Applying the glaze is the step that truly transforms these spiced muffins into Old Fashioned Donut Muffins. Dipping them while they are still warm allows some of that sweet glaze to soak in slightly, and dipping them twice creates a beautiful, thick coating just like you’d find on a bakery donut.
Follow these steps to glaze your cooled muffins:
- Once the muffins have cooled for at least 10 minutes on the wire rack and the glaze is ready, take each muffin and dip the top into the bowl of prepared glaze. Make sure the entire top surface is coated.
- Lift the muffin out of the glaze and let any excess glaze drip back into the bowl. Place the glazed muffin back onto the wire rack. Allow the first layer of glaze to set and harden slightly. This might take a few minutes.
- For an extra layer of flavor and that beautiful thick, crinkly glaze texture, dip the top of each muffin into the glaze a second time after the first layer has partially set. Again, let any excess drip off before placing it back on the wire rack. Let the glaze set completely before serving. This might take another 15-30 minutes depending on the humidity.
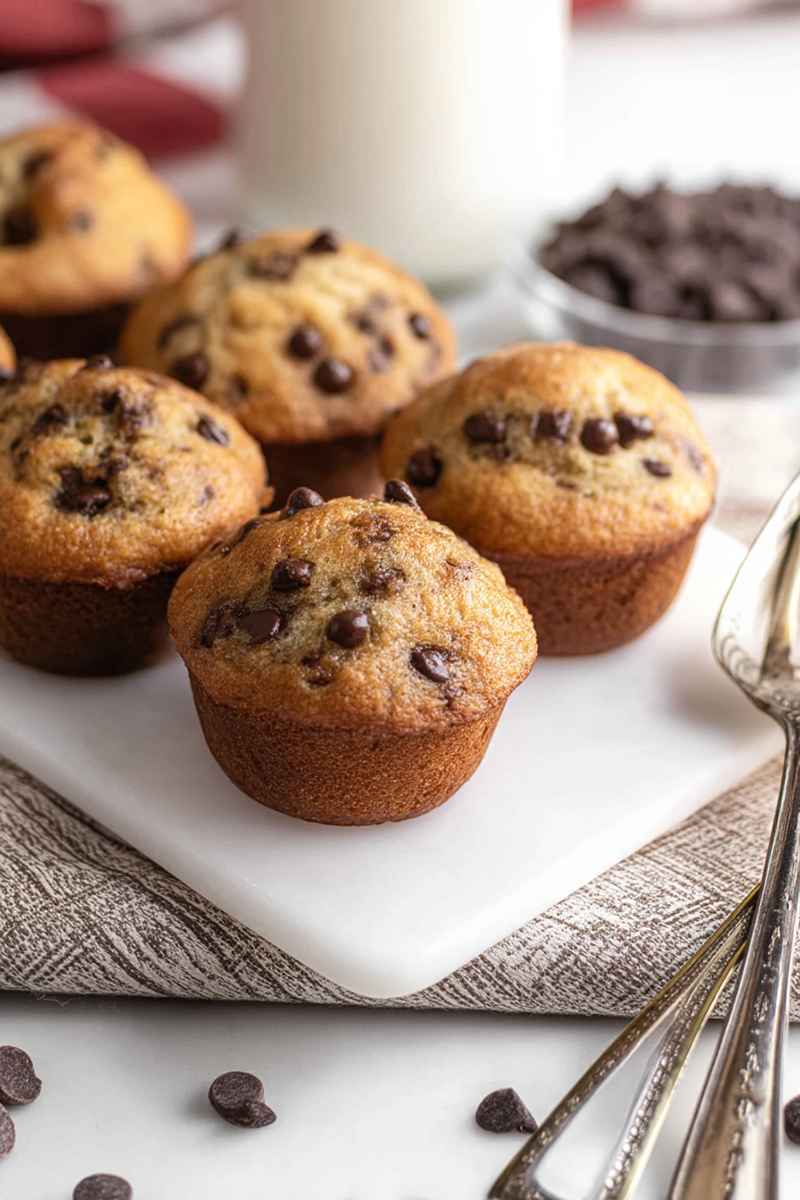
Creative Twists Recipe Variations for Your Donut Muffins
The wonderful thing about baking at home is the freedom you have to play around with recipes and make them uniquely yours. These Old Fashioned Donut Muffins are a fantastic base, and you can easily experiment with different additions to change up the flavor and texture. Don’t hesitate to try any of these suggestions or dream up some of your own.
Here are a few ideas to get you started:
- Introduce Fruit: For a touch of fruity sweetness and moisture, try adding diced apple or pear to the batter. You’ll want to peel the fruit first, then dice it into small, bite sized pieces. Measure about 1 cup of diced fruit. Toss the fruit pieces with a tablespoon or two of the dry flour mixture before you combine the wet and dry ingredients. Coating the fruit helps prevent it from sinking to the bottom of the muffins during baking. This can give them a lovely, spiced apple fritter like quality.
- Mix in Nuts: Adding toasted nuts provides a wonderful crunch and depth of flavor. Chopped pecans, almonds, or walnuts work beautifully. Toasting the nuts beforehand really enhances their taste and aroma compared to using raw nuts. You can stir about 1/2 to 1 cup of toasted, chopped nuts into the dry ingredients before adding the wet ones. Alternatively, you could sprinkle some toasted nuts on top of the glazed muffins before the glaze fully sets. To toast nuts, spread them in a single layer on a baking sheet and bake at 350 degrees Fahrenheit for 5 to 10 minutes, watching carefully so they don’t burn. You will know they are done when they smell fragrant and are lightly golden.
- Top with Toasted Coconut: If you love coconut, sprinkling toasted coconut flakes on top of the warm, glazed muffins is a delicious addition. The slightly chewy texture of the coconut complements the soft muffin perfectly. Toast the coconut in the oven just like the nuts. Spread flakes on a baking sheet and bake at 350 degrees Fahrenheit for 5 to 10 minutes, stirring occasionally, until golden brown and fragrant.
- Fold in Dried Fruit: Dried fruits like raisins, cranberries, dried cherries, or even dried blueberries can add little bursts of chewy sweetness throughout the muffins. Add about 1/2 cup of your chosen dried fruit to the dry ingredients along with the flour and spices. Toss everything together to coat the dried fruit pieces. This helps distribute them more evenly in the batter.
Feel free to mix and match these ideas too. A cranberry pecan donut muffin sounds absolutely divine, doesn’t it?
Common Questions About Old Fashioned Donut Muffins
As with any baking project, a few questions often come up. Here are some common queries about making these delicious Old Fashioned Donut Muffins, along with some helpful answers to guide you.
Using both fats serves a specific purpose in achieving the ideal texture for these muffins. The softened butter contributes wonderful flavor and richness, giving the muffins that classic bakery taste. The vegetable oil, on the other hand, helps keep the muffins incredibly tender and moist. It adds moisture without solidifying like butter does when cooled, resulting in a softer crumb over time. It’s important that the butter is softened, not melted, for proper mixing.
The best way to check if your muffins are done is by gently touching the top center of one with your fingertip. If it springs right back and holds its shape, they are ready to come out of the oven. You can start checking them a few minutes before the lower end of the suggested baking time. Don’t rely solely on color, as ovens can vary. Taking them out as soon as they pass this “spring back” test is key to preventing them from drying out.
This is a common issue in muffin and quick bread baking, and it usually points to one of two things. The most frequent culprit is overmixing the batter, especially after adding the flour and liquid. Flour contains gluten, and mixing too vigorously or for too long develops this gluten, resulting in a tough, dense, and sometimes dry texture. Remember to fold the ingredients gently using a spatula until just combined, leaving a few small lumps or streaks of flour is actually better than having a perfectly smooth batter. The second common cause is over baking. Baking the muffins for too long or in an oven that is running too hot will dry them out quickly. Using an oven thermometer can help verify your oven’s temperature. Always start checking for doneness early using the “spring back” test and remove them from the oven as soon as they are ready. Letting them cool in the hot muffin pan for too long after baking can also continue the cooking process and dry them out, so transfer them to a wire rack promptly.
No, paper liners are not strictly required for this recipe. They are definitely convenient though. Using liners makes it very easy to lift the muffins out of the pan without sticking, and they provide a tidy way to hold the muffin while you are dipping it into the glaze. If you choose not to use liners, be sure to grease the muffin pan cavities thoroughly with butter or baking spray to prevent sticking. Keep in mind that baking without liners might slightly reduce the baking time since the batter is in direct contact with the metal pan, so start checking for doneness a little earlier.
Easy Old Fashioned Donut Muffins (Baked, Not Fried!)
- Prep Time: 15 minutes
- Cook Time: 17 minutes
- Total Time: 32 minutes
- Yield: 12 muffins
- Category: Muffins
- Method: Baked
Description
These Old Fashioned Donut Muffins are wonderfully dense and rich just like your favorite classic donut! They offer that perfect crumb and delicious spiced flavor in an easy-to-make muffin form!
Ingredients
- ¼ cup (60 grams) unsalted butter, softened to room temperature
- ⅓ cup (80 grams) vegetable oil
- ½cup (100 grams) granulated sugar
- ⅓ cup (70 grams) packed light brown sugar
- 2 large eggs
- 1 ½ teaspoons (7 grams) baking powder
- ¼ teaspoon (1 gram) baking soda
- ¾ teaspoon (2 grams) ground nutmeg
- 1 teaspoon (3 grams) ground cinnamon
- ¾ teaspoon (5 grams) fine sea salt
- 1 teaspoon (5 ml) vanilla extract
- 2 ⅔ cups (330 grams) all purpose flour
- 1 cup (240 ml) whole milk
For the Glaze
- 2 tablespoons (30 grams) unsalted butter, melted
- 1 cup (120 grams) powdered sugar
- ¾ teaspoon (4 ml) vanilla extract
- 2 tablespoons (30 ml) hot water
Instructions
- Preheat your oven to 375 degrees Fahrenheit (190 degrees Celsius). Line a standard 12 cup muffin tin with paper liners.
- In a large bowl, use a wooden spoon to mix the softened butter, vegetable oil, granulated sugar, and brown sugar until everything is well combined and smooth.
- Add the eggs one at a time, beating well after each addition to incorporate them into the batter.
- Stir in the baking powder, baking soda, ground nutmeg, ground cinnamon, salt, and vanilla extract. Mix these dry ingredients into the wet mixture until just blended.
- Begin adding the flour and milk alternately, starting and ending with flour. First, fold in about one third of the flour using a rubber spatula. Mix gently until just combined. Next, pour in about half of the milk and stir just until combined. Add another third of the flour and mix gently. Then, add the remaining milk and stir until combined. Finally, add the last portion of the flour and mix until just incorporated. Be very careful not to overmix the batter at any stage. Overmixing will result in tough muffins that do not rise properly. Undermixing slightly is better than overmixing.
- Spoon the batter evenly into the prepared muffin cups. Fill them quite full. Bake in the preheated oven for 17 to 19 minutes, or until the tops spring back when gently touched. Let the muffins cool in the pan for a few minutes before transferring them to a wire rack. Allow them to cool on the rack for at least 10 minutes before applying the glaze.
For the Glaze
- While the muffins cool, prepare the glaze. In a medium bowl, whisk together the melted butter, powdered sugar, vanilla extract, and hot water until the mixture is smooth and has a pourable consistency.
Assembling and Baking
- Once the muffins have cooled slightly on the wire rack, dip the top of each muffin into the prepared glaze. Let the excess glaze drip back into the bowl.
- Place the glazed muffins back on the wire rack and let the first layer of glaze set and harden slightly.
- For an extra layer of flavor and shine, dip each muffin top into the glaze a second time, allowing the excess to drip off. Let the glaze set completely before serving.
Notes
- Storage: Tip To keep leftover muffins fresh, store them in an airtight container at room temperature for up to 3 days.
Nutrition
- Serving Size: 1 muffin
- Calories: 259
- Sugar: 34g
- Sodium: 255mg
- Fat: 13g
- Saturated Fat: 5g
- Unsaturated Fat: 7g
- Trans Fat: 0g
- Carbohydrates: 36g
- Fiber: 0g
- Protein: 2g
- Cholesterol: 47mg