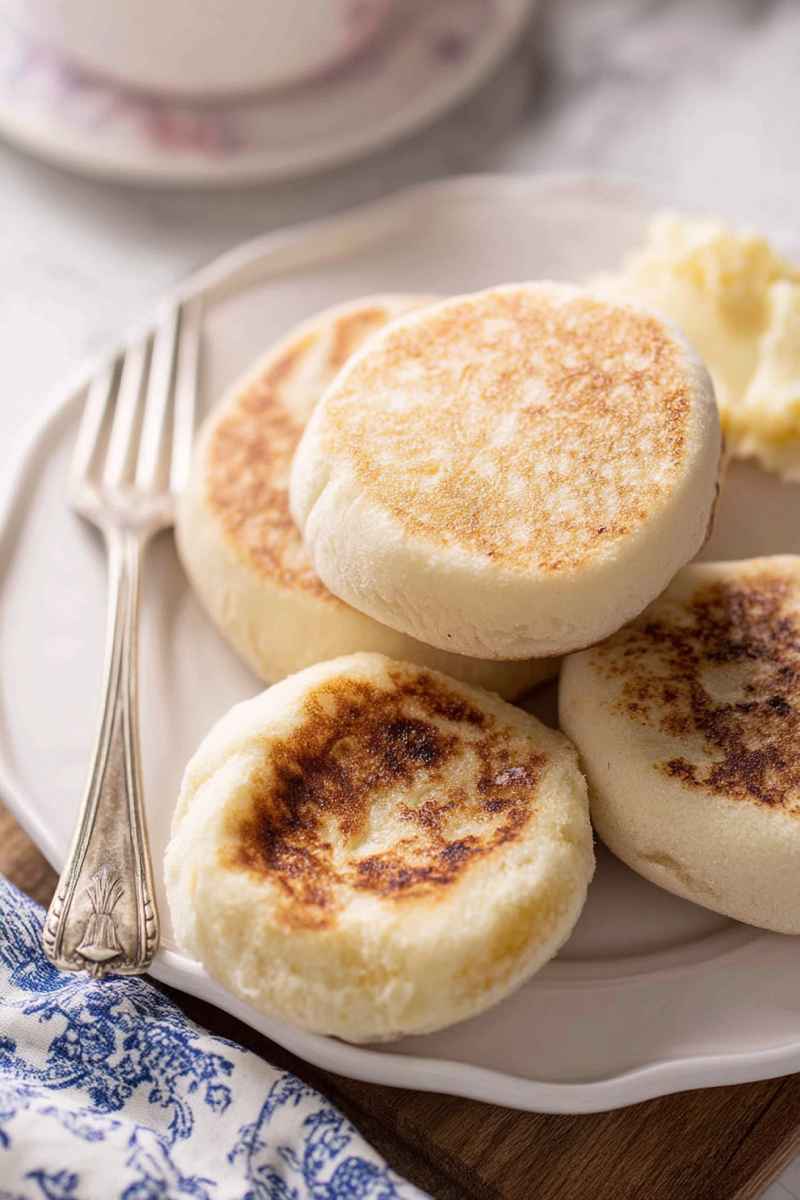
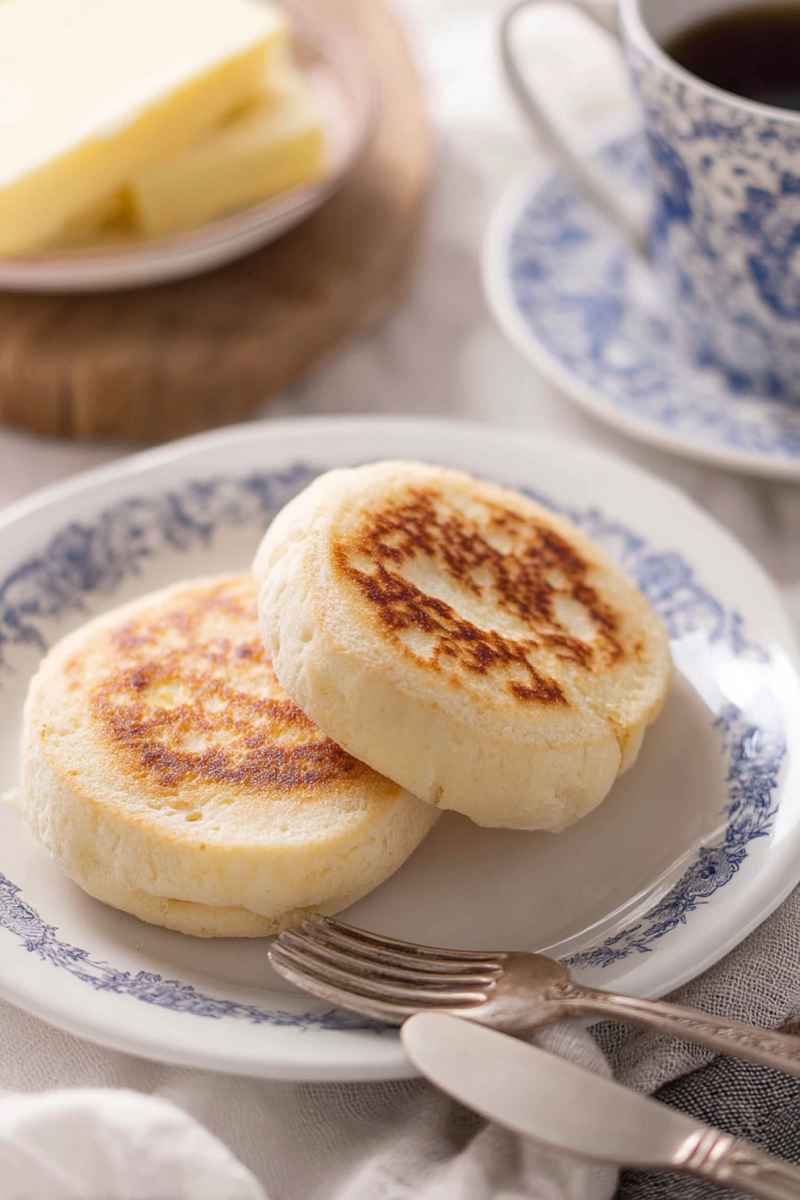
Welcome to the joy of making English muffins right in your own kitchen. These delightful rounds boast a wonderfully fluffy interior filled with those classic craggy pockets, just perfect for catching pools of melted butter or your favorite jam. I promise you, once you experience the simple pleasure of a warm, homemade English muffin split and toasted, you’ll wonder why you ever bought them from the store.
Essential Ingredients for English Muffins
Crafting these simple yet satisfying English muffins requires just a handful of everyday ingredients. Each component plays a vital role in achieving that perfect texture and flavor you’re looking for. Using high-quality ingredients will certainly make a difference in your final result.
- All-Purpose Flour: The foundation of our muffins, regular all-purpose flour works wonderfully here. You absolutely do not need to use bread flour for this recipe.
- Unsalted Butter: Melted butter brings more than just richness; it helps create those signature nooks and crannies that make English muffins so iconic. Be sure it is melted and slightly cooled before you add it.
- Yeast: You can use either active dry or instant yeast for this recipe. We’ll activate it first in a warm liquid mixture before combining it with the dry ingredients to give your muffins their beautiful rise.
- Whole Milk: Using whole milk contributes significantly to a richer flavor and helps keep the finished muffins wonderfully moist. While whole milk gives the best result, you could try low-fat or even a dairy-free alternative if needed.
- Sugar: A touch of sugar does two important things here. It adds a subtle sweetness that enhances the overall flavor and it also helps feed the yeast, ensuring it becomes active and bubbly. Avoid brown sugar as it can change the taste profile too much.
- Salt: It might seem small, but salt is crucial for balancing and enhancing all the other flavors in the dough. Don’t skip this important seasoning step.
- Cornmeal or Semolina: This is what gives English muffins their slightly gritty bottom and top crust after cooking. You’ll sprinkle this over the prepared dough rounds before they hit the skillet. Either cornmeal or semolina works well.

How to Make Delicious English Muffins
Creating these wonderful English muffins at home is a straightforward process, even if you’re new to working with yeast dough. Following these steps will guide you to fluffy, perfectly cooked muffins ready for toasting. It’s a rewarding baking project.

- First, you’ll gently warm your milk and water together with the sugar. The temperature should be just right, around 110 degrees Fahrenheit (43 degrees Celsius), warm but not hot. Stir the yeast into this warmed liquid mixture. Allow it to sit quietly for about six to seven minutes. You’ll know the yeast is active and happy when a lovely foamy layer appears on the surface.
- While your yeast mixture is getting bubbly, measure your flour and salt into the bowl of your stand mixer. Give them a quick whisk together to combine them well. Fit your mixer with the paddle attachment, ready for the dough.
- Into the activated yeast mixture, stir in the room temperature egg and your melted butter. With your stand mixer running on a low speed, slowly pour this liquid combination into the flour mixture in the bowl. Continue mixing until everything is just combined. Then, increase the mixer speed to medium-high. Keep mixing for approximately seven minutes until your dough looks smooth and has a nice elastic quality. The dough will be quite sticky.
- Lightly coat a large clean bowl with oil. Carefully transfer the sticky dough into this prepared bowl. Cover the bowl tightly with plastic wrap. Find a nice warm spot in your kitchen and let the dough rise until it has doubled in size. This typically takes about one hour. If you prefer, you can also let the dough rise slowly in the refrigerator overnight for enhanced flavor. If you choose the overnight method, remember to let the dough warm up at room temperature for about an hour before you are ready to shape it.
- Generously flour a clean counter surface. Gently turn the risen dough out onto this floured area. Using your hands, carefully spread and pat the dough down until it is just under one inch thick. Prepare two baking sheets by lining them with parchment paper. Sprinkle a good amount of cornmeal or semolina generously over the parchment paper on both sheets.
- Use a three-inch round cutter to cut out individual muffins from the dough. Carefully lift each cut dough round and place it gently onto the prepared baking sheets using a spatula or your hands. Gather the dough scraps together, gently form them into a ball, and pat them down again to the correct thickness. Continue cutting rounds from the re-rolled scraps until you have used all the dough. Loosely cover the cut muffins resting on the baking sheets with plastic wrap. Place them in a warm spot to rise again for approximately thirty minutes.
- Place a large skillet or griddle over very low heat on your stovetop. Once you can feel warmth radiating from the pan when you hold your hand a few inches above it, lightly sprinkle the surface with cornmeal or semolina. Carefully place three to four muffins onto the warm pan, making sure not to overcrowd it. Cover the skillet with a lid and cook for five to six minutes. Then, carefully flip each muffin over using a spatula and cook the second side for another five to six minutes until they are beautifully golden brown on both sides and cooked through the center.
- Once a batch is cooked, remove them from the pan. Remember to brush away any leftover cornmeal or semolina from the pan before adding the next batch to prevent it from burning. Add a fresh sprinkle of cornmeal or semolina to the hot pan before cooking the next batch of muffins. Cook the remaining muffins in batches following the same process until they are all finished. These are best served warm, fresh off the skillet. If this is your very first time making English muffins, it’s a great idea to cook just one test muffin first to get a feel for the cooking time and the heat of your pan.
Top Tips for Perfect English Muffins
Getting those perfect, deeply craggied English muffins is easier than you think with a few handy tips. I’ve learned a few things along the way that can help ensure your homemade batch turns out just right every time. Pay attention to these little details and you’ll be rewarded with amazing results.
- While you can certainly let the dough rise for just one hour during the first proofing stage, the muffins will develop a richer, more complex flavor the longer you allow the dough to ferment. Aiming for a longer proofing time, ideally between four to eight hours, really enhances their taste.
- I really recommend using a stand mixer for this dough. It is naturally quite sticky, which is key to getting those signature nooks and crannies. Trying to mix and knead it by hand can be quite challenging and messy. A stand mixer makes the process much smoother.
- If you decide to use bread flour instead of all-purpose flour, be aware that it will give your finished muffins a slightly chewier texture. It’s a matter of preference, but the classic texture comes from all-purpose flour.
- To help your dough rise effectively and quicker, place it in a warm environment away from drafts. However, be careful not to put it in a spot that’s too hot or in direct sunlight. Excessive heat can actually negatively affect the yeast and the rise.
- Don’t worry if you don’t have a round cutter. You can absolutely still shape the dough into individual rounds by hand. Just aim for roughly the same size and thickness.
- If you find that your muffins feel under-baked or overly soft in the middle after skillet cooking, you can finish them off in the oven. Simply place them on a baking sheet and bake them for about three minutes in a 350 degree Fahrenheit (175 degrees Celsius) oven. This should help them firm up perfectly.
- If you notice your English muffins are sticking to the pan while they are cooking, you can add a very tiny amount of butter to the skillet before cooking the next batch. Be careful not to add too much.
- A cast-iron skillet or a flat griddle works best for cooking English muffins on the stovetop. They provide even heat distribution which is important for consistent cooking.
- You will definitely need to cook the muffins in batches. After each batch, make sure to brush away any excess semolina or cornmeal that remains on the pan. This prevents it from burning and giving your subsequent batches a bitter taste.
- When you are ready to serve them, using a serrated knife is the easiest way to slice open English muffins. The serrated edge helps cut through the delicate structure without squishing it.
- Honestly, English muffins are truly at their absolute best when they are toasted until golden brown and slightly crispy on the surface. The heat really brings out their flavor and texture.

Frequently Asked Questions About Homemade English Muffins
Making homemade English muffins might bring up a few questions, especially if it’s your first time. Here are some common things people wonder about when making these delightful breakfast treats. Hopefully, these answers help you feel confident in the kitchen.
The dough for English muffins is supposed to be sticky. This high level of hydration is actually necessary to help create all those wonderful nooks and crannies inside that English muffins are famous for. Don’t be tempted to add too much extra flour during mixing or shaping, as this will make them dense.
Yes, absolutely. You have a couple of options. You can make the dough the day before and let it complete its first rise slowly in the refrigerator overnight. Just remember to bring the dough to room temperature for about an hour before you move on to shaping and cooking the next morning. Alternatively, you can bake the English muffins completely, let them cool, and store them. Then, simply toast them when you are ready to eat them.
Toasted until golden and spread generously with butter or jam is a classic and utterly delicious way to enjoy them for breakfast or a snack. They are also a key ingredient for making classic Eggs Benedict or fantastic breakfast sandwiches often called McMuffin style with egg, cheese, and your choice of meat. You can also serve them alongside scrambled eggs and bacon.
Cooked English muffins can be stored in an airtight container at room temperature for approximately three to five days. If they start to feel a little dry towards the end of that time, toasting them will help refresh them. For longer storage, you can freeze them for up to three months. Make sure they are completely thawed before you plan to serve or toast them.
If you’ve finished cooking your muffins on the stovetop and they still feel soft and undercooked in the center, don’t worry. Simply transfer them to a baking sheet and pop them into a preheated oven at 350 degrees Fahrenheit (175 degrees Celsius) for about three minutes. This quick oven finish will help cook the middle through without drying out the outside.

Easy Homemade English Muffins (Classic Nooks & Crannies)
- Prep Time: 20 minutes
- Cook Time: 10 minutes
- Total Time: 30 minutes
- Yield: 14 English muffins
- Category: Muffins
- Method: Stovetop
Description
These Homemade English Muffins are absolutely irresistible. They boast a wonderfully fluffy interior and that classic craggy surface perfect for toasting and slathering with butter or jam!
Ingredients
- 2 ¾ cups (340 grams) all-purpose flour
- 2 ¼ teaspoons (7 grams) instant or rapid rise yeast
- 1 teaspoon (5 grams) salt
- 2 tablespoons (25 grams) sugar
- ¾ cup (180 ml) whole milk
- ½ cup (120 ml) water
- 3 tablespoons (45 grams) unsalted butter, melted
- 1 large egg (50 grams), at room temperature
- A bit of cornmeal or semolina, for dusting
Instructions
- Combine the milk, water, and sugar in a small bowl or measuring cup. Stir them together. Warm this mixture slightly in the microwave until it reaches about 110°F (43°C). Stir in the yeast. Let the mixture sit undisturbed for 5 to 7 minutes until you see a foamy layer on top.
- While the yeast mixture is activating, put the flour and salt into the bowl of your stand mixer. Whisk them together briefly. Attach the paddle attachment to the mixer.
- Mix the room temperature egg and the melted butter into the milk mixture you prepared earlier. With the mixer running on a low speed, slowly pour the liquid mixture into the flour mixture. Once everything is combined, increase the mixer speed to medium-high. Continue mixing for about 7 minutes until the dough looks smooth and feels elastic.
- Lightly oil a large bowl. Transfer the dough into the bowl. Cover the bowl tightly with plastic wrap. Find a warm spot and let the dough rise until it has doubled in size, which usually takes about an hour. Alternatively, you can place the dough in the refrigerator to rise slowly overnight. If you do this, let it warm up at room temperature for about an hour before you are ready to use it.
- Dust a clean counter surface with flour. Gently transfer the dough onto the floured surface. Carefully spread and pat the dough down until it is just under an inch thick. Get two baking sheets ready by lining them with parchment paper. Sprinkle cornmeal or semolina generously over the parchment paper on both sheets.
- Use a 3 inch round cutter to cut out the individual muffins from the dough. Carefully lift each cut round and place it gently onto the prepared baking sheets using a spatula or your hands. Gather the dough scraps together, gently form them into a ball, and pat them down again. Continue cutting rounds from the re-rolled scraps until all the dough is used. Loosely cover the cut muffins on the baking sheets with plastic wrap. Place them in a warm spot to rise again for approximately 30 minutes.
- Place a large skillet over very low heat. Once you can feel warmth radiating from the pan when you hold your hand a few inches above it, sprinkle the surface with cornmeal or semolina. Carefully place 3 to 4 muffins onto the hot pan, making sure not to overcrowd it. Cover the skillet and cook for 5 to 6 minutes. Then, carefully flip each muffin over and cook the second side for another 5 to 6 minutes until they are golden brown and cooked through.
- Once a batch is cooked, remove any leftover cornmeal from the pan. Add a fresh sprinkle of cornmeal or semolina before cooking the next batch of muffins. Cook the remaining muffins in batches until they are all finished. Serve them warm. If this is your first time making them, it is a good idea to cook one test muffin first to get a feel for the cooking time and heat.
Notes
Proofing Time: While you can let the dough rise for just one hour, it will develop more flavor if you give it a longer proofing time, around 4 to 8 hours is ideal.
Equipment: Using a stand mixer is highly recommended for this recipe because the dough is quite sticky and can be challenging to mix and knead by hand.
Ingredient Substitution: If you use bread flour instead of all-purpose flour, your muffins will have a slightly chewier texture.
Rising Conditions: To help the dough rise faster, place it in a warm environment. However, avoid placing it in a hot spot or direct sunlight, as this can negatively affect the rise.
Shaping: If you do not have a round cutter, you can shape the dough into individual rounds by hand.
Troubleshooting: If your muffins feel undercooked and overly soft in the middle, finish cooking them in a 350°F (175°C) oven for about 3 minutes. This should help them firm up perfectly.
Preventing Sticking: If you notice the muffins sticking to the pan while cooking, add a very small amount of butter to the skillet.
Pan Type: A cast-iron skillet or a griddle works best for cooking English muffins.
Cooking in Batches: You will need to cook the muffins in batches. Remember to brush away any excess semolina or cornmeal from the pan between batches to prevent it from burning.
Serving Tip: Use a serrated knife to easily slice open the muffins when you are ready to serve them.
Best Enjoyed Toasted: English muffins are truly at their best when served toasted.
Storage: Cooked English muffins store well in an airtight container at room temperature for 3 to 5 days. For longer storage, they can be frozen for up to 3 months.
Nutrition
- Serving Size: 1 muffin
- Calories: 135 kcal
- Sugar: 2 g
- Sodium: 200 mg
- Fat: 3 g
- Carbohydrates: 23 g
- Fiber: 1 g
- Protein: 4 g
- Cholesterol: 9 mg