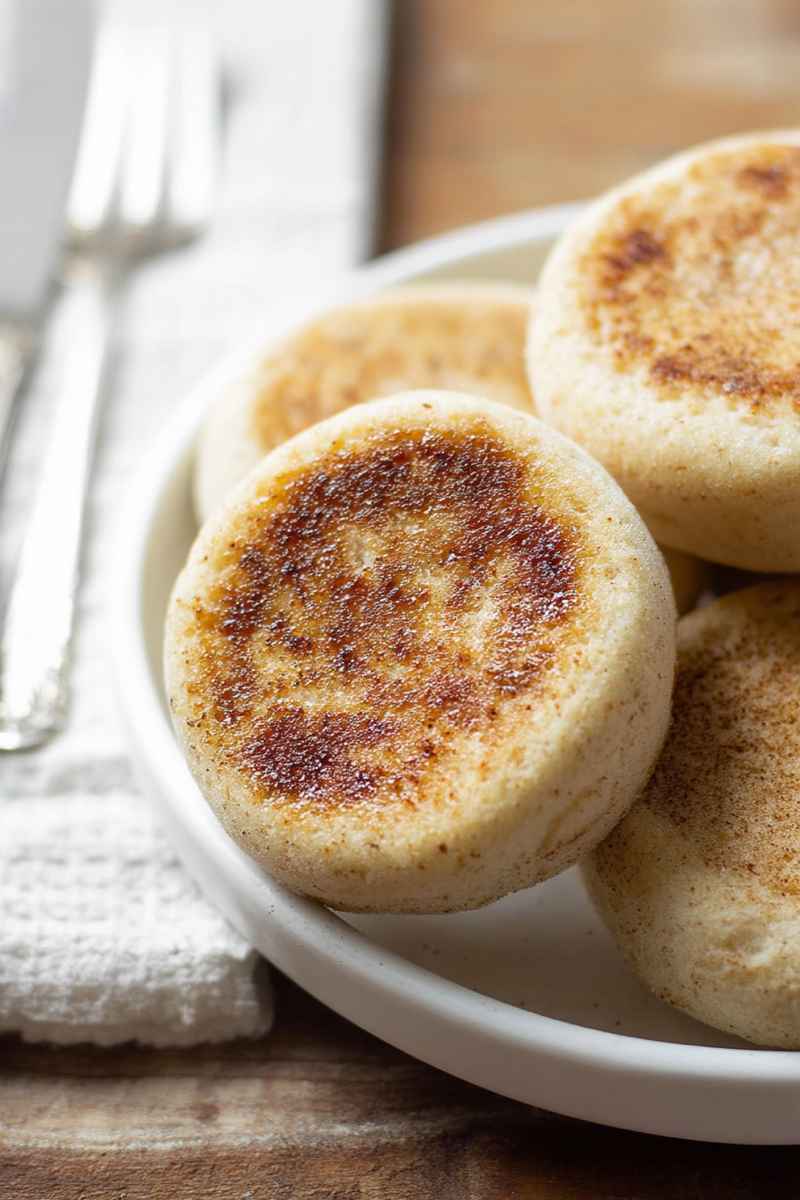
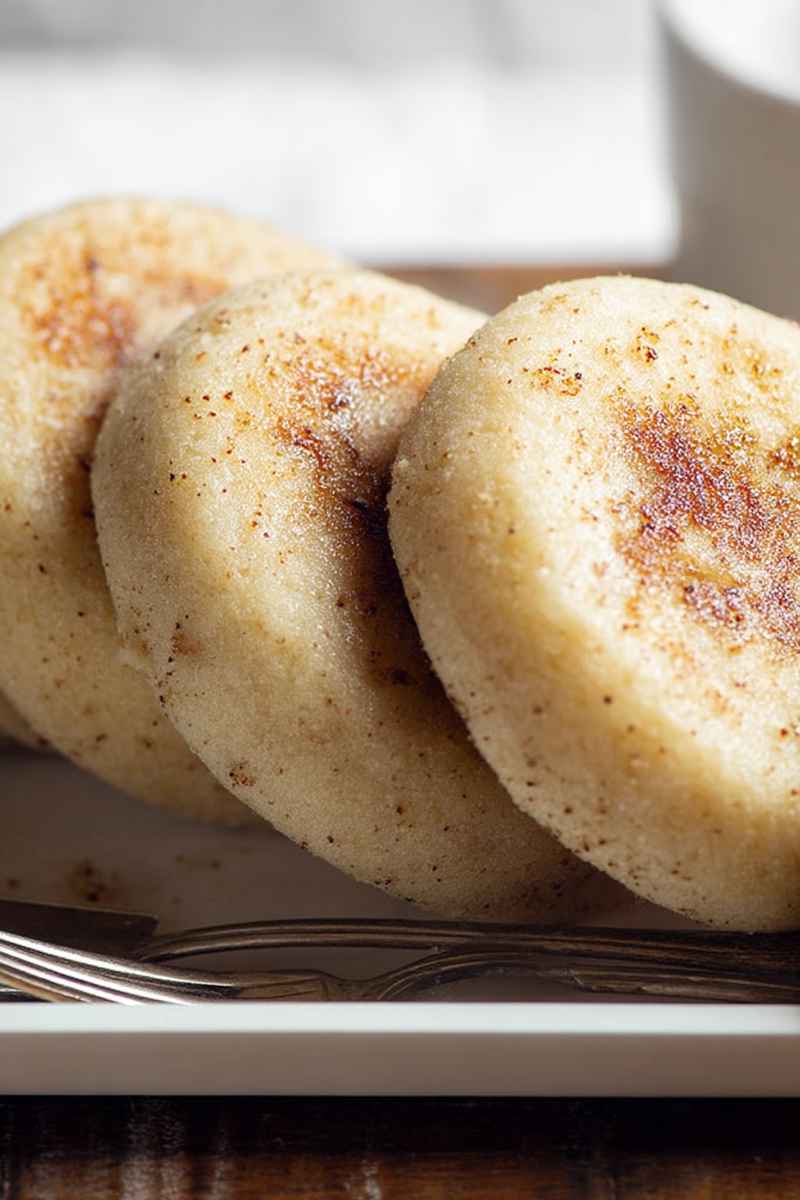
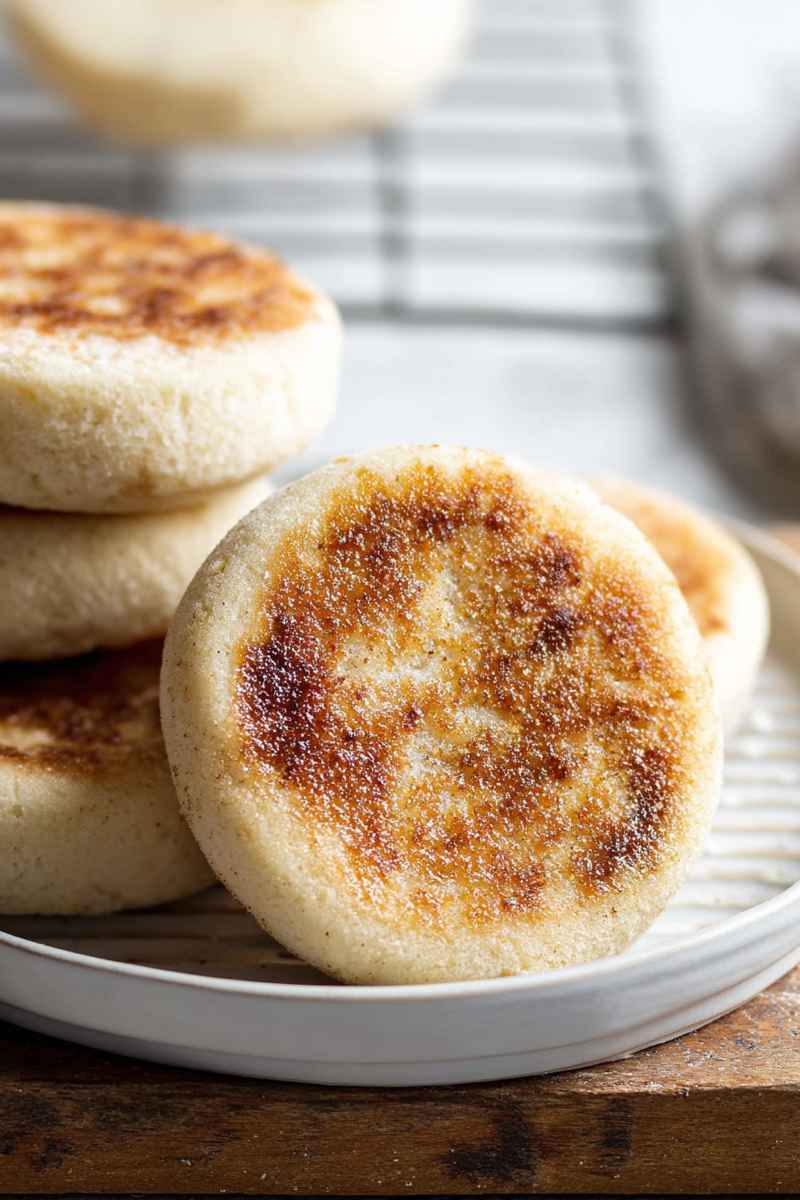
If you are searching for a perfectly light, wonderfully soft, and satisfyingly chewy Gluten Free English Muffin with those signature nooks and crannies, then this recipe is precisely what you need. I have worked extensively to bring you a simple, delicious option that feels just like the classic treat you remember. These versatile homemade muffins are fantastic for breakfast, a quick snack, or building your favorite sandwich.
Ingredient Spotlight
Understanding the role each ingredient plays is key to successful gluten free baking. I want to walk you through why I chose these specific components for our English muffins. They work together to create the ideal texture and structure we are aiming for.
Super Fine Brown Rice Flour
This flour is absolutely foundational for the structure of these gluten free English muffins. I really recommend using a super fine grind here. Regular ground brown rice flour tends to leave a gritty texture, which we definitely want to avoid for that smooth muffin feel. I also advise against using white rice flour. It contains less protein compared to brown rice flour and can result in a gummy texture in the dough, which is far from our desired light and chewy outcome. The super fine brown rice flour provides a sturdy yet tender base for the muffins.
Fine Cornmeal
Cornmeal, which is a finely ground meal made from dried corn, contributes significantly to both the texture and flavor of our English muffins. It is important to note that this is different from cornstarch. Cornmeal gives the surface a pleasant structure and subtle taste. If the only cornmeal you can find is coarse or medium ground, do not worry at all. You can simply blend it in a blender or a spice grinder for just a few pulses until it reaches a finer, smoother consistency. This simple step ensures your muffins have that lovely exterior texture without being overly coarse.
Potato Starch
Potato starch is a fine, white powder extracted from potatoes and then dried. Its role in this recipe is to improve the overall texture of the bread. It helps make the finished muffins softer and fluffier. Potato starch also has excellent moisture retention properties. This is crucial in gluten free baking, as it helps prevent the muffins from drying out or becoming crumbly, ensuring they stay tender. Make sure you are using potato starch and not potato flour. Potato flour is much heavier and made from whole potatoes, which would negatively impact the lightness of these muffins.
Egg
Including a large egg in this recipe adds several important benefits to the dough. The egg enhances both the structure and the tenderness of the muffins. The proteins present in the egg help to stabilize the dough mixture. Meanwhile, the natural fats in the egg contribute to a soft, rich interior crumb. The egg also aids in the rise of the dough. This helps make the English muffins lighter and airier, contributing to that perfect texture.
Milk
I have experimented with different liquids for this recipe, specifically comparing water and whole milk. I strongly recommend using whole milk if you are able to. The casein protein found in whole milk actually mimics some of the properties of gluten. This helps significantly in creating a better structure for these gluten free English muffins. You can use a dairy free milk alternative if needed, but be aware that using dairy free milk will typically result in an end product that is lighter in color. The richness of whole milk adds a subtle depth of flavor as well.
Whole Psyllium Husks
This ingredient is a real game changer in gluten free baking. Whole psyllium husks are essential for reducing the typically crumbly structure that gluten free baked goods can sometimes have. They work by creating a gel-like consistency when mixed with liquid. This helps to bind the dough together and gives it a texture much more similar to traditional wheat based dough. I have specifically tested and developed this recipe using whole psyllium husks. I have not tested this particular recipe (or many of my other recipes) using psyllium husk powder, as the absorption rates can be different. Using whole psyllium husks is key to achieving the correct dough consistency here.
Essential Kitchen Tools
You do not need a lot of fancy equipment to make fantastic Gluten Free English Muffins at home. Chances are, you probably already have most of these essential kitchen tools ready to go in your cupboards and drawers.
Digital Kitchen Scale
A digital kitchen scale is truly a non negotiable item for making this recipe successfully. In fact, I consider it a must have for all of my recipes. Measuring ingredients, especially flours and starches in gluten free baking, by weight using a scale is the most accurate method available. This accuracy is crucial for achieving the right balance and consistency in your dough. For measuring very small amounts, particularly under 10 grams, I find a precision pocket scale especially helpful for ensuring exact measurements of ingredients like yeast or salt. Measuring cups can be notoriously inaccurate due to variations in how ingredients are scooped and leveled. This can lead to significant errors, especially when dealing with gluten free flours which have different weights compared to traditional wheat flour. Investing in an affordable digital scale will greatly improve your baking results.
Mixing Bowl
You will need a good sturdy mixing bowl to bring your dough together. While it is possible to mix the dough for these English muffins using a stand mixer fitted with a dough hook attachment, I personally prefer the hands on approach of mixing the dough by hand in a large mixing bowl. The consistency of this dough just before its resting period is quite similar to the dough I use for my gluten free pizza recipe, which also mixes well by hand. A large bowl gives you plenty of room to work the dough comfortably.
Danish Dough Whisk or Wooden Spoon
When mixing the dough by hand, you will need something sturdy to get the job done. I recommend either a Danish dough whisk or a strong wooden spoon. A Danish dough whisk is designed specifically for mixing thick doughs and batters without getting clogged. However, a reliable wooden spoon works perfectly well too. Either tool will provide the necessary leverage and strength to combine all the ingredients into our wet, slightly lumpy dough consistency.
A Heavy Bottom Skillet
A heavy bottom skillet is essential for the initial cooking step of these English muffins on the stovetop. I really like using a cast iron skillet because it distributes and retains heat so well, providing even cooking and browning. However, a good quality non stick skillet will work just as effectively. Even a flat griddle pan can be used for this step. The key is a pan that heats evenly and maintains temperature to create that lovely golden crust on the muffins before they go into the oven.
Beyond these main items, you will also find a small bowl useful for whisking the wet ingredients together, a fork for that whisking, a standard sheet pan or baking sheet, parchment paper to line the sheet pan, and a digital thermometer. A digital thermometer is particularly important for checking the milk temperature to ensure your yeast is happy and active, and later, for checking the internal temperature of the muffins to confirm they are fully baked.
What I Learned Testing This Recipe
Developing a recipe like this often involves quite a bit of testing and refinement. My primary goal with this gluten free English muffin recipe was to create a final product that was genuinely light and tender on the inside. I wanted that soft, chewy texture and, of course, the signature nooks and crannies that are perfect little pockets for butter or jam. It was also important to me to use ingredients that are commonly found in other gluten free baking recipes that I share, making it easier for you to keep your pantry stocked.
During my testing, I experimented with substituting potato starch with tapioca starch. While these starches are often considered interchangeable in many recipes, I observed differences in the outcome here. The English muffins made using tapioca starch turned out noticeably softer and possessed a chewier texture compared to those made with potato starch. However, a key difference was that the muffins made with tapioca starch tended to deflate slightly after baking. This deflation did not seem to affect their flavor or the quality of the nooks and crannies, but it did impact their final appearance, making them look a little less uniformly puffy. Based on achieving the best combination of texture and appearance, I found that potato starch yielded the most consistently desirable result for these muffins.
What Makes an English Muffin Special?
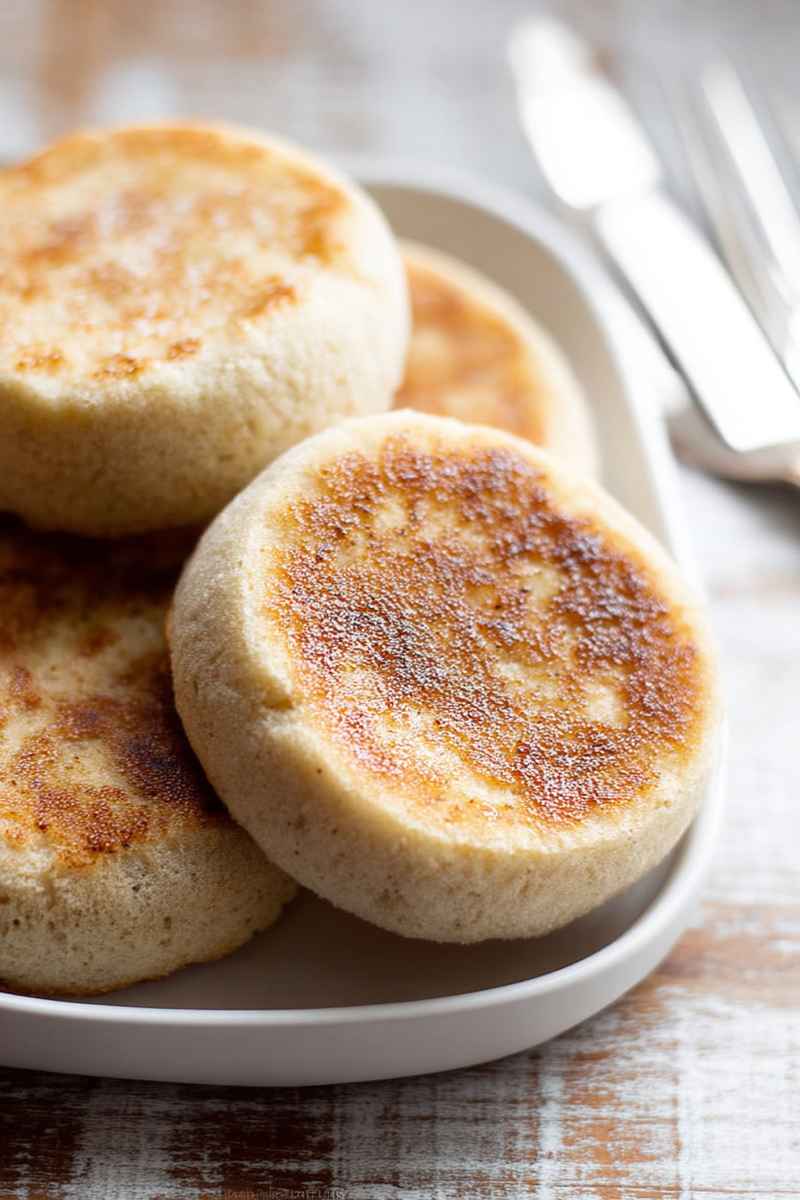
English muffins are a distinct type of small, round, and flat bread. They are traditionally cooked in a way that sets them apart from standard loaves of bread. Typically, they are cooked first on a griddle or in a skillet before being finished with a brief bake in the oven. This two step cooking process is what helps give them their unique texture. They develop a slightly crisp, golden exterior from the initial pan cooking.
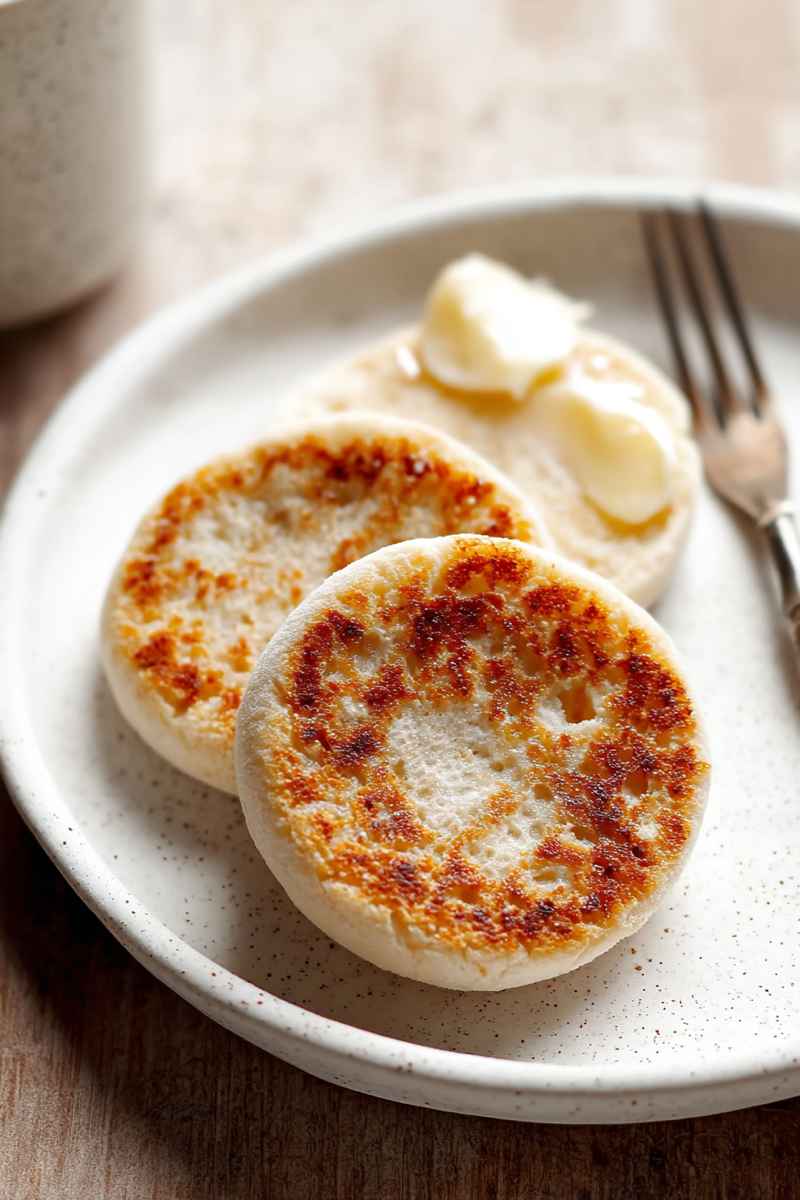
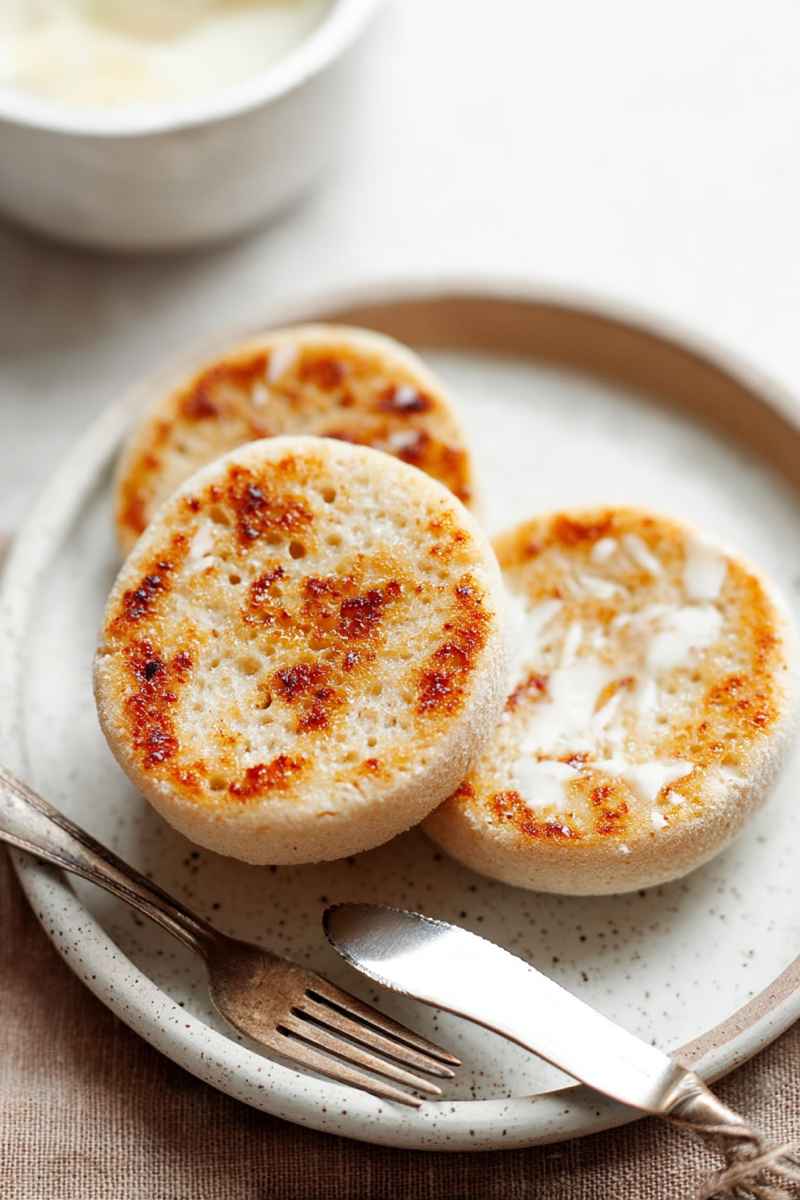
The interior of an English muffin is characteristically soft and chewy. What truly defines them, however, are the signature nooks and crannies found within the crumb. These irregular air pockets are not just a visual feature; they are functionally perfect for holding various spreads. Butter, jam, honey, or even avocado toast ingredients nestle beautifully into these little crevices. To preserve these precious nooks and crannies, English muffins are traditionally split open using a fork rather than sliced with a knife. This creates a rougher, more porous surface ideal for absorption. This unique combination of cooking method, texture, and structure makes English muffins a favorite base for breakfast sandwiches like classic Eggs Benedict or a simple egg and cheese muffin.
Crafting the Gluten Free Dough
Making the dough for these gluten free English muffins is a straightforward process, though it does require a bit of mixing effort. While you certainly can use a stand mixer with a dough hook attachment, I actually find mixing the dough by hand in a large bowl to be quite effective and often prefer this method for this particular recipe. As I mentioned before, the consistency of this dough before it gets a chance to rest is very similar to the dough I prepare for my gluten free pizza. If you have made that, you will have a good idea of what to expect.
Achieving a relatively high hydration level in this dough is deliberate and important. This increased moisture content is what helps create those wonderfully light and airy gluten free English muffins with larger, more pronounced nooks and crannies inside. The extra moisture turns into steam during baking. This steam helps the muffins rise well and contributes significantly to both the soft, chewy interior texture and that special signature structure. Do not be alarmed if the dough seems quite wet initially. This is intended. The flours need time to properly absorb all the liquid.
Here is how we bring the dough together:
- Start by gently warming the milk. You want it to be around 110 degrees Fahrenheit. It is very important not to let the temperature go above 115 degrees Fahrenheit. If the milk is too hot, it can kill the active dry yeast, preventing your dough from rising. Using a digital thermometer is the best way to accurately check the temperature here. This warming step might take about 30 to 60 seconds if you are using a microwave.
- Once the milk is at the correct temperature, sprinkle the active dry yeast and just a small pinch of granulated sugar over the surface of the warm milk. Give it a very light stir. Then, let this mixture rest undisturbed for about 5 to 10 minutes. You will know the yeast is healthy and active when it becomes noticeably bubbly and frothy on top. If you do not see this foaming action after 10 minutes, your yeast may not be good, and you should discard the mixture and start again with new yeast.
- While your yeast is activating in the milk, take a separate mixing bowl. Into this bowl, whisk together all the dry ingredients. This includes the superfine brown rice flour, potato starch, fine cornmeal, whole psyllium husk, xanthan gum, the rest of the granulated sugar, and the kosher salt. Whisk these together thoroughly to ensure they are well combined and evenly distributed.
- In a third, small bowl, crack the large egg. Add the neutral oil to this bowl as well. Use a fork to beat these two ingredients together until they are well combined. Set this aside for a moment.
- By now, your yeast mixture should be bubbly and ready. Pour this activated yeast mixture into the bowl with your combined dry ingredients. Also add the beaten egg and oil mixture, along with the vinegar, to the bowl.
- Now comes the mixing. Use a strong wooden spoon or your Danish dough whisk to combine everything together. Initially, it will look like a very wet and slightly lumpy mess of dough. This is completely normal and expected. It might seem too wet at the beginning, but trust the process. The flours and psyllium husk will begin to absorb the liquid as you mix. Continue mixing with some effort until the dough starts to look smoother and holds together a bit better. This step does require some arm work, but it is important for developing the dough’s texture.
- Once the ingredients are combined into a dough, use a flexible spatula to scrape any dough that is clinging to the sides of the mixing bowl. Gather the dough into a rough ball shape within the bowl. It does not need to be perfectly smooth or round at this point. The main goal is just to gather it together so it is contained in one mass for the next step.
- Cover the bowl containing the rough dough ball with a clean kitchen towel. Allow the dough to rest right there in the bowl for 15 minutes. This rest time is really important. It gives the flours and, crucially, the psyllium husk, a chance to fully hydrate and absorb all the liquid in the dough. You will notice the dough changes consistency slightly after this rest.
Shaping and Proofing Our English Muffins
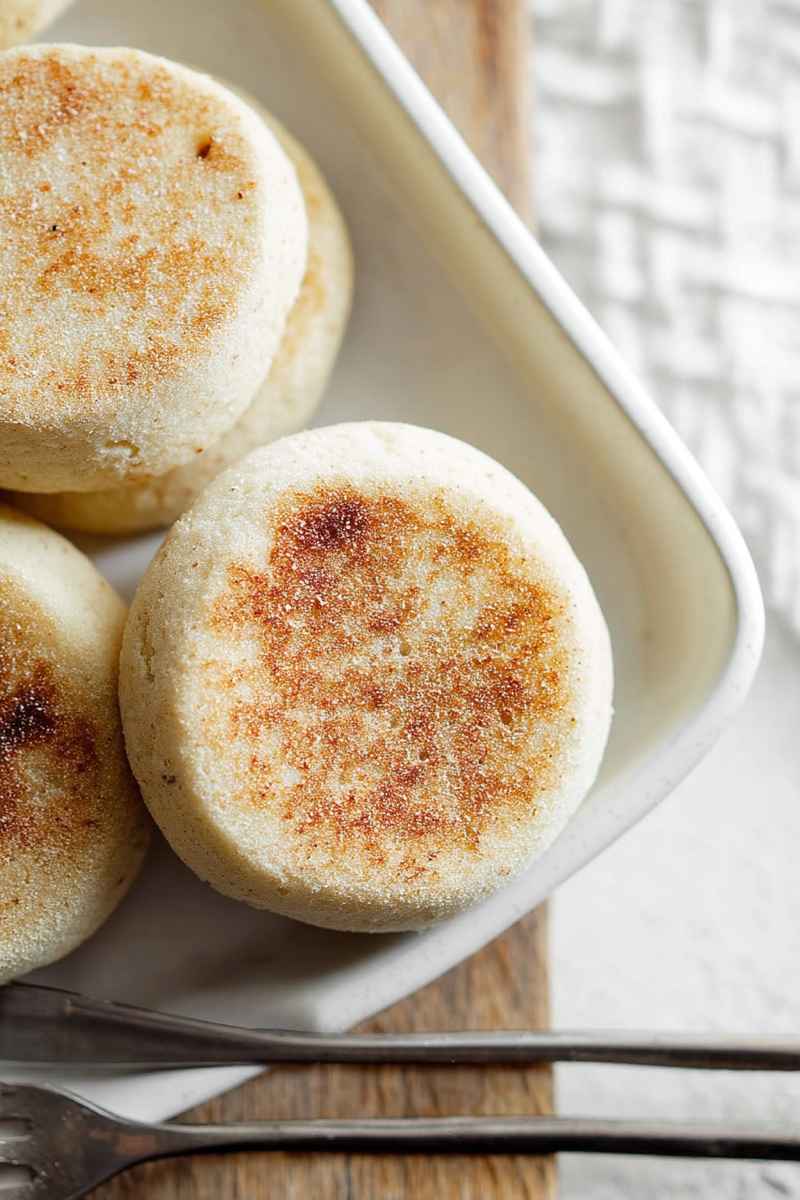
Once your gluten free English muffin dough has finished its 15 minute rest, it is time to move on to shaping the individual muffins. For the very best outcome when shaping these, using cornmeal is generally a better choice than using extra gluten free flour. Cornmeal helps to add a slight, pleasant crunch to the bottom of the muffins. It also assists in developing that nice, golden crust when they are cooked initially in the skillet or on the griddle.
Remember, the dough is intentionally quite soft at this stage. While it might feel natural to want to add a lot of extra flour during the shaping process to make it less sticky, please try to resist this urge. The relatively high level of hydration in the dough is truly the key to achieving those light and airy gluten free English muffins with their signature larger nooks and crannies. Too much added flour will make them dense.
Here is how you will shape and proof the muffins:
- Get a baking sheet ready and line it with parchment paper. Generously sprinkle this parchment paper with fine cornmeal. This cornmeal layer is important because it will help prevent your shaped dough rolls from sticking to the paper while they proof. If you happen to prefer a little more texture or crunch on the bottom of your muffins, you could opt to use medium grind cornmeal for dusting the parchment paper instead of fine.
- Using your digital kitchen scale, divide the entire batch of dough into 6 pieces that are as equal in weight as possible. To do this easily, you can weigh the total amount of dough you have and then divide that number by 6. Each individual piece of dough should weigh somewhere in the range of 75 to 80 grams to get consistent sized muffins.
- Lightly dust your work surface, like your kitchen counter, with fine cornmeal. Gently take each portion of gluten free dough and shape it into a smooth, round shape resembling a dinner roll. If you find the dough is sticking a bit to your hands, you can lightly grease your palms with a tiny bit of neutral oil or sprinkle your hands with a very small amount of potato starch. Try your best to avoid using too much extra flour on your hands or the surface, as this can negatively impact the dough’s final texture. It is completely okay, even desirable, if the dough rolls get coated quite well in the cornmeal. This coating is part of what gives English muffins their classic rustic texture on the outside.
- Carefully arrange the shaped dough rolls onto the prepared baking sheet that you lined with parchment paper and cornmeal. Once they are on the sheet, gently press down on the top of each roll. You want to flatten them until they are approximately 2.5 to 2.75 inches wide and about ¾ inch thick. They do not need to look absolutely perfect or machine made, but aiming for them to be roughly the same size is helpful. This similarity in size will help ensure that they rise and bake evenly.
- Now, cover the shaped gluten free English muffins on the sheet tray with a clean tea towel or a piece of plastic wrap. Let the dough rise in a warm spot in your kitchen. You are looking for them to become visibly puffy and increase in size by approximately 50 percent from their original flattened state. This proofing time allows them to lighten up and develop air pockets. If you prefer a slower rise, which can sometimes enhance flavor, you have the option to refrigerate the shaped muffins for up to 8 hours. This allows them to rise slowly in the cooler environment of the fridge.
Cooking and Baking Our English Muffins
The method for cooking English muffins is a bit unique. While it is possible to cook some varieties entirely on the stovetop, I find that starting them in a cast iron skillet or heavy bottom pan for a few minutes on each side before transferring them to the oven to finish baking yields the best results. This combined approach is excellent. It guarantees that they will cook through completely in the center while still developing a lovely exterior. It is truly important not to skip this initial skillet step. This pan cooking step is what helps create that beautiful golden color and slightly crisp exterior crust. Without it, your muffins might not develop the classic crusty bottom and edges that are so characteristic of a great English muffin.
Follow these steps for cooking and baking:
- Once your gluten free English muffins look light and puffy and have increased in size by about 50 percent from when you shaped them, it is time to preheat your oven. Set the oven temperature to 350 degrees Fahrenheit. Make sure the oven has plenty of time to come fully to temperature.
- Add a small amount of neutral oil, such as vegetable oil or canola oil, to your cast iron skillet or other heavy bottom skillet. Place the skillet on your stovetop and heat it over medium low heat for about 1 to 2 minutes. The pan needs to be hot enough to begin cooking and browning the muffins immediately, but you do not want the heat to be too high. If the pan is too hot, the outside of the muffins will burn before the inside has a chance to cook properly.
- Carefully lift the shaped English muffins from the sheet tray and gently place them into the hot skillet. Make sure you leave some space between each muffin. This gives them a little room to expand slightly as they cook. Depending on the size of your skillet, you will likely need to cook the muffins in batches. I usually find that cooking 3 muffins at a time works well in a standard size skillet, but adjust based on what fits comfortably in yours.
- Cook the muffins on this first side over the medium low heat for 3 to 4 minutes. It is important to keep an eye on them during this time. Watch how quickly they are browning and adjust the heat slightly if necessary to prevent them from browning too fast or burning. To check for the right amount of golden brownness on the underside, you can carefully peek underneath one of the muffins using a small offset knife or a spatula.
- Once the first side is nicely golden, use a spatula or your small offset knife to carefully flip each muffin over. Cook them on the second side for another 3 to 4 minutes. You want them to be golden brown on both sides at this point. Their edges should also look somewhat set and cooked.
- As each batch of muffins finishes cooking in the skillet, transfer those cooked muffins back onto the same baking sheet you used for proofing. Repeat this skillet cooking process with any remaining shaped muffins until they have all had their time in the hot pan. If you happen to have two skillets available and enough space on your stovetop, you could cook them simultaneously to save some time.
- After all the muffins have been seared and browned on both sides in the skillet, place the baking sheet with all the muffins onto the middle rack in your preheated oven. Bake them at 350 degrees Fahrenheit for 10 to 12 minutes. The best way to tell if they are fully baked in the center is to check their internal temperature. They are done when an instant read thermometer inserted into the center of a muffin reaches 200 degrees Fahrenheit. In my testing, I have often found that baking for exactly 11 minutes is usually just the right amount of time for them to be perfectly cooked through.
- Once the muffins are finished baking, carefully take the sheet tray out of the oven. Let the muffins cool right there on the baking sheet for a minimum of 10 minutes. This allows them to set slightly. After 10 minutes, you can transfer them to a wire cooling rack to finish cooling down completely. Or, if you are anything like me and simply cannot wait, feel free to split one open and enjoy it warm right away. They are absolutely divine when fresh from the oven.
Serving Up Your English Muffins
Homemade Gluten Free English Muffins are wonderfully versatile. They really do offer so many delicious serving possibilities. To get the most out of their unique texture and those perfect nooks and crannies, I strongly recommend allowing them to cool for at least 15 minutes before you try to split or serve them, if you can manage to wait that long. Remember, the traditional and best way to split an English muffin is using a fork, not a knife. Insert the tines of a fork horizontally around the outer edge of the muffin, then gently pull the two halves apart. This method creates that lovely, rough surface full of nooks and crannies inside.
Here are some ideas for enjoying your freshly baked muffins:
Classic Toasted with Butter: This is perhaps the simplest and most beloved way to enjoy an English muffin. Split the muffin in half using a fork. Toast the halves until they are golden and slightly crispy. Then, spread generously with your favorite butter or nut butter. It is pure comfort. You can also add your go to jam, fruit preserves, or a drizzle of honey for a classic sweet treat.
Breakfast Sandwiches: English muffins make an absolutely ideal base for all sorts of breakfast sandwiches. Build a hearty option by adding scrambled or fried eggs, a slice of cheese that melts beautifully, and your choice of breakfast meat like crispy bacon or savory sausage. They hold up perfectly to the fillings.
Avocado Toast Base: For a quick, healthy, and trendy option, toast the muffin halves. Then, top them with mashed ripe avocado. Finish with a sprinkle of flaky salt, some black pepper, and perhaps a dash of fresh lemon juice. It is a delicious twist on classic avocado toast.
A Perfect Side Dish: Do not just think of English muffins for breakfast. They can be a wonderful accompaniment to other meals. Serve your Gluten Free English muffins alongside hearty soups, fresh salads, or comforting stews. Their texture adds interest, and they are fantastic for soaking up flavorful broths or sauces.
Mini Pizza Bites: English muffin halves make an excellent quick base for fun mini pizzas. Top each half with a layer of your favorite tomato sauce. Add some shredded cheese, like mozzarella, and any other pizza toppings you love. Place them under the broiler or back in the oven until the cheese is bubbly and melted. These are always a hit.
Storing and Freezing Your Muffins
These delicious Gluten Free English Muffins are definitely at their absolute best when they are enjoyed within just a day or two of being baked. If you are planning to eat them within this shorter timeframe, make sure they have cooled completely first. Then, store them in an airtight container or a resealable plastic bag at room temperature. They will keep well this way for up to 2 days, staying soft and ready to enjoy.
For storing your muffins for a longer period, freezing is a fantastic option. The best way to do this is to first split the cooled muffins in half using a fork. Arrange the split halves in a single layer on a baking sheet. Place the baking sheet in the freezer until the muffin halves are firm and frozen solid. Once they are frozen, transfer the firm halves to a freezer safe bag or a container specifically designed for freezing. When stored properly this way, they will stay fresh in the freezer for up to 3 months. When you are ready to enjoy one later, you can either thaw the muffin half at room temperature for a bit. Or, for a quicker method, you can heat one unwrapped in the microwave for about 30 seconds before popping it into the toaster to warm and crisp up. This helps revive that lovely texture.
Understanding Salt in Baking
Salt plays a crucial role in baking. It is not just for flavor; it also affects yeast activity and helps control fermentation. I want to share a quick note about the type of salt I use in my recipes, including these English muffins. I specifically use Diamond Crystal Kosher Salt unless I state otherwise in a recipe.
Different brands and types of salt have varying crystal sizes and densities. This means that measuring salt by volume (like with a teaspoon) can lead to inconsistent results depending on the brand. For example, Morton’s Kosher Salt has smaller, denser granules compared to Diamond Crystal. If you measure the same volume of Morton’s, you will end up with roughly twice the amount of salt by weight, making your baked goods much saltier than intended. If you use a different brand or type of salt in your kitchen, please be mindful of this difference and adjust the amount accordingly. When in doubt, weighing your salt is the most accurate approach for consistency.
The Importance of Baking by Weight
For the most accurate and consistent baking results, especially when working with gluten free flours, I cannot emphasize enough the importance of baking by weight using a digital kitchen scale. Measuring ingredients, particularly flours and starches, by volume using measuring cups can be highly inaccurate. The same cup of flour can weigh differently depending on how densely it is packed or scooped. This variability can significantly impact the outcome of your gluten free recipes.
A digital kitchen scale is an incredibly affordable tool. You can often purchase one online for less than the cost of a full set of measuring cups. Baking by weight ensures you are using the exact amount of each ingredient specified in the recipe every single time. This is particularly critical with gluten free flours, as they have different densities compared to wheat flour and can absorb liquid differently. For measuring very small amounts of ingredients, like yeast or salt, I even find it helpful to use a precision pocket scale to ensure accuracy under 10 grams. Switching to baking by weight is one of the simplest ways to improve your baking success.
A Note About Ovens and Temperatures
All of the recipes I develop and test are created using a conventional oven. I always place my baked goods on the oven rack that is positioned in the absolute middle of the oven. This positioning helps ensure that heat circulates evenly around the baking sheet and prevents the bottoms from burning before the tops are cooked through.
If you are baking with a convection oven, which uses a fan to circulate hot air, you may need to adjust the baking time or temperature slightly. Convection ovens can sometimes cause baked goods to dry out more quickly on the outside while potentially leaving the inside undercooked. You might need to reduce the temperature by about 25 degrees Fahrenheit or shorten the baking time. It is also important to know that the built in thermostats in many home ovens can be inaccurate. Ovens often take longer than you might think to fully preheat to the set temperature, sometimes 15 to 20 minutes for a standard oven. To ensure your oven is truly at the correct temperature before you put your muffins in, I highly recommend using an external oven thermometer. It is a small investment that provides peace of mind and contributes greatly to successful baking.
Substitutions and Modifications
My recipes are carefully tested multiple times exactly as they are published in this post. While I understand the desire to make dietary or ingredient modifications based on what you have on hand or specific needs, please be aware that making substitutions or modifications to this recipe may alter the end result. Changes can affect the appearance, texture, and taste of the finished English muffins. The Gluten Free Austrian Blog cannot be responsible for the outcome of any recipe that has been altered from its original published form. I encourage you to try the recipe as written first to understand the intended result before making changes.
Frequently Asked Questions
Let us address some common questions you might have about making these gluten free English muffins.
English muffins are unique because they are cooked first on a griddle or in a skillet and then finished in the oven. This method gives them a distinct texture with a slightly crisp exterior and a soft interior filled with nooks and crannies. Regular bread is typically just baked in the oven.
If your yeast did not become bubbly and frothy after resting in the warm milk with sugar, it likely means the yeast is either inactive or the milk was too hot. Make sure your milk is between 110 and 115 degrees Fahrenheit, using a thermometer to check. Ensure your yeast is fresh and not expired.
This recipe relies on a specific blend of superfine brown rice flour, potato starch, and cornmeal for its structure and texture. Substituting with a general all purpose gluten free flour blend will likely not yield the same results, as blends vary greatly in their composition. I recommend sticking to the flours listed for the best outcome.
This recipe was specifically developed using whole psyllium husks because they create the necessary gel like structure to mimic gluten. Psyllium husk powder is much more concentrated. Using powder might require a different amount and could affect the hydration and texture of the dough significantly. I strongly recommend using whole psyllium husks as written in the recipe.
The nooks and crannies are formed naturally by the dough’s structure and the way it rises. They are best preserved when you split the English muffin open using a fork instead of slicing it with a knife. Inserting a fork around the edge and gently pulling apart creates that wonderful, irregular open texture inside.
Yes, you can make the dough and complete the shaping step. Instead of letting them rise at room temperature for the full proofing time, you can place the shaped muffins on the baking sheet in the refrigerator for up to 8 hours for a slow rise. Cook and bake them as directed after taking them from the fridge.
Cooking in the skillet gives them their crust, but the baking step ensures they are cooked all the way through in the center without burning the outside. This two part process guarantees a fully cooked muffin with the perfect internal texture and external finish.
Easy Gluten-Free English Muffins (with Nooks & Crannies)
- Prep Time: 20 minutes
- Cook Time: 25 minutes
- Total Time: 45 minutes
- Yield: 6 servings
- Category: Muffins
- Method: Oven and Stovetop
Description
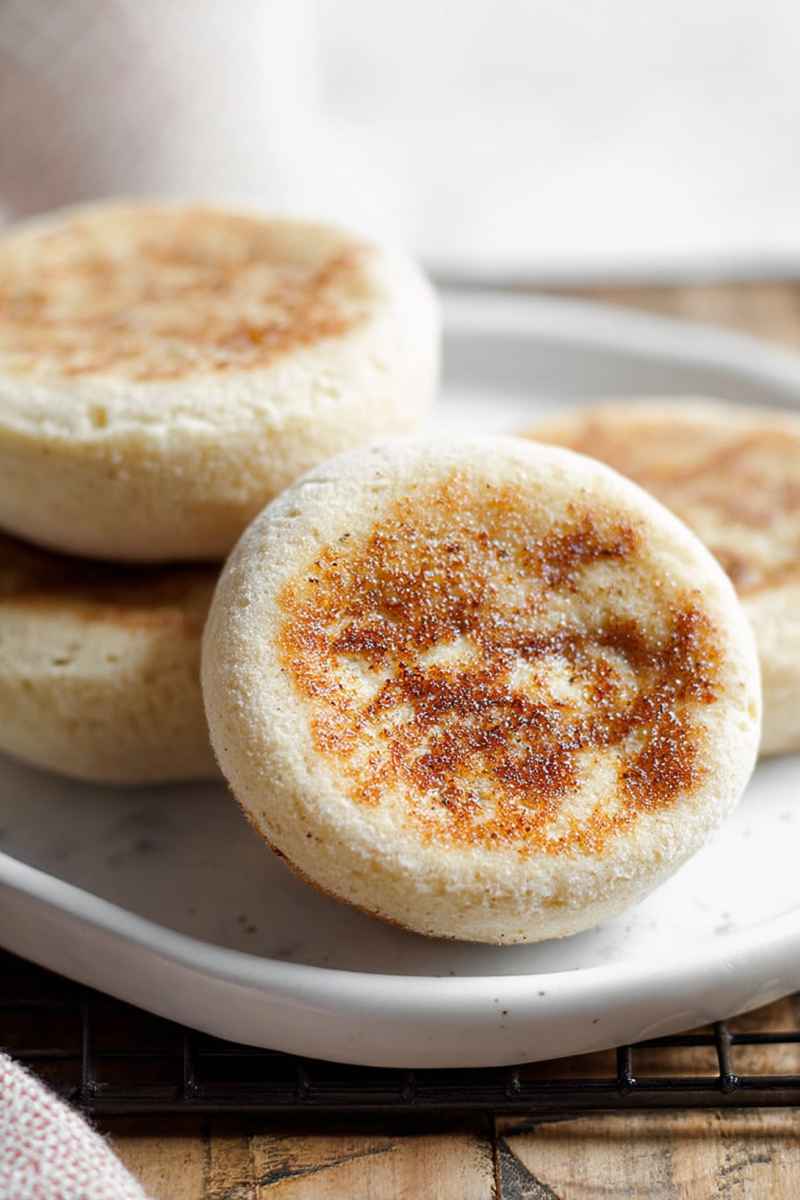
These Gluten Free English Muffins are wonderfully light, soft, and chewy with perfect, iconic nooks and crannies! They make a fantastic choice for any breakfast, snack, or sandwich craving!
Ingredients
For the Gluten Free English Muffin Dough
- ¾ cup (170 grams) milk
- 1 teaspoon (3 grams) active dry yeast
- pinch (1 gram) granulated sugar
- ½ cup (70 grams) superfine brown rice flour
- ½ cup (60 grams) potato starch
- ¼ cup + 2 tablespoons (57 grams) fine cornmeal
- 2 teaspoons (10 grams) granulated sugar
- 1 tablespoon (7 grams) whole psyllium husk
- 1 teaspoon (5 grams) xanthan gum
- 1 teaspoon (3 grams) kosher salt
- 1 large egg, at room temperature
- 1 tablespoon (15 grams) neutral oil
- 2 teaspoons (10 grams) vinegar (white or apple cider)
For Shaping and Cooking
- additional fine cornmeal for shaping
- additional neutral oil as needed for cooking
Instructions
For the Gluten Free English Muffin Dough
- Gently warm the milk to about 110°F. It should not go over 115°F, which could harm the yeast. Use a thermometer to check the temperature. This might take 30 to 60 seconds in a microwave.
- Sprinkle the active dry yeast and a tiny pinch of sugar over the warm milk. Stir lightly. Let it rest for 5 to 10 minutes. You will know the yeast is ready when it becomes bubbly and frothy.
- While the yeast activates, whisk together the brown rice flour, potato starch, cornmeal, whole psyllium husk, xanthan gum, granulated sugar, and kosher salt in a mixing bowl.
- In a separate small bowl, beat the large egg and neutral oil together with a fork.
- When the yeast mixture is bubbly, add it to the dry ingredient mix. Also add the beaten egg and oil mixture and the vinegar.
- Use a strong wooden spoon or a Danish dough whisk to combine everything into a wet, slightly lumpy dough. It will seem quite wet initially, but the flours will soak up the liquid. Keep mixing until the dough becomes smoother. This step takes effort.
- Use a flexible spatula to scrape the dough from the sides of the bowl. Gather it into a rough ball shape. It does not need to be perfect, just contained.
- Cover the bowl with a clean kitchen towel. Let the dough rest in the bowl for 15 minutes. This rest time allows the flours to fully absorb the liquid.
Shaping and Proofing English Muffins
- Line a baking sheet with parchment paper. Sprinkle it generously with fine cornmeal to help prevent sticking. For a slightly crispier bottom, you can use medium grind cornmeal instead.
- Using a kitchen scale, divide the dough into 6 pieces of roughly equal size. Each piece should weigh between 75 and 80 grams.
- Lightly dust your work surface with fine cornmeal. Gently shape each dough piece into a smooth, round dinner roll shape. If the dough is sticking, lightly grease your hands with oil or sprinkle a tiny amount of potato starch. Try not to use too much extra flour. It is fine if the rolls get coated in cornmeal; this helps create the classic English muffin texture.
- Place the shaped rolls onto the prepared baking sheet. Gently press down on each roll until it is about 2.5 to 2.75 inches wide and approximately ¾ inch thick. Aim for rolls that are similar in size so they rise and cook evenly.
- Cover the muffins on the sheet tray with a clean tea towel. Let them rise in a warm spot until they look puffy and are about 50% larger than their original size. For a slower rise, you can place them in the refrigerator for up to 8 hours.
Cooking and Baking English Muffins
- Once the gluten free English muffins are light, visibly puffy, and have increased in size by about 50%, preheat your oven to 350°F.
- Add a small amount of neutral oil to a cast iron or heavy-bottom skillet. Heat the skillet over medium-low heat for 1 to 2 minutes. The pan should be hot enough to cook the muffins but not so hot that they burn before cooking through.
- Carefully place the muffins into the hot skillet. Leave some space between them so they have room to expand slightly. Depending on your skillet size, you will likely need to cook them in batches. Cooking 3 at a time works well.
- Cook the muffins on the first side for 3 to 4 minutes using low heat. Watch them and adjust the heat as needed to prevent them from browning too quickly. You can peek underneath with a small offset knife to check for even browning.
- Use a spatula or offset knife to flip the muffins over. Cook them on the second side for another 3 to 4 minutes until they are golden brown and their edges look set.
- Once cooked on both sides in the skillet, transfer those muffins to the prepared baking sheet. Repeat the skillet cooking process with any remaining muffins. If you have two skillets, you could cook them simultaneously.
- Once all the muffins have been seared in the skillet, place the baking sheet with the muffins into the preheated oven. Bake at 350°F for 10 to 12 minutes. They are done when their internal temperature reaches 200°F. Baking for 11 minutes is often just right.
- Take the sheet tray from the oven. Let the muffins cool on the baking sheet for 10 minutes before moving them to a wire cooling rack to finish cooling. Or, if you cannot wait, enjoy one warm right away.
Notes
Dough Texture: The dough will feel quite soft. It might be tempting to add more flour during shaping, but resist doing so. This high level of hydration is key to making the light, airy gluten free English muffins with their signature large nooks and crannies.
Storing and Freezing: These gluten free English muffins taste best if enjoyed within one or two days of baking. After they have cooled completely, store them in an airtight container or a sealed plastic bag at room temperature for up to 2 days. For longer storage, split the muffins in half. Freeze them in a single layer on a baking sheet until they are firm. Then, transfer the frozen halves to a freezer-safe bag or container. They will stay fresh for up to 3 months. To serve them later, you can thaw them at room temperature or heat one unwrapped in the microwave for about 30 seconds before toasting.
Nutrition
- Serving Size: 1
- Calories: 267
- Sugar: 4g
- Sodium: 200mg
- Fat: 10g
- Carbohydrates: 40g
- Fiber: 4g
- Protein: 6g
- Cholesterol: 45mg