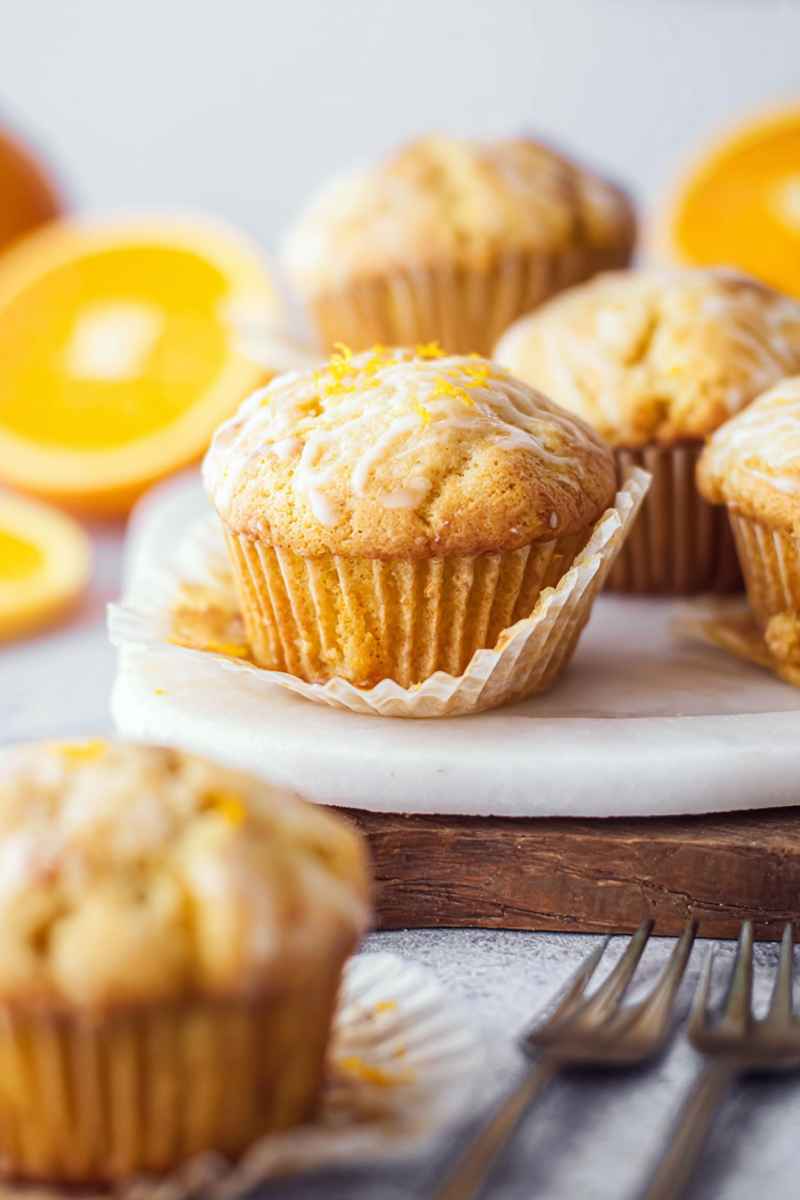
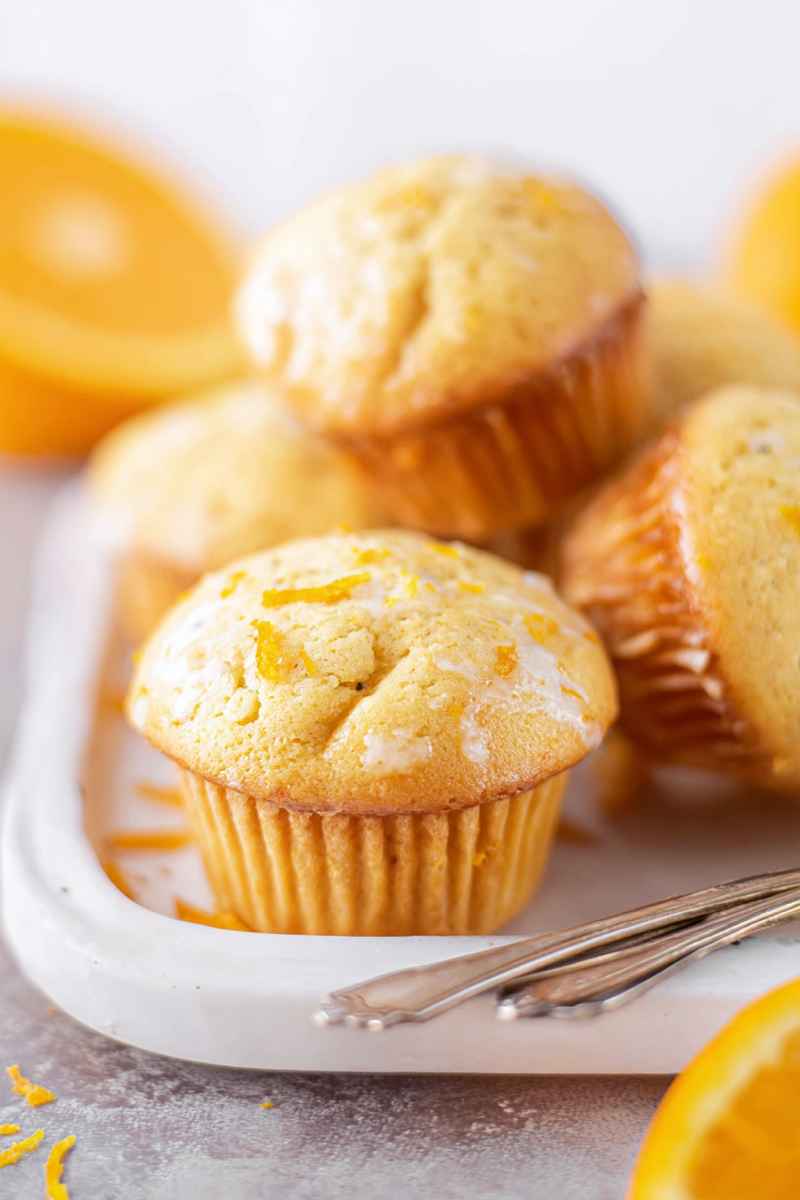
These wonderfully moist bakery style orange muffins are absolutely bursting with bright citrus flavor from fresh orange juice and zest. I think they are simply the best orange muffins you will ever taste, moist and completely delicious. They are prepped quickly and bake up tall and domed just like they came from your favorite bakery.
Why These Are the Best Orange Muffins
I really believe these stand out as exceptional orange muffins for a few key reasons.
- Loaded with vibrant orange taste: The recipe uses both the zest and the juice from fresh oranges. This combination gives you that pure, sunny citrus punch in every single bite. You get the fragrant oils from the zest and the tangy sweetness from the juice.
- Simple ingredients: You likely already have most of the items needed right in your pantry and fridge. This makes them easy to whip up on a whim. Plus, the batter comes together really fast, ready in just about 10 minutes of active prep time.
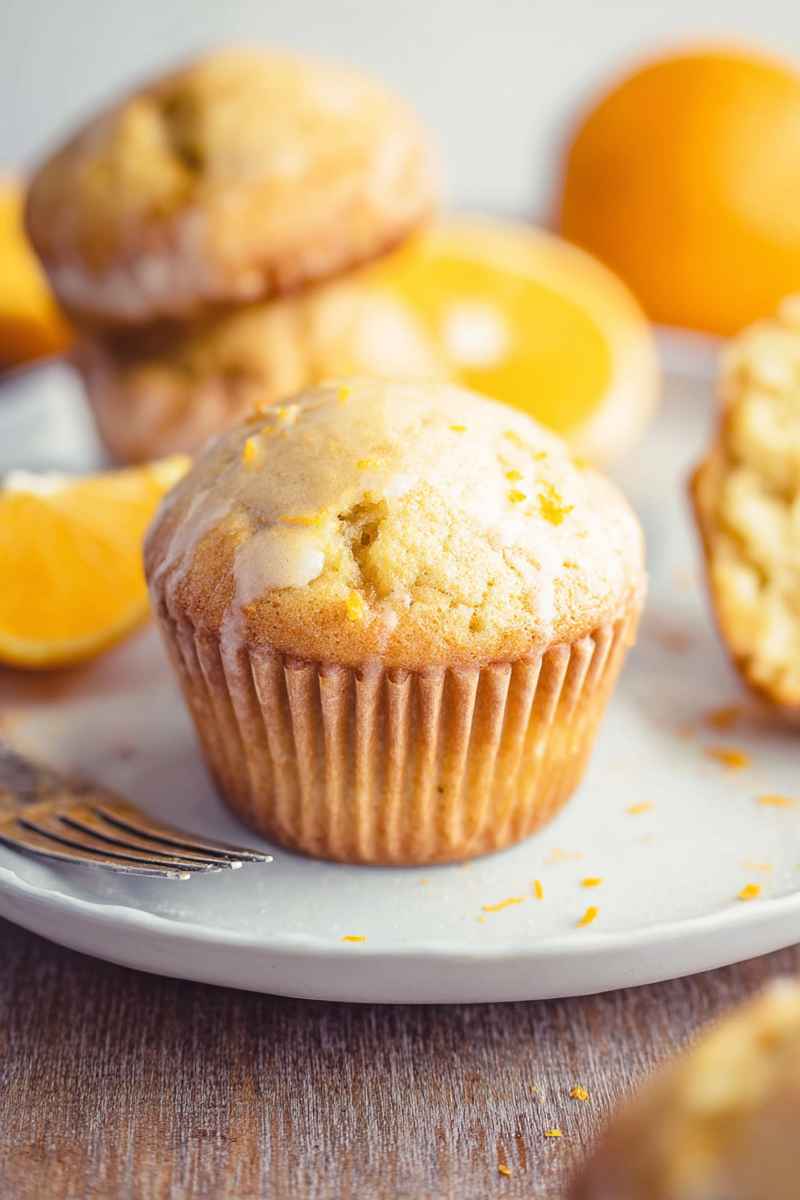
- Soft and tender texture: These muffins have a perfect crumb. They are incredibly moist and stay that way, never dry or crumbly.
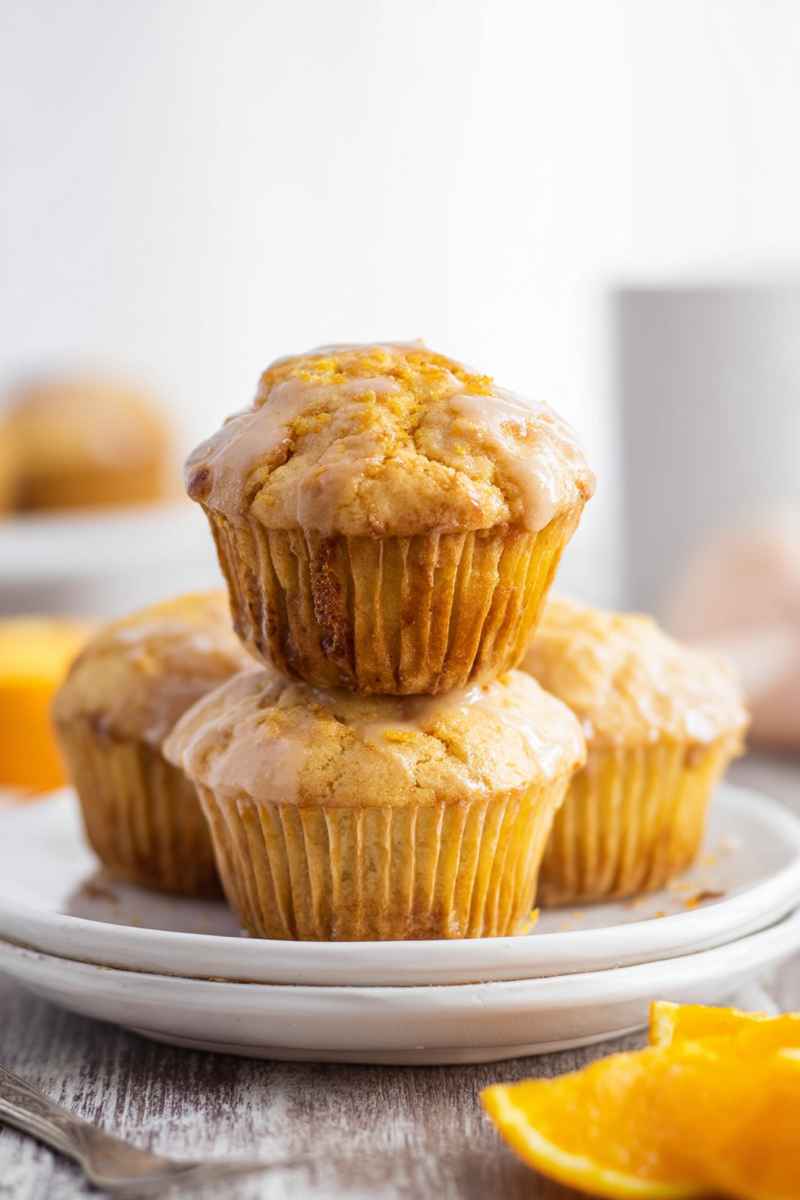
- Gorgeous bakery style tops: You know that tall, domed top you see on muffins at the bakery? This recipe has specific steps designed to help you achieve that impressive look right in your own kitchen. They rise beautifully and spread out just enough.
Baking these muffins fills your home with the most amazing aroma too. It is such a cheerful scent.
What You Will Need for These Bright Orange Muffins
Gathering your ingredients is the first step to baking happiness. These simple items combine to create truly wonderful orange muffins. You will find the full measurements and step by step instructions in the section below.
- All purpose flour: This creates the main structure for the muffins. It is the base that holds everything together as they bake and rise.
- Granulated sugar: Sugar does more than just add sweetness. It also helps the muffins stay moist and contributes to that lovely golden color on the outside.
- Baking powder and baking soda: This dynamic duo provides the leavening power. They work together to create bubbles in the batter, which makes the muffins light, airy, and helps them rise tall.
- Salt: Just a little bit of salt makes a big difference. It balances the sweetness of the sugar and really brings out the bright flavor of the orange.
- Eggs: Eggs are essential binders. They help connect all the ingredients, providing structure and richness to the batter.
- Buttermilk: Buttermilk adds fantastic moisture and a slight tang that complements the citrus beautifully. Its acidity also reacts with the baking soda to help the muffins rise higher.
- Vegetable oil: Using oil instead of melted butter contributes to a very moist and tender muffin. It helps keep the crumb soft over time.
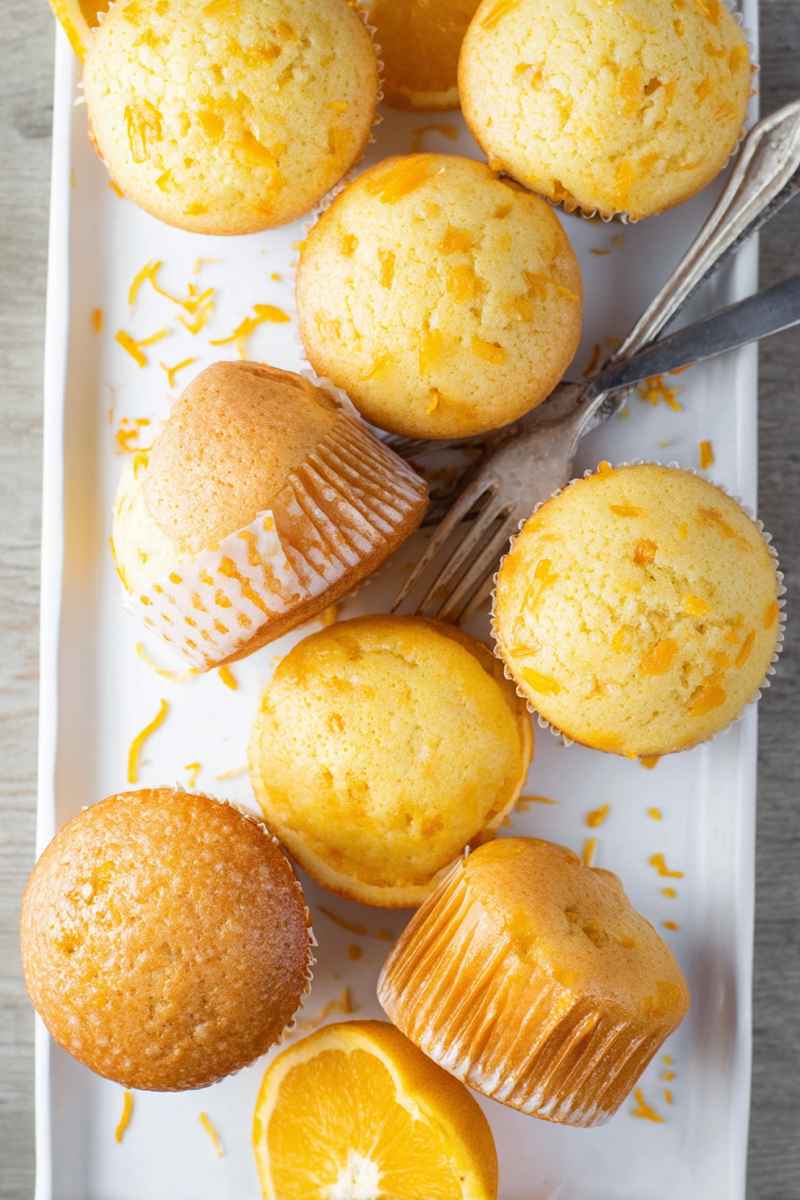
- Orange zest and orange juice: These are the absolute stars of the show. Fresh orange zest holds the concentrated oils that give you intense aroma and flavor. Freshly squeezed orange juice provides the tangy liquid and adds another layer of bright citrus taste.
Having all your ingredients measured out and ready before you start mixing makes the process much smoother. It is called mise en place in cooking terms, and it really does help baking feel less stressful and more fun.
How to Make These Bright Orange Muffins
Making these easy fresh orange muffins is simpler than you might think. While they look like they came straight from a professional bakery display, the process is very approachable for any home baker. You will find the complete instructions outlined here.
- Bring the dry ingredients together. Find a large mixing bowl. Measure out the flour, granulated sugar, baking powder, baking soda, and salt. Add all of these dry ingredients into the bowl. Use a spoon to stir everything gently together until it looks well combined. Once they are mixed, set this bowl aside for a moment.
- Combine the wet ingredients. Get a separate, larger mixing bowl ready. Crack the two large eggs into this bowl. Now, pour in the buttermilk, the vegetable oil, the beautiful orange zest you prepared, and the fresh orange juice. Use a fork or a spatula to stir these wet ingredients together. Mix gently for about 30 seconds. You just want them combined, not vigorously whisked.
- Mix everything together. Now, carefully add the dry ingredients from the first bowl into the larger bowl with the wet ingredients. Begin to mix everything together by hand. Use a spatula or a wooden spoon. Stir just until you see no more dry flour pockets. It is really important not to overmix at this stage. Overmixing can lead to tough muffins. The batter will look quite thick, and that is exactly right.
- Let the batter rest. Take a clean kitchen towel and loosely cover the bowl containing the thick batter. Let the batter sit and rest right on your counter for about 15 minutes. This resting time is a little trick that helps improve the muffin texture and height. While the batter is resting, take this time to preheat your oven. Turn the temperature up to 425 degrees Fahrenheit (220 degrees Celsius).
- Prepare your muffin tin. For that classic bakery style muffin top, you will prepare your standard 12 cup muffin pan in a specific way. Place muffin liners into only six of the muffin wells. The key is to skip every other cup. This means you will only be filling alternate wells with batter. Filling every other well provides extra space between the muffins as they bake. This space allows them to spread out and dome nicely without bumping into each other.
- Fill the liners. Now it is time to fill those prepared paper liners. You want to fill each liner generously, all the way to the very top edge. It might seem like a lot of batter for each cup, maybe around 6 to 8 heaping tablespoons per liner, but trust the process. Distribute the thick batter evenly among the six lined muffin cups until you have used about half of the total batter for this first batch. If the tops of the batter look a little lumpy or uneven, you can gently use the back of a spoon or a butter knife to smooth them out before baking. If you like a little extra sparkle and crunch on top, sprinkle some coarse sanding sugar over the filled batter.
- Begin to bake. Carefully place your prepared muffin pan, with the six generously filled cups, into the center of your preheated oven. Close the door. Bake at the initial high temperature of 425 degrees Fahrenheit (220 degrees Celsius) for exactly 7 minutes. After those 7 minutes are up, and without opening the oven door at all, reduce the oven temperature down to 350 degrees Fahrenheit (175 degrees Celsius). Continue baking at this lower temperature for another 13 to 16 minutes. You will know the muffins are done when a wooden toothpick inserted into the center of one comes out clean, without any wet batter attached.
- Cool the muffins. Once they are baked, carefully remove the pan from the oven. Allow the muffins to cool in the muffin pan for a few minutes. This helps them set up slightly before you move them. After a short time in the pan, gently transfer the baked muffins to a wire cooling rack to cool completely.
- Bake the second batch. You still have batter remaining for the other six muffins. Repeat steps 5 through 8 with the rest of the batter. Make sure to line the other six wells of your muffin pan. It is important to turn the oven temperature back up to the initial 425 degrees Fahrenheit (220 degrees Celsius) before you put the second batch in to bake.
Following these steps will give you beautiful, tall, flavorful orange muffins every time.
How to Properly Measure Flour
Getting the correct amount of flour is really important for the texture of your muffins. Too much or too little can change everything. The most accurate way to measure flour, especially for consistent results, is always using a kitchen scale to weigh it in grams. This eliminates guesswork.
However, if you do not have a kitchen scale available, you can use a standard measuring cup. Just be sure to use the right technique to avoid compacting the flour, which would mean you are adding too much by weight. Here is how to do it correctly without a scale.
- Lighten the flour. Flour tends to settle and become heavy and compact just sitting in the bag or container. Before you measure, use a whisk or a spoon to gently fluff or aerate the flour inside its packaging. This is like loosening it up. Remember, this is just aerating or fluffing, not sifting the flour unless the recipe specifically asks you to sift.
- Spoon it into the cup. Do not dunk or scoop your measuring cup directly into the flour bag. This forces too much flour into the cup and compacts it. Instead, use a spoon to lightly sprinkle or spoon the aerated flour into your dry measuring cup until it is overflowing slightly.
- Level it off. Once the cup is slightly overflowing, use the back of a straight edge, like a butter knife or a bench scraper, to level off the excess flour from the top. Do this without tapping the cup against the counter, as tapping will compact the flour you just carefully spooned in.
This spoon and level method helps ensure you are measuring closer to the intended weight of the flour, leading to better baking results.
Total Time Required for These Muffins
Getting these delicious orange muffins from concept to ready to eat does involve a few different time periods. Understanding the timing helps you plan when to start baking.
- The initial active time to prep and mix the batter takes about 10 minutes. This is the hands on part.
- There is a mandatory 15 minute resting period for the batter after mixing. This is crucial for developing those tall, domed tops. The batter just sits quietly on the counter during this time.
- The first baking phase at the high temperature takes exactly 7 minutes. This initial burst of heat helps the muffins rise rapidly.
- The second baking phase at the lower temperature takes an additional 13 to 16 minutes. This is where the muffins finish cooking through and the centers set.
- Finally, you will need about 20 to 30 minutes for the muffins to cool completely before they are ready to be glazed and enjoyed. Allowing them to cool properly ensures they set correctly and are not too delicate to handle.
So, while the prep is quick, factor in the resting and cooling times for the best outcome.
How to Create Bakery Style Muffins
We all love those impressive, tall, domed muffin tops you see at bakeries. They just look so inviting. Achieving that look at home with these orange muffins is totally possible if you use a few specific techniques. I have used these methods with other muffin recipes too, like blueberry or chocolate chip, and they really make a difference.
- The Resting Period is Important. After you mix the batter, let it rest. This recipe calls for a 15 minute rest, and while it is a relatively short rest, it is quite effective. During this time, the starch molecules in the flour are busy absorbing the liquid ingredients. This absorption causes them to swell up. The batter actually becomes thicker as it rests. This thicker consistency helps the muffins hold their shape better as they rise and bake, encouraging that lovely dome. It is a quick step that yields great rewards.
- Fill Every Other Muffin Cup. This simple tip is actually a game changer for getting those beautiful domes. Instead of filling every cup in your 12 count muffin pan, only place liners and fill six cups, skipping the ones in between. Filling every other well provides extra space between the muffins in the pan. As the muffins rise and spread out during baking, they have room to expand upwards and outwards without bumping into their neighbors. This technique also helps the circulating air in the oven reach the sides of the muffins better, which can encourage a nicer browning and contributes to setting that domed shape.
- Fill Those Cups Right To The Top. This might feel counterintuitive, especially if you are used to only filling muffin cups two thirds or three quarters full. But for bakery style muffins, you really need to fill the paper liners all the way up to the very top edge with batter. Having a large amount of batter in each cup gives the muffin more material to push upwards as it bakes. This generous filling is absolutely key in helping the muffin gain significant height and develop that characteristic dome.
- Start Baking at a High Temperature. Begin by baking the muffins at a high temperature initially. This recipe uses 425 degrees Fahrenheit (220 degrees Celsius) for the first 7 minutes. This initial blast of high heat causes the outside of the muffin batter to set rapidly. As the inside continues to expand and rise from the leavening agents, the already set outer surface helps to push the batter upwards rather than letting it spread outwards too much. This rapid rise sets the structure for the dome shape. After this initial high heat phase, the temperature is lowered to allow the inside of the muffin to bake through completely without the outside burning.
These four tips, used together, are your secret weapons for achieving tall, impressive, bakery worthy muffin tops right from your home oven. They are simple adjustments that make a big visual difference.
Substitutions and Variations
One of the great things about a solid base recipe like this one is how easily you can change it up to create new flavor combinations or adjust for dietary needs. Here are a few ideas for substituting ingredients or adding fun variations to these bright orange muffins.
- Add Some Crunch: If you like a little textural contrast in your muffins, you can easily add seeds. Mixing in poppy seeds or even chia seeds into the dry ingredients before combining them with the wet will give you tiny pops of crunch throughout the muffin. About 2 tablespoons should be plenty for the whole batch.
- Make Them Gluten Free: If you need a gluten free option, you are in luck. These muffins work really well with a good quality gluten free flour blend that is designed as a one for one substitute for all purpose flour. I have heard great things about brands like King Arthur Baking’s Gluten Free Measure for Measure Flour for this kind of recipe. You simply swap the gluten free blend in place of the all purpose flour in the exact same amount.
- Add a Simple Glaze: While these muffins are delicious on their own, adding a sweet orange glaze takes them to another level of decadence. A simple glaze made from powdered sugar and a little fresh orange juice drizzled over the cooled muffins adds extra sweetness and reinforces that lovely orange flavor. The recipe card included details for a simple glaze.
- Include Blueberries: Orange and blueberry is a classic combination for a reason. You can easily turn these into orange blueberry muffins by gently folding about 2 cups of fresh or even frozen blueberries into the finished batter right before you scoop it into the muffin tin. Be careful not to overmix once the blueberries are added, just fold them in gently.
These are just a few ideas to get you started. Feel free to experiment once you have the basic recipe mastered.
Storing and Freezing Your Muffins
Knowing how to properly store your muffins is important for keeping them fresh and delicious for as long as possible. There are a couple of ways I recommend handling storage depending on when you plan to eat them.
Muffin Storage at Room Temperature
If you anticipate eating your muffins within about 24 hours of baking them, you might actually want to leave them out on the counter. Surprisingly, for the first day, leaving them uncovered can help prevent the tops, especially if you added sanding sugar or a light glaze, from becoming soggy. Muffins are so moist that sometimes storing them immediately in an airtight container can trap too much moisture, which can make those lovely crunchy or crisp tops soft.
For slightly longer storage, say for 2 to 4 days at room temperature, I have found a little trick that helps. Get an airtight container. Line the bottom of the container with a layer of paper towels. Place the completely cooled muffins in a single layer on top of the paper towels. If you have multiple layers of muffins, add a layer of paper towels between each layer of muffins and then place another layer of paper towels over the top of the muffins before sealing the container. The paper towels act like little sponges, absorbing any excess moisture that the muffins naturally release while they are stored. This helps keep the muffin texture nice. If the paper towels seem to become very damp after a couple of days, swap them out for fresh ones.
How to Freeze Muffins
Freezing muffins is a great way to save them for later enjoyment. They freeze really well. First, make sure the muffins are completely cooled. If you are freezing glazed muffins, make sure the glaze has set completely.
The best way I have found is to wrap each individual muffin snugly in plastic wrap. This helps protect them from freezer burn. Once they are individually wrapped, you can place all the wrapped muffins together into a larger ziploc freezer bag or an airtight freezer safe container. Label the bag or container with the date. They should keep well in the freezer for up to 3 months.
To thaw a frozen muffin, you have a couple of options. You can simply leave the wrapped muffin out at room temperature. It usually takes about an hour or so to defrost fully. Or, if you are in a hurry, you can unwrap the muffin and microwave it in short intervals, maybe 20 seconds at a time, until it is defrosted and warmed through. Freezing is perfect for always having a delicious treat ready to go.
Frequently Asked Questions About Orange Muffins
Here are answers to some common questions people often have when making orange muffins.
A: Yes, you can use bottled orange juice. However, fresh squeezed orange juice will give you a brighter, more vibrant orange flavor in the muffins and the glaze.
A: Buttermilk contributes significantly to the moisture and tender texture. Its acidity also helps with leavening. If you do not have buttermilk, you can make a substitute by adding 1 tablespoon of white vinegar or lemon juice to a liquid measuring cup, then filling it up to the ¾ cup mark with regular milk. Let it sit for about 5 minutes before using.
A: There could be a few reasons. Make sure you followed the tips for bakery style muffins: allowing the batter to rest, filling the muffin cups completely full, baking at the initial high temperature, and filling only every other muffin well. Also, make sure your baking powder and baking soda are fresh.
A: The recipe specifically calls for a 15 minute rest, which is beneficial. While you can mix the wet and dry ingredients separately ahead of time, once they are combined, it is best to stick to the recommended rest time and bake relatively soon after to get the best rise and texture.
A: The most reliable way is to insert a toothpick into the center of a muffin. It should come out clean or with just a few moist crumbs attached. If you see wet batter, they need more time. Avoid overbaking, as this can make them dry.
A: Absolutely. Orange and chocolate is a delicious combination. You could gently fold in about 1 cup of chocolate chips along with the blueberries or poppy seeds mentioned in the variations section.
A: Stored properly at room temperature with paper towels, they should stay fresh for about 2 to 4 days. They also freeze well for up to 3 months.

Easy Bakery-Style Orange Muffins (The BEST Recipe!)
- Prep Time: 25 minutes
- Cook Time: 23 minutes
- Total Time: 48 minutes
- Yield: 12 muffins
- Category: Muffins
- Method: Oven
Description
These Bright Orange Muffins are wonderfully moist and packed with sunny citrus flavor from fresh orange juice and zest! They have that perfect bakery-style texture everyone loves.
Ingredients
For the Orange Muffins
- 3 cups (360g) all purpose flour
- 1 ½ cups (300g) granulated sugar
- 3 tsp baking powder
- ½ tsp baking soda
- ½ tsp salt
- 2 large eggs
- ¾ cup (180ml) buttermilk
- ½ cup (120ml) vegetable oil
- Zest of 3 large oranges (about 3–5 Tbsp)
- ¼ cup (60ml) fresh squeezed orange juice
For the Orange Glaze
- 1 ⅓ cups (150g) powdered sugar
- 3 Tbsp fresh squeezed orange juice (you might need a little more)
Instructions
For the Orange Muffins
- Find a medium mixing bowl. Add the flour, granulated sugar, baking powder, baking soda, and salt. Stir these dry ingredients together with a spoon until they are well combined. Put this bowl aside.
- Get a larger mixing bowl. Crack in the eggs, then pour in the buttermilk, vegetable oil, orange zest, and fresh orange juice. Stir gently with a spatula for about 30 seconds until just mixed.
- Carefully add the dry ingredients from the first bowl into the wet ingredients in the larger bowl. Mix by hand just until you no longer see dry flour. Be careful not to overmix. The batter will be quite thick.
- Cover the bowl loosely with a clean kitchen towel. Let the batter rest on the counter for 15 minutes. While it rests, heat your oven to 425°F (220°C).
- To get tall, bakery-style muffin tops, prepare a 12-cup muffin pan. Place 6 muffin liners in the pan, skipping every other cup. This space helps the muffins rise high and spread out nicely without touching.
- Divide the thick batter evenly among the 6 lined muffin cups. Fill each liner all the way to the top. It might seem like a lot of batter per cup, but keep distributing it until all the batter is used for the 12 muffins (you’ll bake in two batches). If the tops look lumpy, use the back of a spoon or a butter knife to gently smooth them.
- If you like, sprinkle some coarse sanding sugar over the tops of the batter before baking.
- Place the muffin pan in the preheated oven. Bake at 425°F (220°C) for exactly 7 minutes. Then, without opening the oven door, reduce the temperature to 350°F (175°C). Continue baking for another 13 to 16 minutes. The muffins are done when a toothpick inserted into the center comes out clean. Let the muffins cool in the pan for a few minutes before transferring them to a wire rack.
- Repeat steps 5 through 8 with the remaining batter in the other 6 liners. Remember to turn the oven temperature back up to 425°F (220°C) before baking the second batch.
For the Orange Glaze
- In a small bowl, combine the powdered sugar and 3 tablespoons of fresh orange juice. Stir well with a spoon or whisk until smooth.
- If the glaze seems too thick, add a tiny bit more orange juice, about ½ teaspoon at a time, until it reaches a drizzly consistency you like.
- Once the muffins are completely cool, you can dip the tops directly into the glaze or use a spoon to drizzle the glaze over each muffin. Let the glaze set before serving.
Notes
- Measuring Flour: Make sure to spoon the flour into your measuring cup and level it off with a straight edge. Avoid scooping directly from the bag.
- Gluten-Free Option: These muffins work beautifully with a good quality measure-for-measure gluten-free flour blend. King Arthur Baking’s blend is a great choice. Simply swap it one-for-one with the all purpose flour.
- Variations: For Orange Blueberry Muffins, gently fold 2 cups of fresh or frozen blueberries into the finished batter. For Orange Poppy Seed Muffins, mix 2 tablespoons of poppy seeds into the dry ingredients.
- Storage: Store leftover muffins in an airtight container at room temperature for up to 3 days.
- Freezing: You can freeze the unglazed muffins. Let them cool completely, then wrap individually in plastic wrap and place in a freezer bag for up to 2 months. Thaw at room temperature and glaze before serving if desired.
Nutrition
- Serving Size: 1 muffin
- Calories: 370
- Sugar: 41g
- Sodium: 280mg
- Fat: 11g
- Carbohydrates: 65g
- Fiber: 1g
- Protein: 5g
- Cholesterol: 34mg